May 25

May 2013 Papertrey Ink Blog Hop

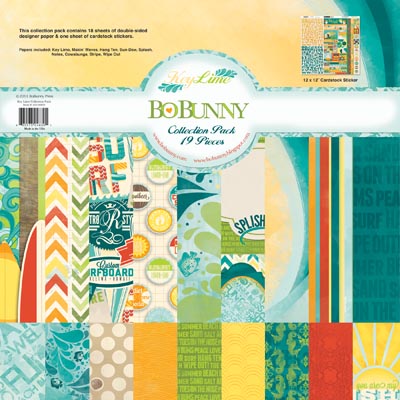
Hi there crafty peeps, just another quick post, you know the drill! I found a minute to join the May PTI Blog Hop, and chose the gorgeous colour palette below, to work with:

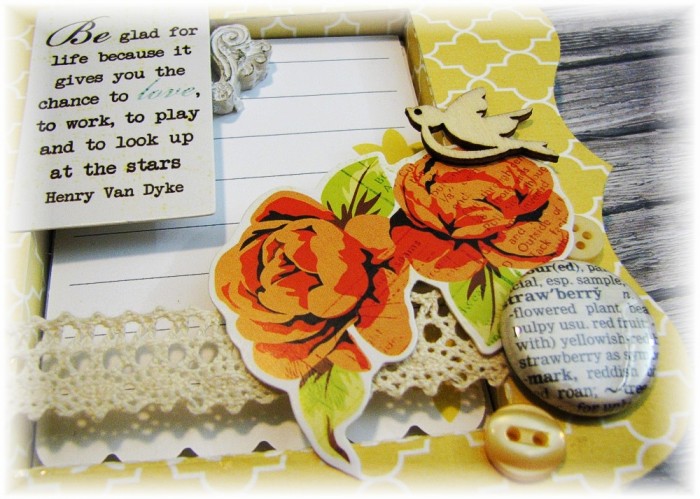
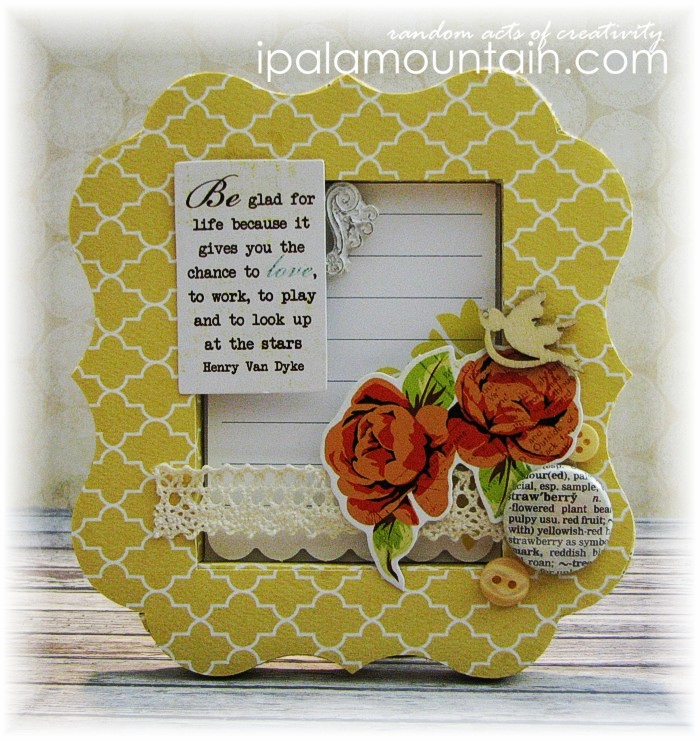
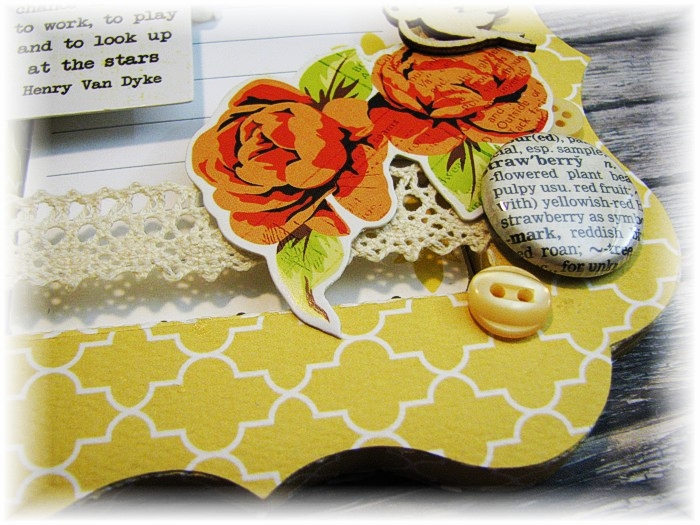
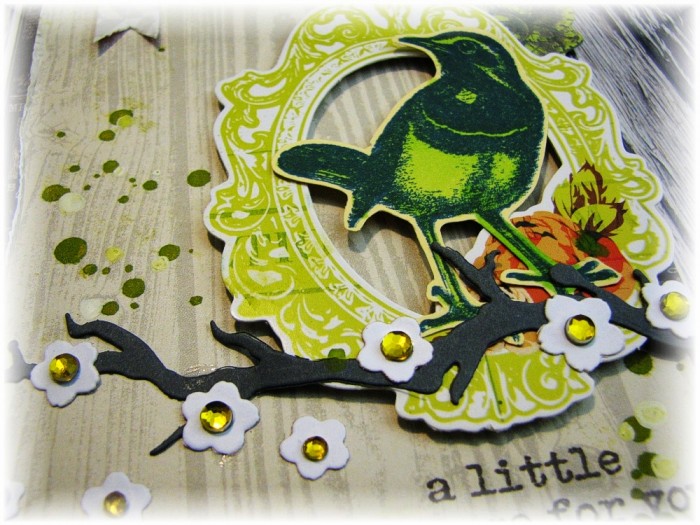
I reached for my favourite PTI floral images so far, the roses from The Sweet Life, and added a touch of pattern with A Little Argyle.


As I was searching for a layout to give me a kick-start, I stumbled upon the Fusion Card Challenge with the fun sketch below. I saw some pretty rad sketches being featured in the past, I’m definitely saving some for the future reference :)

Hope you like, thanks for looking!! xxx


May 25

PageMaps 7th Anniversary

Hi there!!
Happy 7th Anniversary, PageMaps! I am so excited to join PageMaps in its month-long celebration, and all the party details can be found here. I participated in the “Shape It Up” challenge with Marla Kress, where we had to create a shaped card using this PageMaps sketch for inspiration. What a fun challenge! I would love to see what you create with this same challenge and PageMaps has sweetened the pot with a prize package from one of your favourite manufacturers, Bo Bunny’a collection pack of their newest line, Key Lime!


You can join the challenge here. Here’s the sketch!

I made a dimensional card / frame, using my Silhouette and a cutting file. It was a fiddly one but totally worth the effort - I love the effect!!

I’m entering this project into the Gift Challenge in the Moxie Fab World.

Have fun!
Celebration details: https://www.pagemaps.com/7thanniversary2013.htm
Blog: https://www.pagemaps.blogspot.com/


May 23

Two little somethings

This is my SECOND post for today, hope you’ll check out my CASE Study card below as well!

Pretty shocking, eh? Double posting wasn’t something I had in plans, but as some free time happened and mojo came knocking at the door, naturally I jumped at the opportunity. It was a good evening, the cards took me very little time to create (which is handy when having a baby to take care of), but were lots of fun… plus they satisfied the urge for both the CAS and layered styles. I’m usually in the mood for either one but tonight, if I had to choose, I’d have a tie :)

Short and sweet now, though, I don’t want to sit here typing when Julka wakes up. ‘Scrappy’ card first…
(the bird stamp is by Red Lead Paperworks, but I can’t find it on their website any more, so it’s probably discontinued)

…and the challenges I created it for, Tuesday Trigger: Feather Weather and Cardabilities sketch #75.


And a CAS little thing :)


Again, created with a couple of challenges in mind… FTL241 sketch, Monday Mood Board #12 and CFC101.


Find the list of supplies below. Thanks for paying me a visit, have a great day! xx

A little message card


A little something card


May 23

CASE Study Challenge #142

Let’s roll in with a new CASE Study challenge, shall we? This week sees another great card by our May Muse, Maile Belles, a scrumptious layered beauty below:

Oh boy, give me florals any time!! I could have had way too much fun with this design if I was allowed more time; several different cards popped into my head and I had trouble settling down on the supplies I’d use. In the end I reached for a beautiful die cut flower from Kaisercraft, and dressed it up in a bouquet made of stamped Winter Berries by Penny Black, and a Gentle Leaf die from Poppy Stamps. Don’t you just love the way the pink pops up against the neutrals? :)


Click on the links below, for more inspired creations! Hope you’ll find a minute to join us as well. Visit CASE Study for the whole package :)

Maile Belles - May Muse
Amy Wanford
Andrea Ewen
Clare Buswell
Debby Hughes
Jean Martin
Jeanne Jachna
Maureen Plut
Teneale Williams
Erin Schulte - May Guest Designer


May 21

You rock - Runway Inspired

Hi there peeps, fancy a quick post? An impromptu craft affair tonight, very much anticipated but I wasn’t sure I can pull it off at all. Julka had a heck of a day, being driven and carried around a lot and quite enjoying it, but now that the evening came and it would be a perfect time for her to settle down, she’s making up for all that time she spent sleeping earlier! (I must mention that she rests best when there’s noise/commotion/transportation going on - as all kids do, really). Anyway, as you can see… she did give me some break!
I saw the brand new Runway Inspired challenge (ric#36) and was immediately inspired. Strangely enough, as it’s not the easiest inspiration to work with.


I had so much fun with my card. Largely thanks to the fact that put different stamp sets into the mix. It always makes my heart happy, I love versatility.


Hope it tickles :) Until next time!


May 19

Spice up an envelope with Kreate-a-lope

Hi there, crafty peeps! I’ve got a product review/tutorial for you today, courtesy of Green Sneakers, the company behind Kreate-a-lope® envelope templates. I’ve been asked to check out their awesome product and here I am today to show you what I made of it. What fun!
What are Kreate-a-lopes®? They’re sturdy, durable plastic templates that let you create your own, customized envies in minutes - without using a cutting tool! No kidding.

I would like to show you a little project I made, using the standard A2 sized template - perfect for myself since it’s the size I do most of my cards in.
I started with 12×12 patterned paper from Melissa Frances, Decoration. It’s white on one side which suited my needs, since I wanted a white envelope which I’d decorate further afterwards, with the pattern inside. Just a little twist…


I lined up the template with the edges of the sheet, minimizing the loss of paper. I like to make the most of my supplies! Because the template is clear, you can see exactly what parts of the pattern will show up when you have your envelope folded and finished. The window in the center indicates the front (which will be my inside in this case), and you can also see what parts will show at the back and which ones will be overlapping and therefore hidden from view. I think that’s a huge asset of these templates.


I tore away excess by pulling the paper against the edge of the template on a slight angle, until the paper was the same size and shape as the template.


If you like the slightly shabby look of the edges, you can leave it at this, otherwise you can either trace and cut around the template, or ‘tidy up’ after tearing by running around the edges with the craft knife and ruler, like I did.


After I had dealt with the edges, I lined up the template with the paper again. Normally, if you want the pattern on the outside, you flip the paper upside down first, but remember that I want mine inside? Right. So, we’re leaving it as it is, and then we need to fit the rectangle insert in the middle, gently remove the template while holding onto the insert and fold the edges around it. You need to fold the sides first, then the bottom and the upper flap last.

Once the sides are folded, you can go ahead and seal the envelope by applying some adhesive to the sides. I used a double sided tape but a special Lick & Stick Glue is also available for purchase on the company’s website.


Remember how I wrote that I’m supply savvy… once your shape is removed from the 12×12 sheet of paper, you’re left with a bunch of triangle shapes. I put one of them to a good use , by covering the upper flap of the envie with it and trimming the excess. I also used a thin strip to cover the bottom at the front.


I made a matching postcard to go with the envelope. We celebrated my mum-in-law’s birthday the other day, so this ensemble was made with her in mind.
The front of the envelope was decorated further with stamping, a wood veneer butterfly from Studio Calico and I also added a ribbon bow. The stamps come from the Waltzingmouse set called Roses In Bloom.


My verdict? 4.5 out of 5. I love this stuff, how clever and easy to use it is. I love that you can see exactly how the design will look like, before you even start assembling your envelope. A small minus is that tearing the paper is not going to give you nice smooth edges, so if you’re fussed about that bit, you’d rather need to trace and cut. However, they get cleaner the thinner paper you use. I’m a bit crazy about nice, sturdy, thick paper which is naturally harder to tear. All in all, it’s truly a unique and helpful design and I can see myself using it a lot!

I will be back in a couple of days, with one more project featuring a different size of Kreate-a-lope®, for today I’m leaving you with a couple of useful links, that will help you find out more about the product:

How-to video:
https://www.youtube.com/watch?v=tDPbufpWmF0

Kickstarter campaign, aimed to broaden awareness of the product and raise funds for the new sizes:
https://www.greensneakers.com/EnvelopeTemplates/

See you later!


Related Posts Plugin for WordPress, Blogger...