Jan 23

CASE Study Challenge #175

Hi there, it’s time for a new CASE Study challenge! Our Muse Donna Mikasa churned out this piece of awesomeness and I can’t wait to see what everyone creates with it!

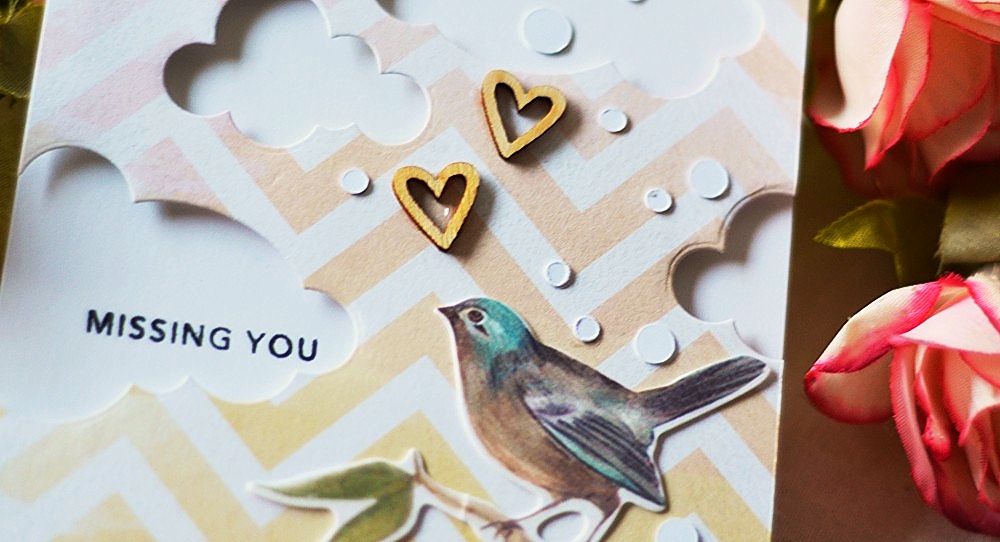
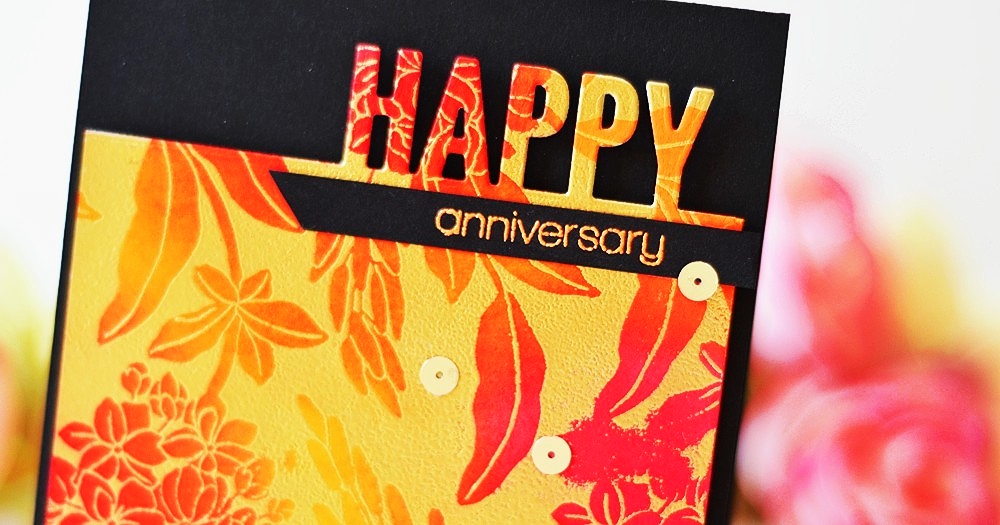
This is hands-down one of the best cards the last year has seen. I didn’t try to be original here with my approach, and you’ll see in the Design Team’s takes that I’m not the only one - the effect of rainb0w gradient covered with gold embossed pattern is simply mesmerizing. I pulled out my Distress Inks, gold embossing powder, a Penny Black Blissful cling stamp and My Favorite Things Celebrate Die-Namics, to make this card:

I embossed the sentiment from Simon Says Happy stamp set, in Zing Apricot EP. I love the quite unexpected look of origami paper that this technique gives, paired with a floral background like this one. The embossing is imperfect and you can see patches of where the powder failed to stick to, but I hope the whole look is distracting enough for these details being hardly noticeable :)

Check out the blogs below for the Design Team’s takes on the challenge, or visit CASE Study to see it all in all place.

Donna Mikasa - January Muse
Erin Thiem - January Guest Designer
Amy Wanford
Andrea Ewen
Clare Buswell
Debby Hughes
Jeanne Jachna
Maureen Merritt
Silke Ledlow
Tasnim Ahmed


Jan 22

Cure for the (Wednesday) blues

Hi there friends, just a quick post tonight. My dear friend Taheerah just started hosting challenges on her blog and I thought I’d join in the first one.
(click on the graphics for the hyperlink)

I’m not surprised that she picked such an inspiration, not only the awesome freestyle arrangement reflects her unique spirit but I’ve been seeing her pinning watercolour ideas for some time, which left me drooling on some as well. Big fan of watercolours here… and hugely happy to see this trend going so strong in paper crafts. Which in turn makes me really love the photo!

I started with a piece of Pink Paislee Color Wash Colorful paper, in which I cut some PTI clouds. Then I layered a couple of Kaisercraft die cuts (True Romance) in the bottom right corner, added a simple sentiment (Simon Says, stamped on a white card peeking out of one of the negative spaces), wood veneer hearts (Freckled Fawn) and scattered come confetti which I saved from a previous Silhouette project. I knew they’d come handy!
Tune in for the CASE Study card tomorrow, g’night!


Jan 20

Deliciously retro with Penny Black

How did your week start, friends? I’m just happy that after a heat wave we experienced and which was rather unpleasant, we’re back to low 20’s. Golly, I can think again! However, lo and behold, there’s much work awaiting me this week and before I dive head first into it, I thought I’d share this rather unconventional and very colourful love card. Courtesy of Penny Black :)

The PB stamp set I used is called My Type and it’s a cling. I inked it up in Curry, Boysenberry and Espresso inks from the ColorBox Chic Queue. While I’m not a huge fan of ColorBox dye inks, the pigment ones are fantastic and the small format allows me to achieve a perfect gradient by tapping the little cat’s eyes in overlapping fashion, on the surface of the stamp.

I used Memento Luxe inks for the hearts and the sentiment, and various scraps of cardstock (1 cm wide, mostly from WorldWin Papers), to build up the other panel. For the colour inspiration, I reached for the Color Me Happy board on my Pinterest and found this gem:

The layout on the other hand, follows this Retro Sketches challenge:

I hope you like it, I know I do :)


Jan 19

Anatomy of layers - dreams do come true

Hi-ya, friends! I asked you a couple of weeks ago, what you would like to see from me this year and a great deal of suggestions regarded the way I combine seemingly unrelated products to create a coherent collage - style card. I gave it a good thought and decided that the best way to explain the process will be a series of step-by-step photo tutorials, like the one I created HERE and which was met with quite an enthusiasm.

Frankly, I was battling with the idea of giving it a go at all, since the choices that determine the final look of my freestyle collage cards, are pretty chaotic & unpredictable. I go through a lot of stuff before I settle on the elements, fumble in my die cut, off-cut and whatnot baskets, but I never over-think the process. My work is largely based on intuition. Does it look fine? Yep, slap it on! :)
That being said, I hope that seeing how I build up my layers will help you open up more to possibilities yourselves. Here’s the card I’m sharing today!

I based it on the following challenges.
(click on the graphics for the hyperlink)

I almost always base my cards on a piece of inspiration, be it a current or past challenge or a Pinterest find. Sketches are my staple since they take the burden of figuring out the initial layout off me and help me visualize the general direction I want to go in. I love inspiration challenges like the WPlus9 Mood Board above as well, since they not only give me an option of colours but patterns, textures and/or style as well.

I decided to have a kraft card base with a layer of PTI Rustic White CS covering the front. I cut it smaller than the card and slightly narrower still, to account for extra bits which I wanted to tuck underneath the panel. I started by sponging Memento Luxe in Dandelion and Peanut Brittle through the Heidi Swapp Polka Dot stencil.

I flicked over some Marigold Glimmer Mist, to break up the regularity of the pattern.

Then I die cut the WPlus9 label (Label Layers 1 die) and gold embossed it using the corresponding stamp set (Filigreed Frames).

I stamped the sentiment from Neat & Tangled Dreams, in Memento Luxe Espresso Truffle. I stamped the banner separately, cut it out and mounted on dimensionals under the sentiment to match the stamp.

On a separate piece of CS, I stamped some leaves from WPlus9 Woodgrain Silhouettes Additions, in Provincial Gray Fresh Ink.

…fussy cut all of them, and added shading with Copic markers (C5 & C3).

I mounted the label on the panel and arranged the leaves around it, tucking the stalks underneath. I mounted all pieces on foam tape.

At this stage I decided to add further interest and an extra colour to the background, and stamped some stars from Simon Says Stamp Merry Trees set in a few places, with PTI Ocean Tides ink.

I took a scrap of stripe paper (Basic Grey Fact pad) and adhered it under the bottom left edge of the panel, leaving only a little bit of it to peek out.

For the finishing touches, I added a dot of glitter glue to the centers of the stars, a punched butterfly (Martha Stewart Classic Butterfly) topped with a pearlescent sequin, a May Arts Ivory twine and a light wash of E41 Copic to the banner.

Voila! Here’s the card again, I hope you enjoyed :)


Jan 16

CASE Study Challenge #174

Hello, hello! Ready for a new CASE Study challenge?Here’s this week’s inspiration by our Muse Donna Mikasa - it’s one of my very favourites of hers!

Seriously, how *cool* is this effect! Pun totally intended. A true masterpiece with everything ‘just right’. I wanted to go for a very similar effect but then I thought of the Trendy Star Power Challenge in the Moxie Fab World and I had a spark of an idea. How about creating a stargazer’s dream of a night sky, speckled with galaxies and dotted with sparkly stars? All of which burst out of a glitzy silver pocket?

I did it by spritzing October Afternoon Icebox Sprinkler, over PTI Enchanted Evening cardstock. You need a light, chalky and opaque spray mist to do the job. Then I die cut the WPlus9 Love Notes pocket from silver glitter paper, stamped the sentiment from Hero Arts Many Birthday Messages with WPlus9 White ink, and added my favourite Studio Calico Tiny Stars, which I glittered over as well.

I also used a FTL275 sketch, below:

Check out the blogs below for the Design Team’s takes on the challenge, or visit CASE Study to see it all in all place.

Donna Mikasa - January Muse
Erin Thiem - January Guest Designer
Amy Wanford
Andrea Ewen
Clare Buswell
Debby Hughes
Jeanne Jachna
Maureen Merritt
Silke Ledlow
Tasnim Ahmed


Jan 15

StampNation Birthday present

News break, crafty friends! You might know that we’re in the midst of celebrating StampNation‘s 3rd Birthday, and today we have a special offer to everyone who’s been thinking about joining

3 Day Trial for $1!

It’s a one - off limited time offer, with the expiration date of midnight on Monday, January 20.

How will this work?

  • subscribe to StampNation HERE for $1 and gain full access to the site.
  • you will have full access to StampNation for 3 days
  • don’t want to continue? be sure to send an email to cancel 24 hours in advance so we can cancel your payment
  • want to remain a member? WONDERFUL! Do nothing and on day #4, you will be charged the $9 membership fee.

We hope you will join us!

  • almost 400 videos
  • The Classroom – tutorials on Clean and Simple Design, Spotlight on Trends and my own Technically Speaking forum…all under one roof!
  • a new challenge every week – more than 100 to inspire you!
  • over 15,000 samples in the gallery
  • the happiest, more supportive and fabulous community of like minded women on the internet! You will LOVE them!

Need social proof? Click here to read the Youtube comments on why members love being a part of SN. We hope you will join us…you won’t regret and now is the perfect time to see why!

My next Technically Speaking tutorial will be up shortly, I’ll show you how to achieve a stained glass look like this one:

Related Posts Plugin for WordPress, Blogger...