Jun 26
Hello friends, and welcome to Spellbinders™ Blog Frenzy! I hope you enjoyed the posts done by the other Design Team members so far; perhaps you were the lucky ones to win some goodies! There are still lots of chances to join us, and I’m happy to share my bit with you today!
Spellbinders™ products used:
- S4-377 Fancy Framed Tags One
- EL-013 Winter Wonders M-Bossabilities™
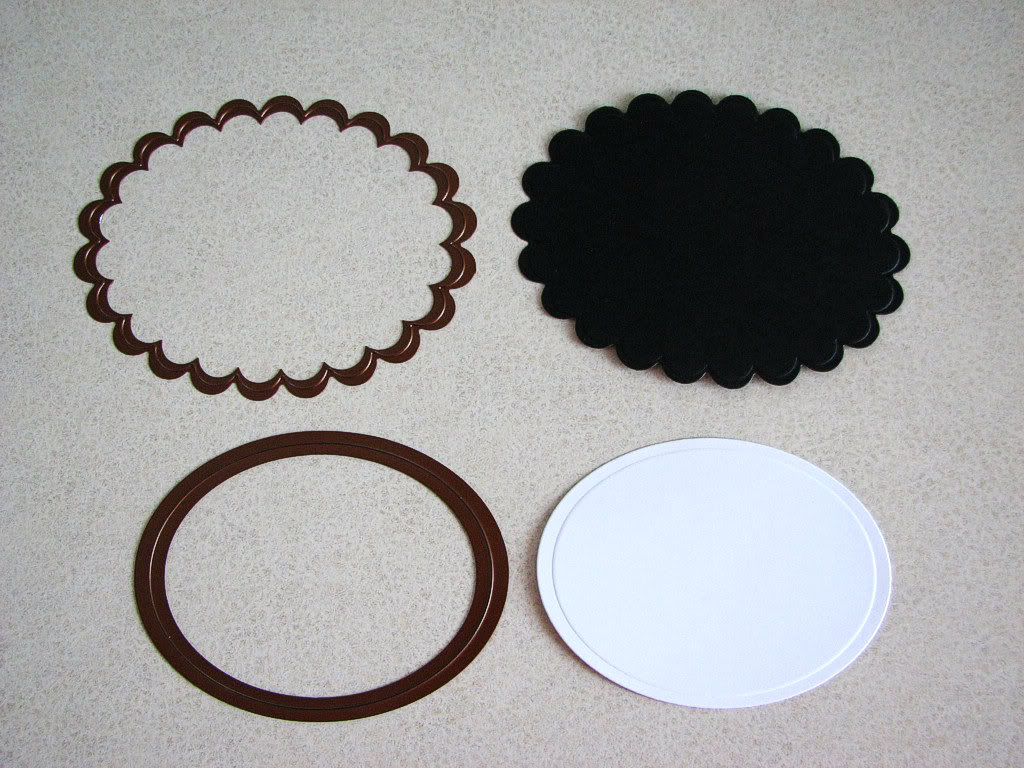
- S4-116 Standard Circles SM
- S4-124 Classic Scalloped Circles LG
- S4-112 Classic Ovals SM
- S4-111 Classic Scalloped Ovals LG
Cross Promotional Partners:
- WorldWin Papers® - Cut Mates 12″ x 12″ White Flour cardstock; Clear Translucent Vellum Cardstock
- Core’dinations ColorCore - Airondack Collection 12″ x 12″ Pool cardstock
- Bazzill Basics Paper® - 12″ x 12″ Beetle Black cardstock
- Creative Impressions - 1/2″ Pink with Black Dots & Edge; 1/4″ Pink with Black Stitch ribbons
- Elmers - Craft Bond Foam Mounting Tape
- SCRAPBOOK ADHESIVES BY 3L™ - Self-adhesive 3D Foam Squares
- Clearsnap - Color Box Whisper Grey ink; Wicked Black dye ink
Preferred Partner Companies:
- Waltzingmouse - Sewing Box Christmas; Say It Loud Winter Holiday clear stamp sets
Here are the brand new dies and embossing folder!
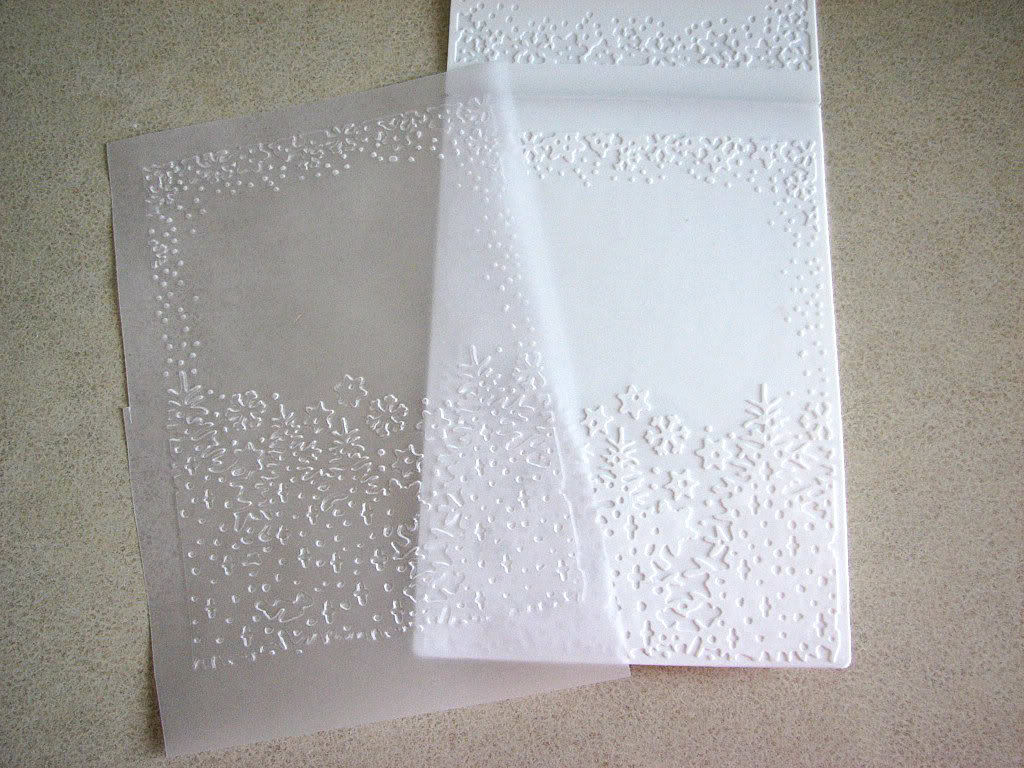
EL-013 Winter Wonders M-Bossabilities™
MSRP US $9.99
Approximate Die Templates Sizes: 5 x 7″

S4-377 Fancy Framed Tags One
MSRP US $24.99
Approximate Die Templates Sizes:
Oval Tag: 4 1/8 x 1 ½” (Insert: 1 ¾ x 1 1/8″)
Rectangle Tag SM: 4 ¼ x ¾” (Insert: 2 3/8 x ½”)
Rectangle Tag LG: 4 1/8 x 7/8″ (Insert: 2 ½ x ½”)
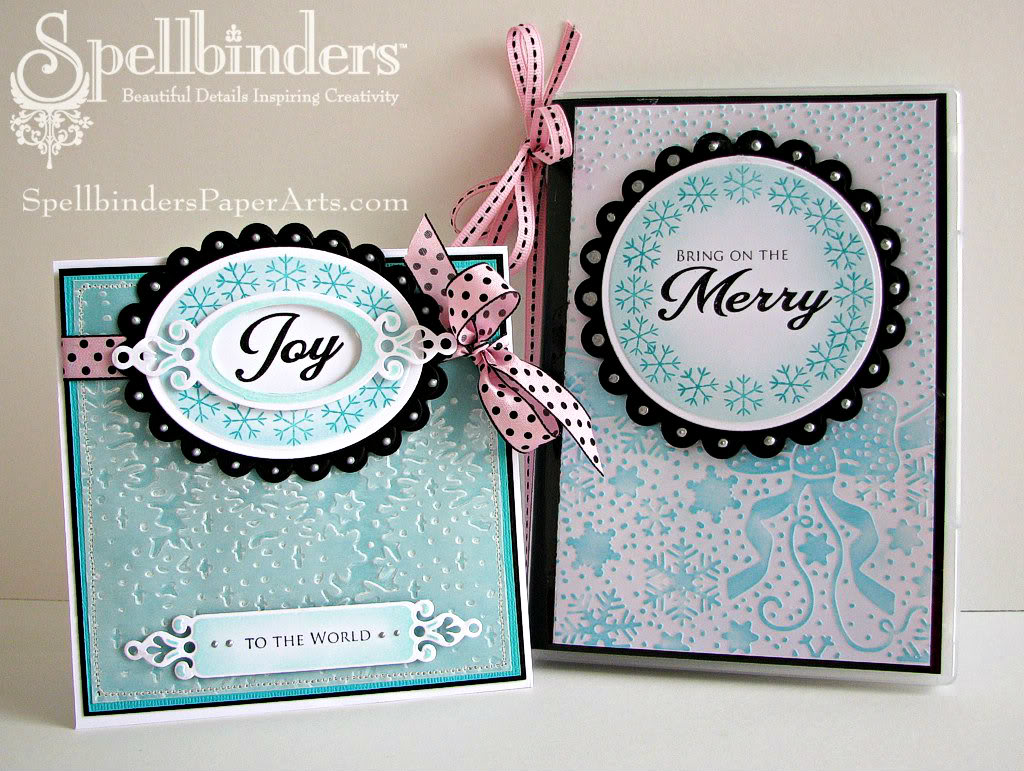
The project that I’m presenting, is a Christmas gift set that consists of a CD case with a matching card. Below you can find the step-by-step instructions on how to recreate the card.
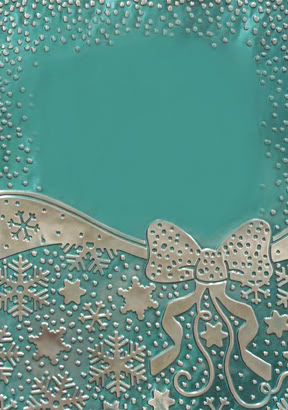
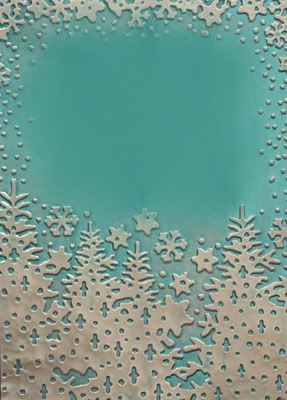
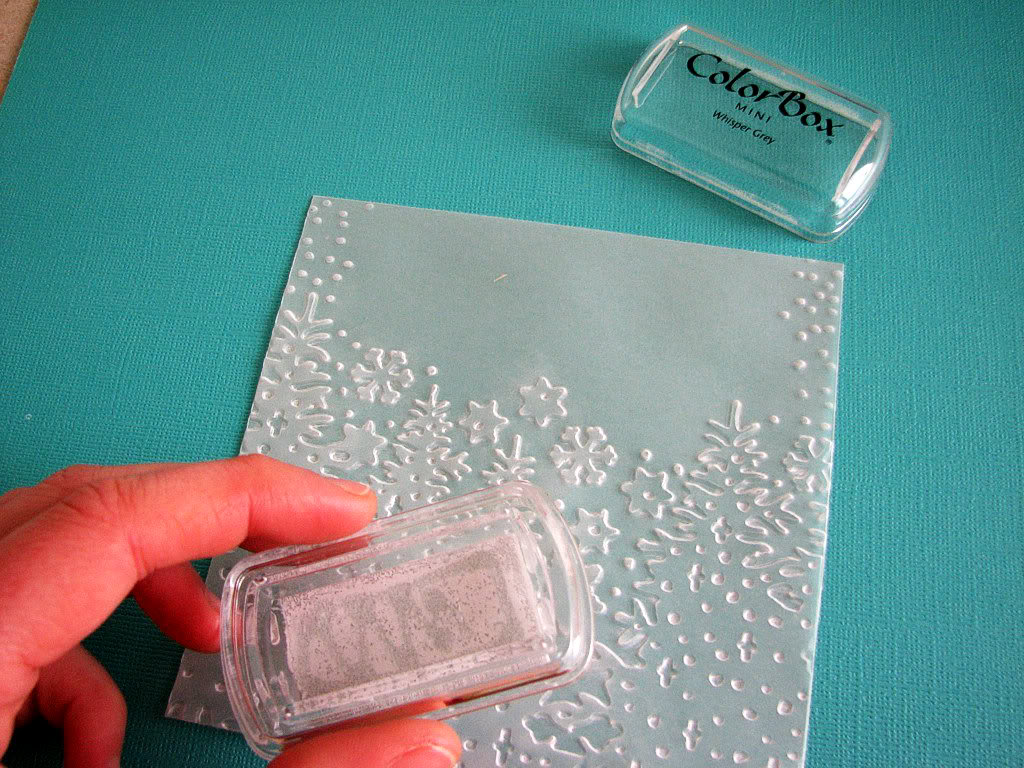
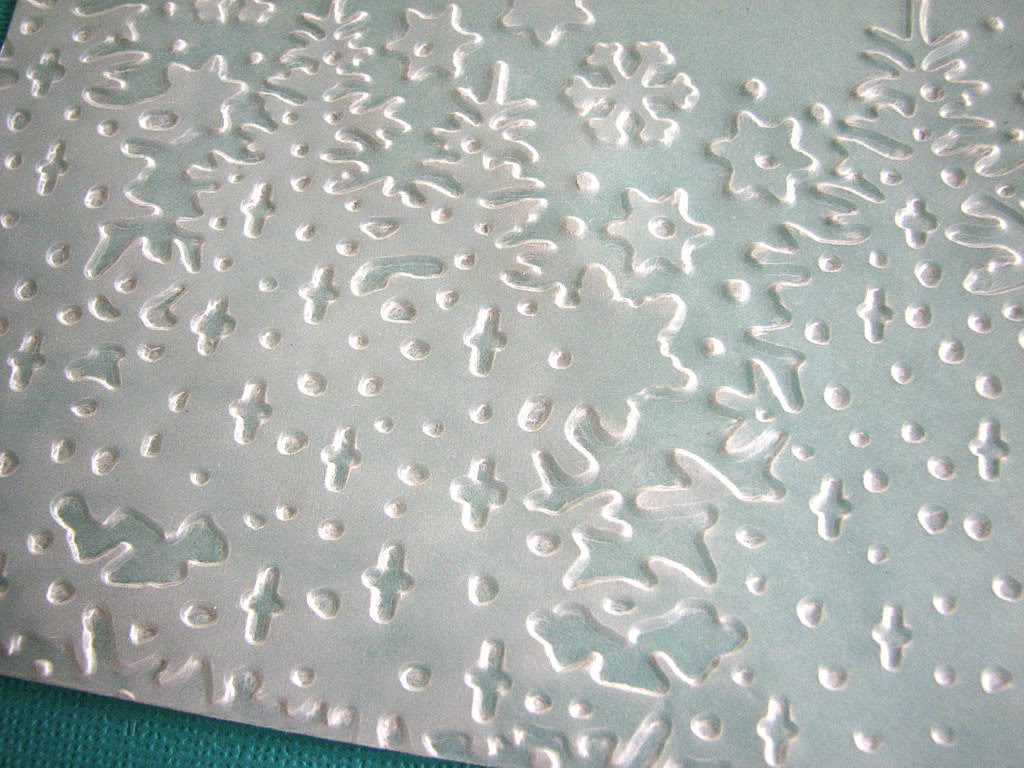
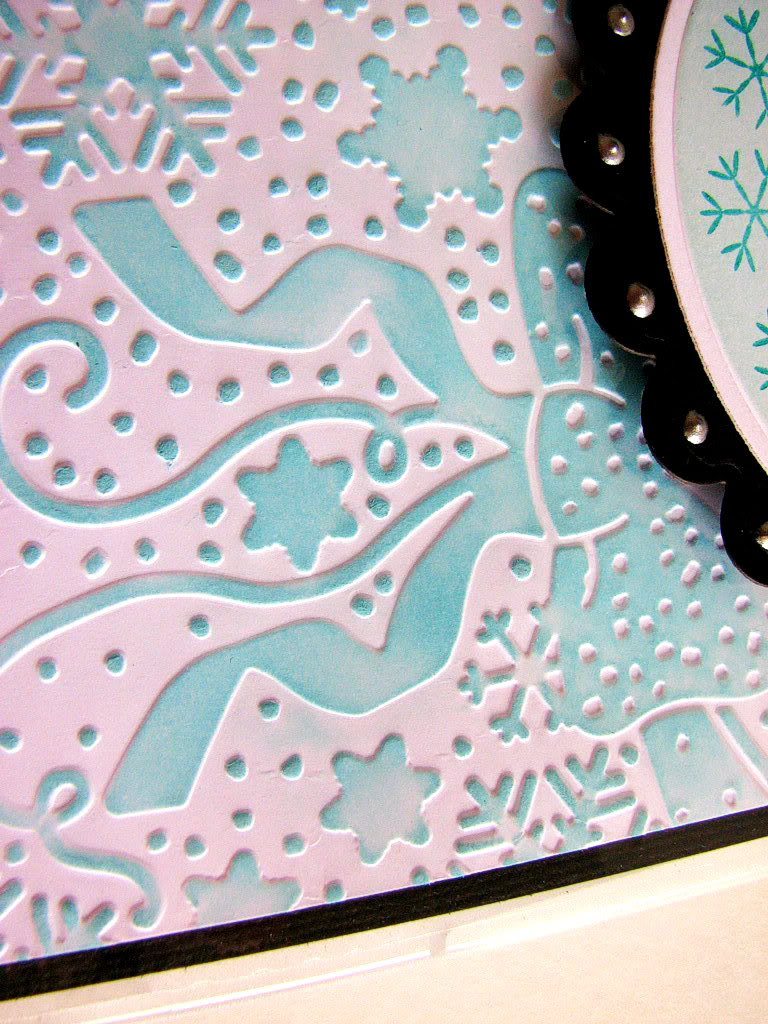
Begin by embossing a piece of vellum cardstock, with the Winter Wonders M-Bossabilities™.
Trim the vellum cardstock to 12.5 x 12.5 cm (4.9 x 4.9 in), keeping all of the bottom scene. Sponge carefully with Color Box Whisper Grey ink. Pressing the ink pad too much against the vellum will cause the ink smudge the non-embossed areas. You will want to lighten the embossed parts only.
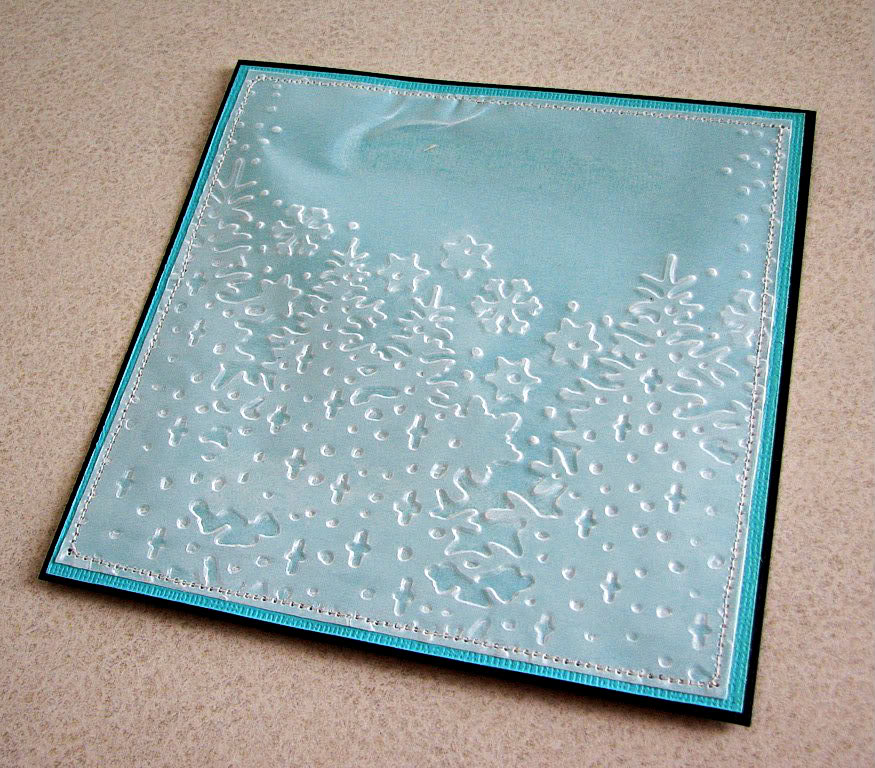
Mat the vellum first with Teal cardstock, then with Black cardstock. Sew around the edges. Don’t mind the nasty fold that was created by sewing, this part will be covered with a label.
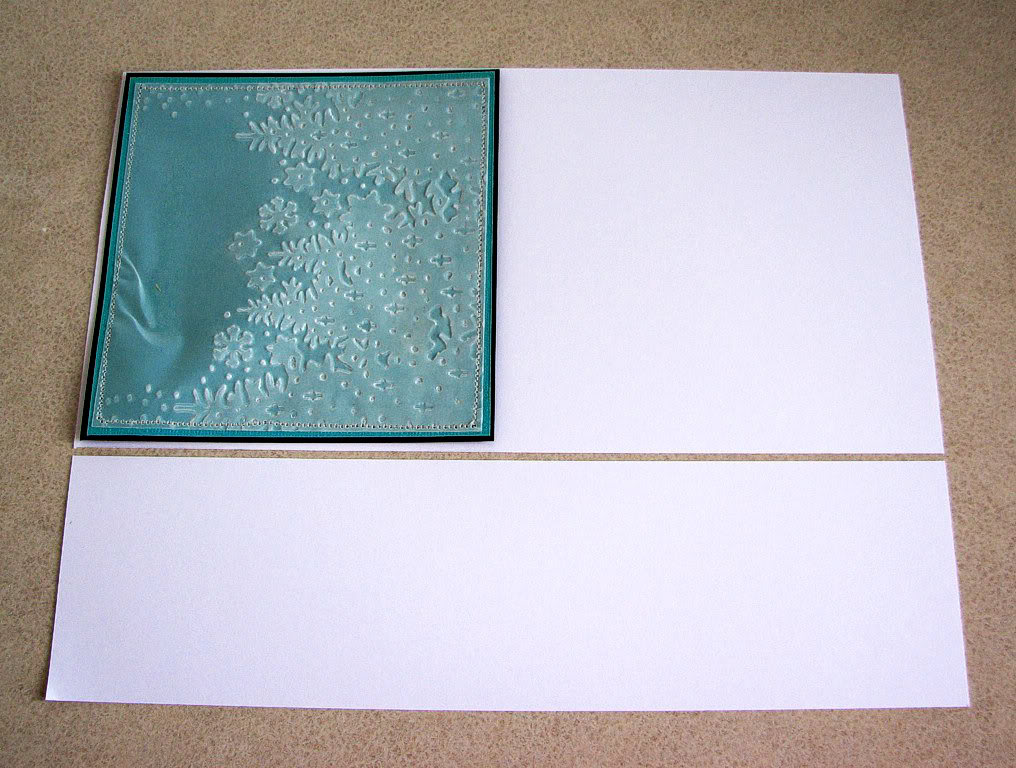
You can now create your card base from white cardstock. By trimming it to 14 x 28 cm (5.5 x 11 in), you’re left with just enough border around the panel, and you only have to trim on one side, because the cardstock length is just right.
After you cut it, you can score the card and set it aside.
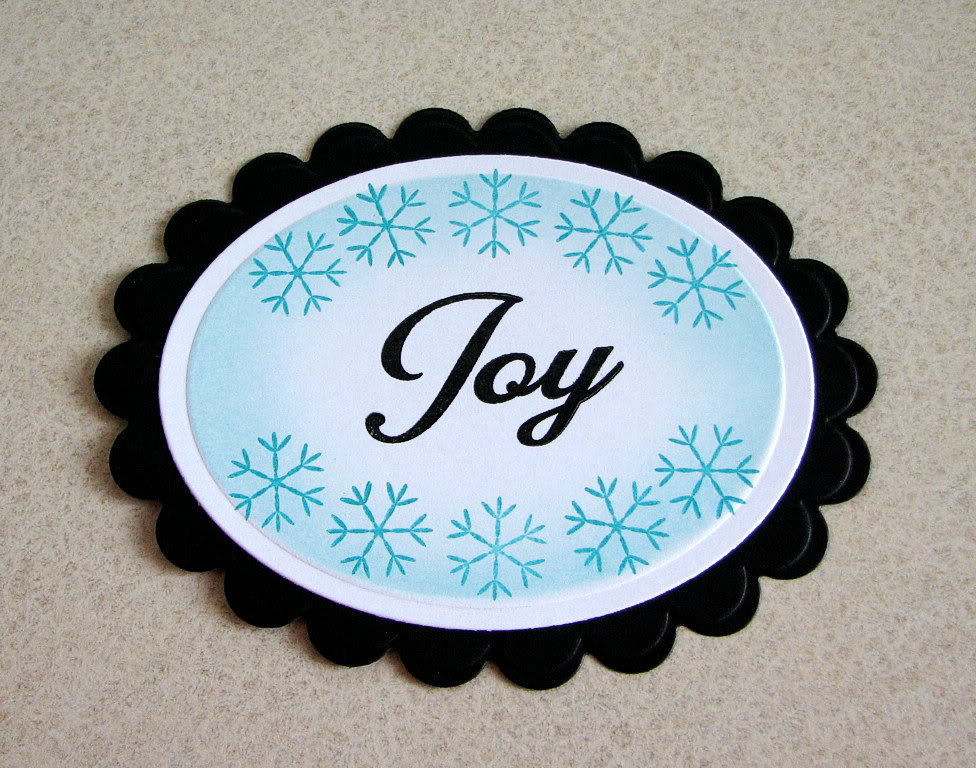
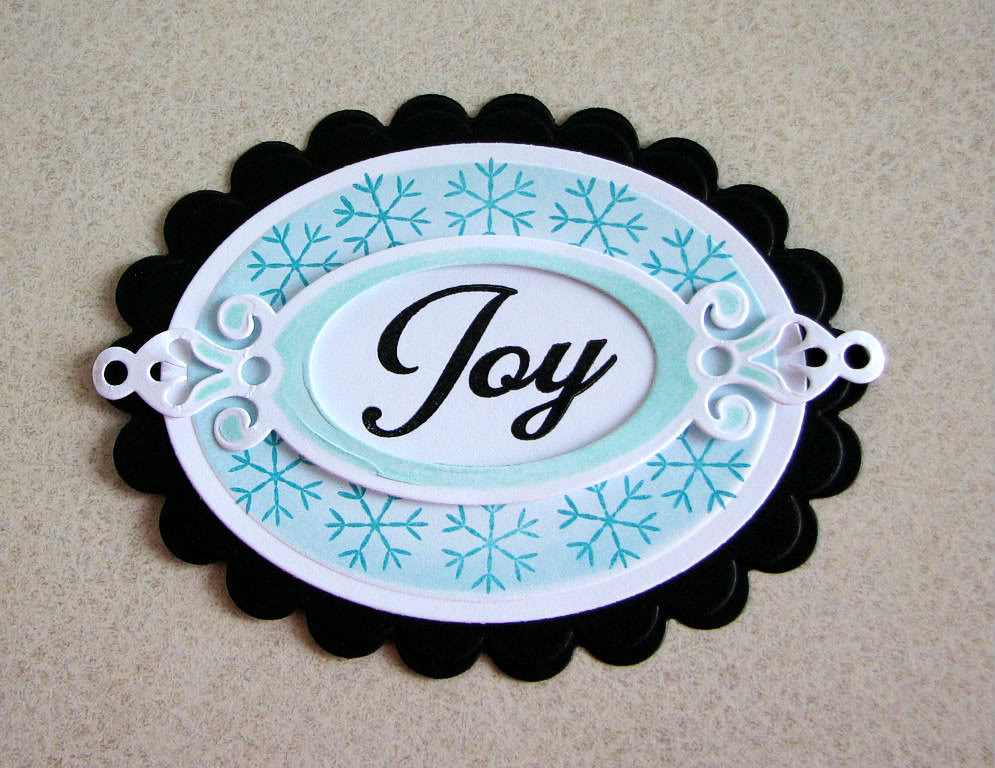
Now we can proceed to the label! Cut and emboss the oval/scalloped oval, and sponge with an aqua ink of your choice. I used Versa Magic Sea Breeze.
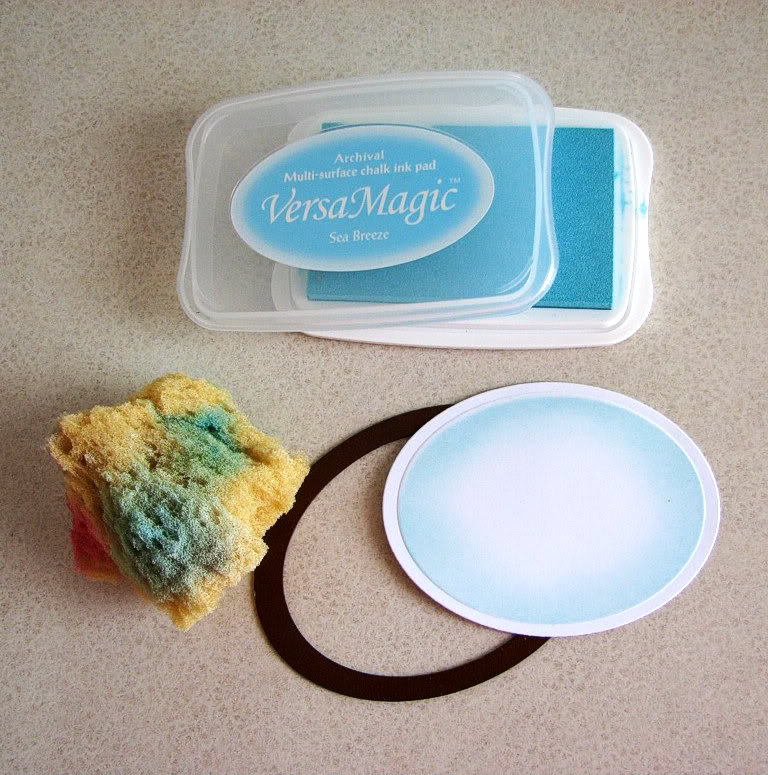
Assemble the oval by adhering the pieces together. Stamp the snowflakes with teal ink (I used Versa Magic Turquoise Gem) and sentiment with Wicked Black ink as shown. You don’t have to stamp in the immediate left and right corners, these parts will be covered.
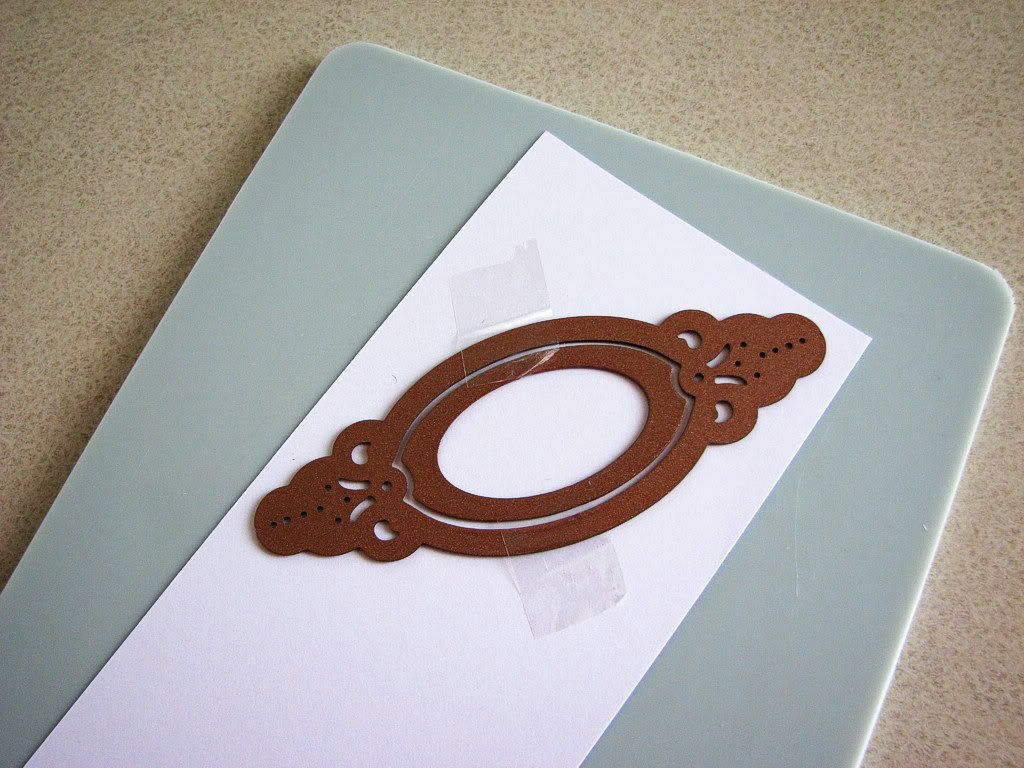
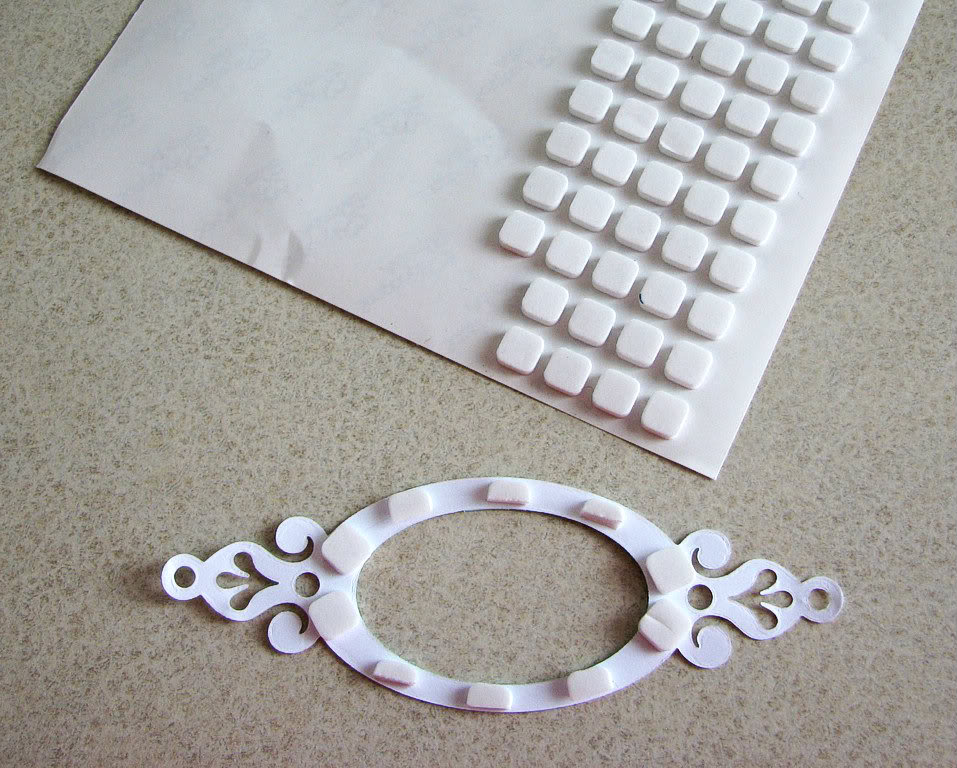
Die cut and emboss the tag from Fancy Framed Tags One, using the insert so that you’re cutting out the “window” too. Sponge through the die with aqua ink, like you did with the ovals.
Adhere 3D Foam Squares to the back, and attach the tag to the oval as shown.
You can now tie the ribbon across the panel, and attach the label over it, using foam tape. Once that’s done, you can adhere your panel to the card base.
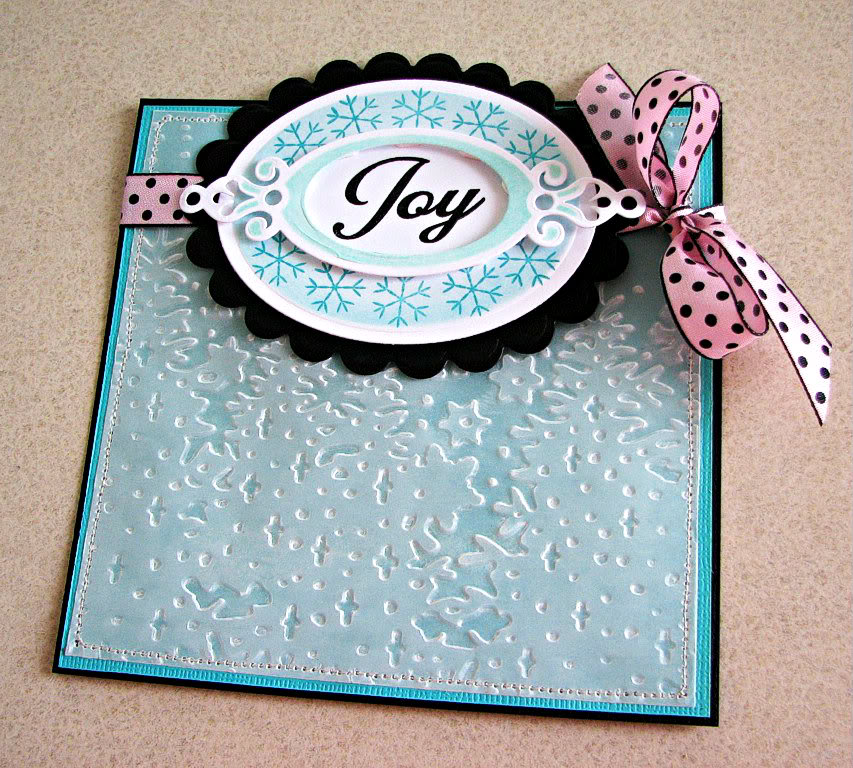
Die cut/emboss/sponge another tag from Fancy Framed Tags One, this time without using the insert. Stamp the sentiment and attach the tag to the bottom of the card.
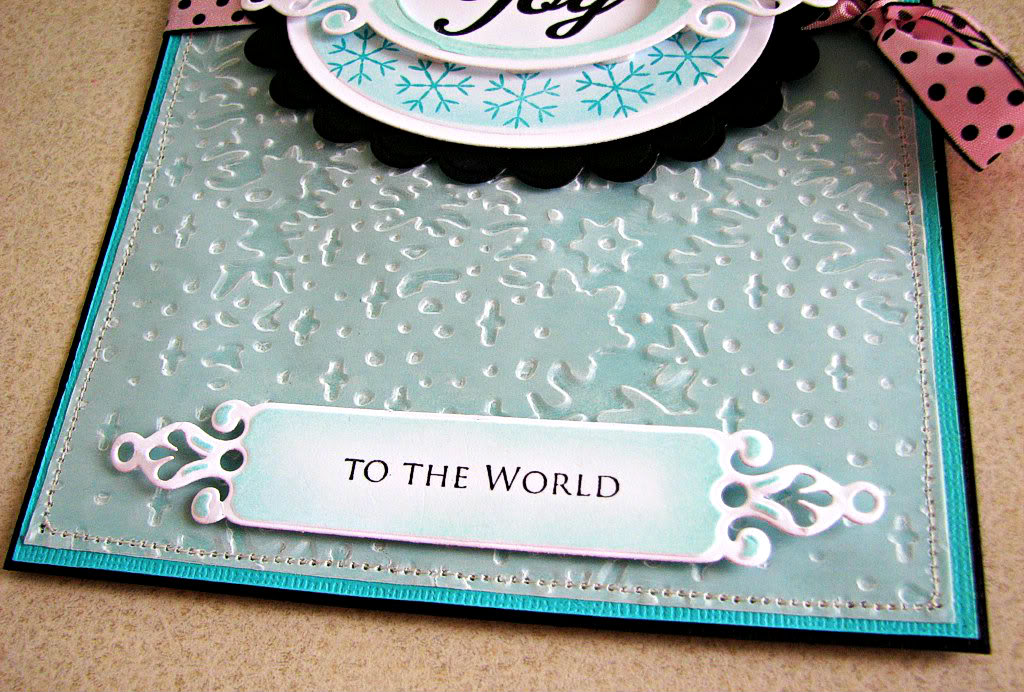
Lastly it’s time for the finishing touches, like adding some Liquid Pearls in Pewter to the label and tag. You can also use pearls or rhinestones.
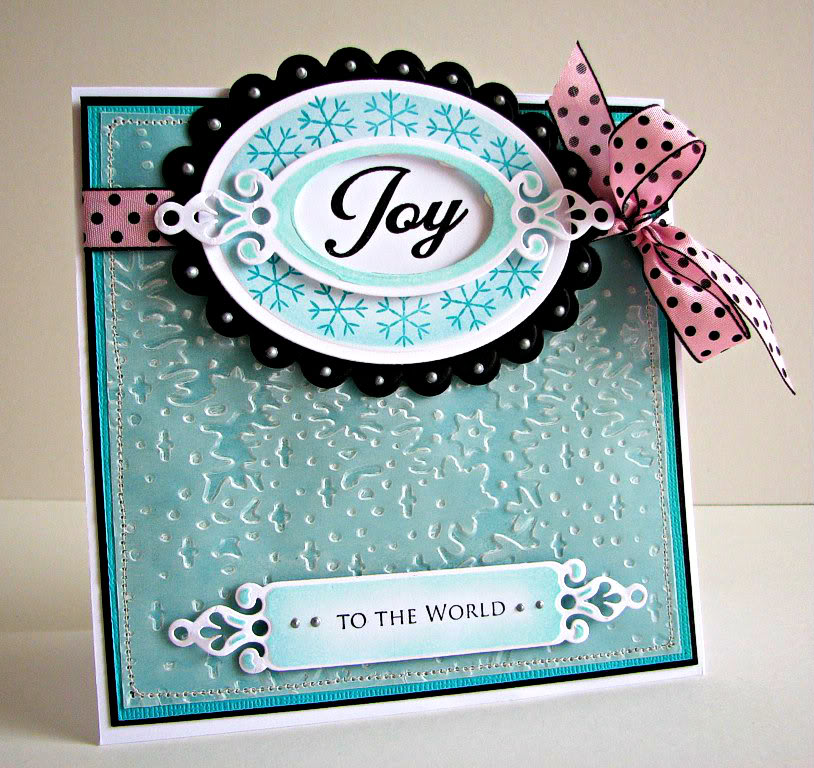

Voila! We got ourselves a nice Christmas card 
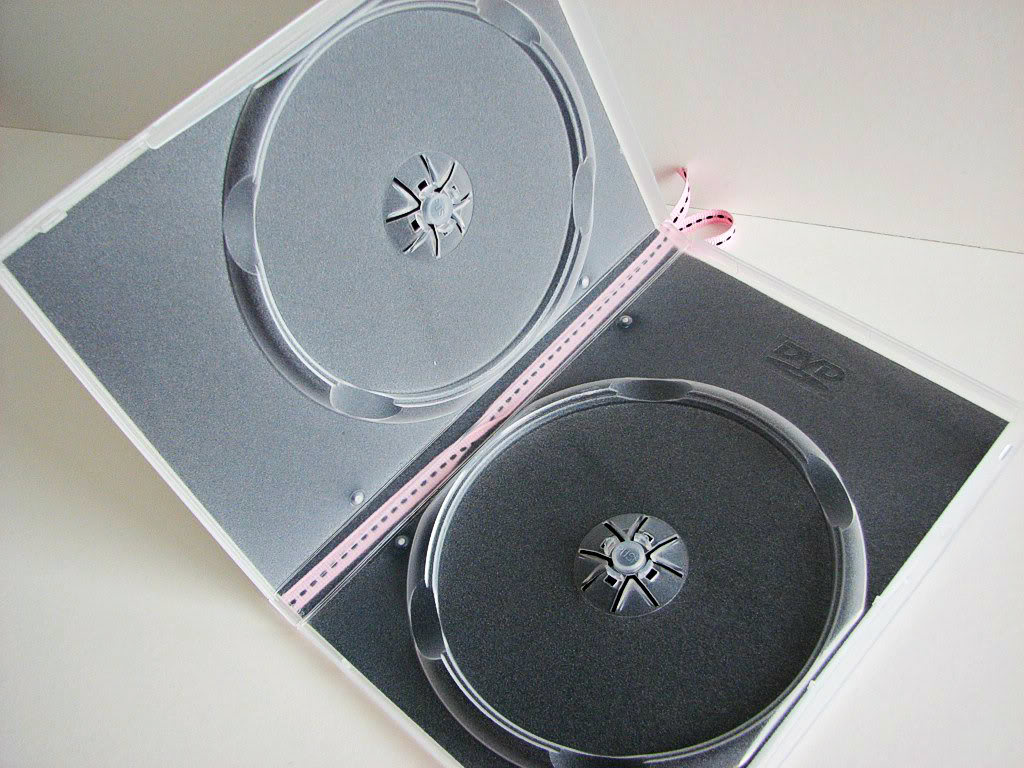
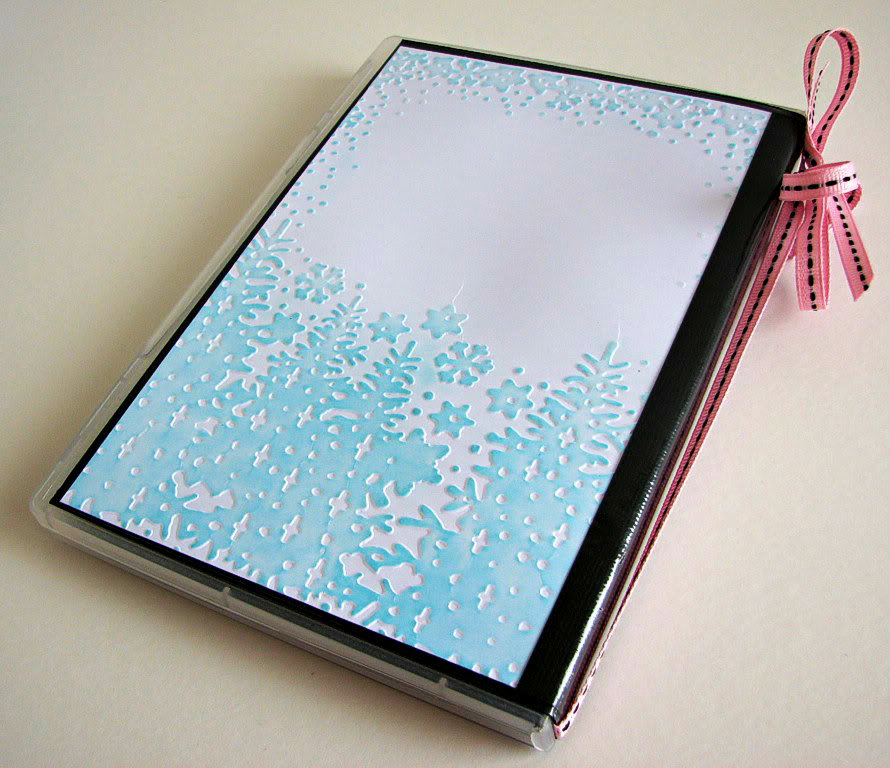
The matching CD holder is meant to hold a recorded Christmas message (perhaps from the kids taking center stage??) that you can then send to the family that lives far away. You can also put a CD with your favourite Christmas carols in.
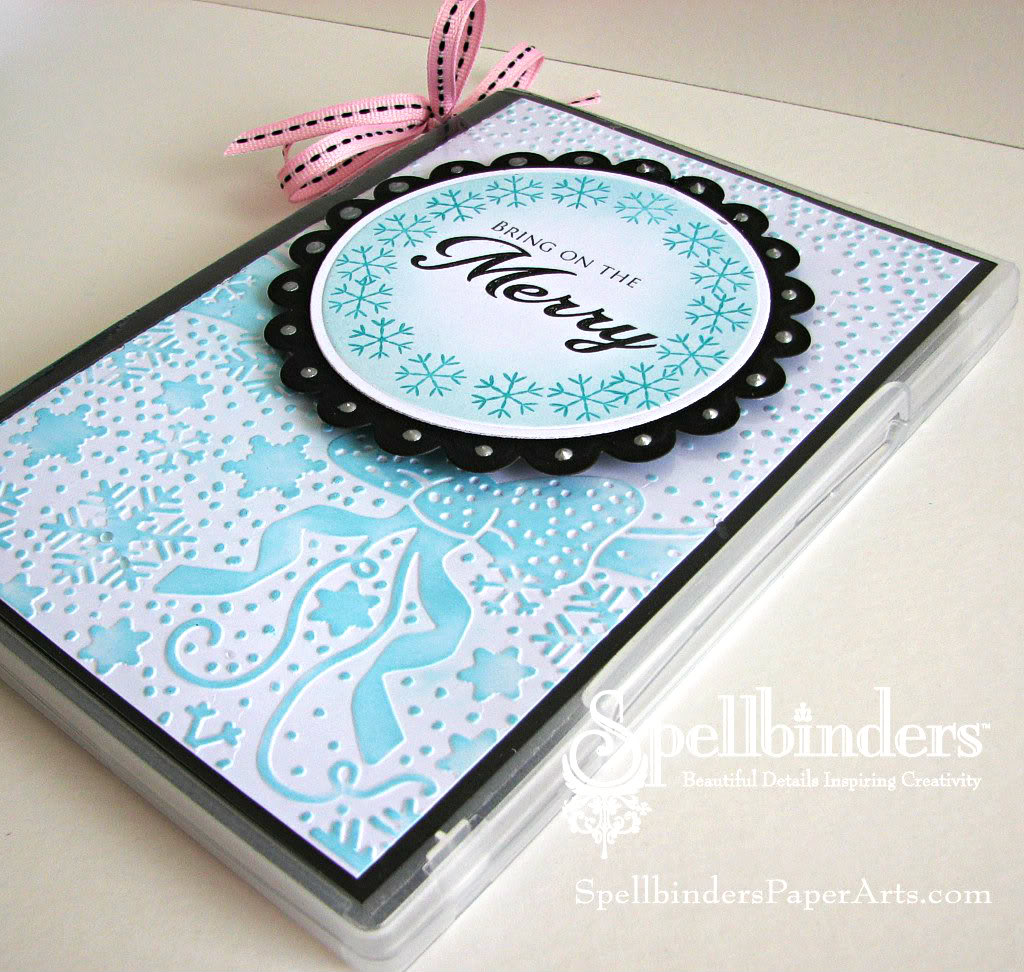
This time I embossed the Winter Wonders M-Bossabilities on white cardstock, and sponged it carefully with aqua ink. The embossing folder happens to be just the right size for the holder, so all I needed to do is take an A2 card, emboss it with the two different patterns, trim slightly and fold in the middle.
The Sneak Peek: Spellbinders™ Summer Spectacular! Begins on June 21st and will end on June 28th, 2012. It consists of 24 individual prizes and one grand prize drawing. Enter the Sneak Peek: Spellbinders™ Summer Spectacular! by visiting the participating blogs each day.
At the end of each blog post, click on the “Enter HERE” to open the entry form. You may only enter once from each blog each day.
Spellbinders™ will randomly draw one winner from each participating blog to receive that blog’s newly revealed dies. The Grand Prize Winner will be randomly drawn from the pool of entrants who sent entry forms from each and every participating blog during the 48 hours each blog was open. For the full list of official rules please click RULES.
**THIS CONTEST IS NOW CLOSED**
**Enter the contest by clicking HERE**
Thank you for joining me today, friends! There’s more goodness to see and more changes to win, on two other blogs today. Please stop by to see what Linda Duke and Julianna Hudgins have in store!!
Questions? [email protected] No entries will be accepted at this email address.