Hello friends, and welcome to Spellbinders™ Blog Frenzy! I hope you enjoyed the posts done by the other Design Team members so far; perhaps you were the lucky ones to win some goodies! There are still lots of chances to join us, and I’m happy to share my bit with you today!
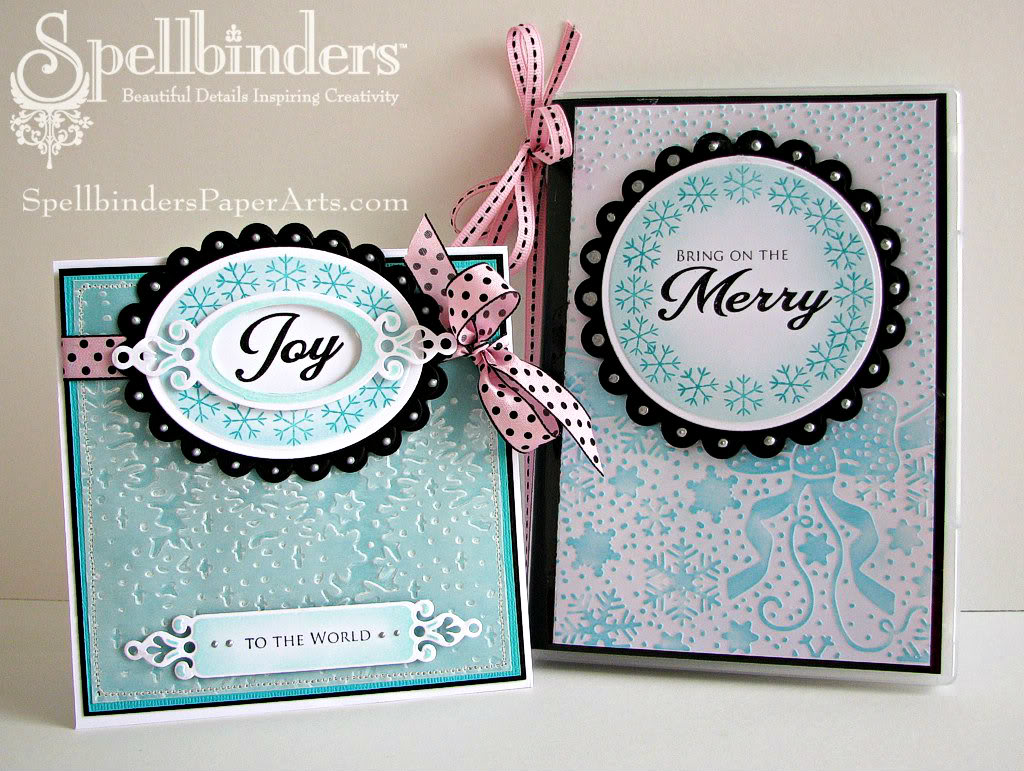
Spellbinders™ products used:
- S4-377 Fancy Framed Tags One
- EL-013 Winter Wonders M-Bossabilities™
- S4-116 Standard Circles SM
- S4-124 Classic Scalloped Circles LG
- S4-112 Classic Ovals SM
- S4-111 Classic Scalloped Ovals LG
Cross Promotional Partners:
- WorldWin Papers® - Cut Mates 12″ x 12″ White Flour cardstock; Clear Translucent Vellum Cardstock
- Core’dinations ColorCore - Airondack Collection 12″ x 12″ Pool cardstock
- Bazzill Basics Paper® - 12″ x 12″ Beetle Black cardstock
- Creative Impressions - 1/2″ Pink with Black Dots & Edge; 1/4″ Pink with Black Stitch ribbons
- Elmers - Craft Bond Foam Mounting Tape
- SCRAPBOOK ADHESIVES BY 3L™ - Self-adhesive 3D Foam Squares
- Clearsnap - Color Box Whisper Grey ink; Wicked Black dye ink
Preferred Partner Companies:
- Waltzingmouse - Sewing Box Christmas; Say It Loud Winter Holiday clear stamp sets
Here are the brand new dies and embossing folder!
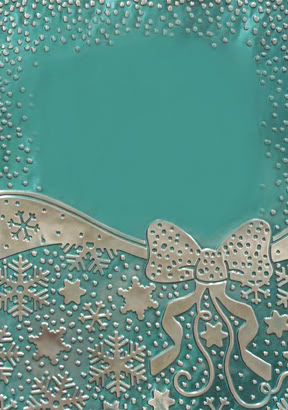
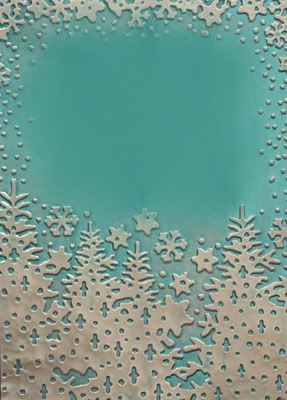
EL-013 Winter Wonders M-Bossabilities™
MSRP US $9.99
Approximate Die Templates Sizes: 5 x 7″
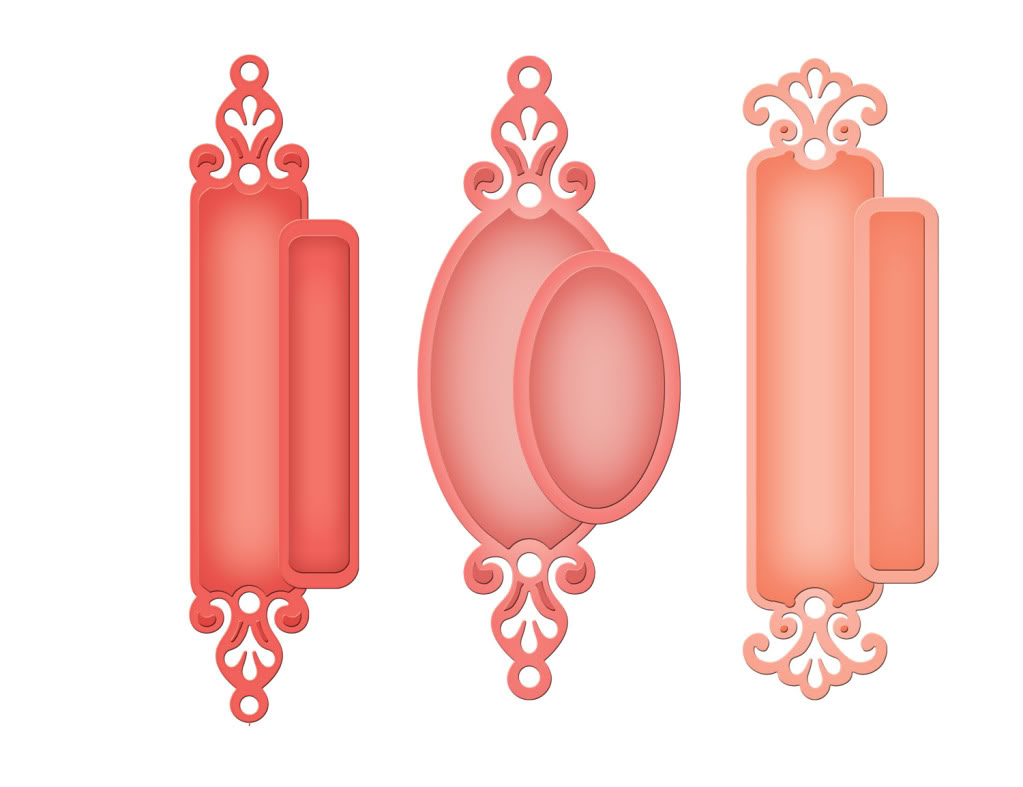
S4-377 Fancy Framed Tags One
MSRP US $24.99
Approximate Die Templates Sizes:
Oval Tag: 4 1/8 x 1 ½” (Insert: 1 ¾ x 1 1/8″)
Rectangle Tag SM: 4 ¼ x ¾” (Insert: 2 3/8 x ½”)
Rectangle Tag LG: 4 1/8 x 7/8″ (Insert: 2 ½ x ½”)
The project that I’m presenting, is a Christmas gift set that consists of a CD case with a matching card. Below you can find the step-by-step instructions on how to recreate the card.
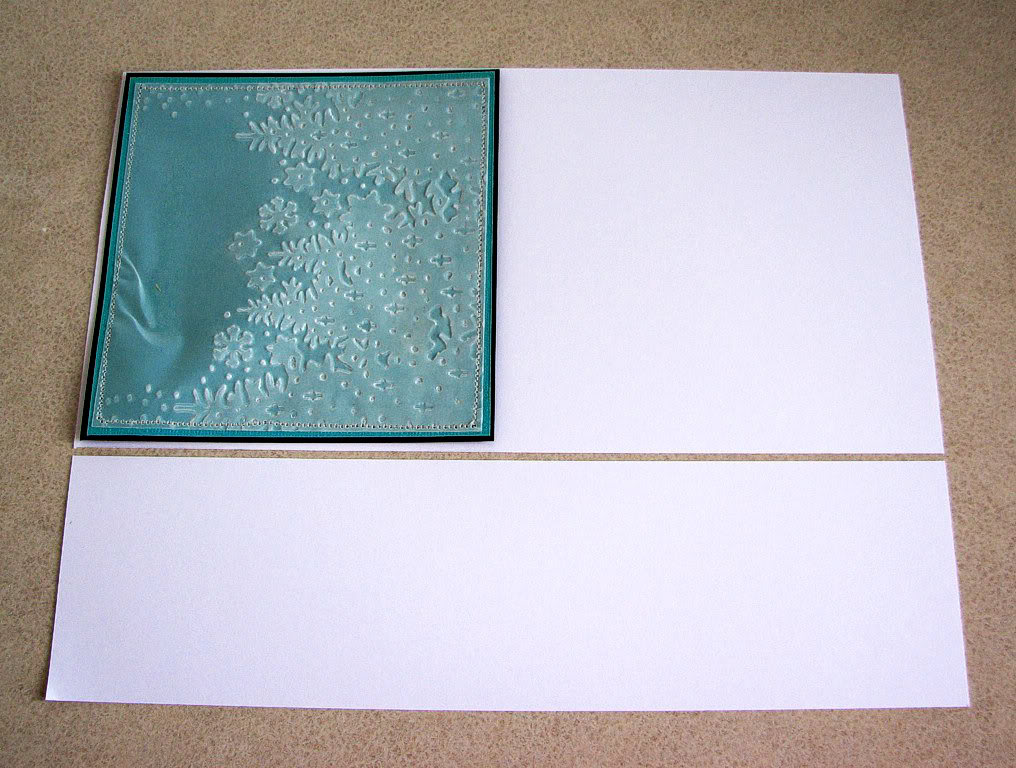
Begin by embossing a piece of vellum cardstock, with the Winter Wonders M-Bossabilities™.
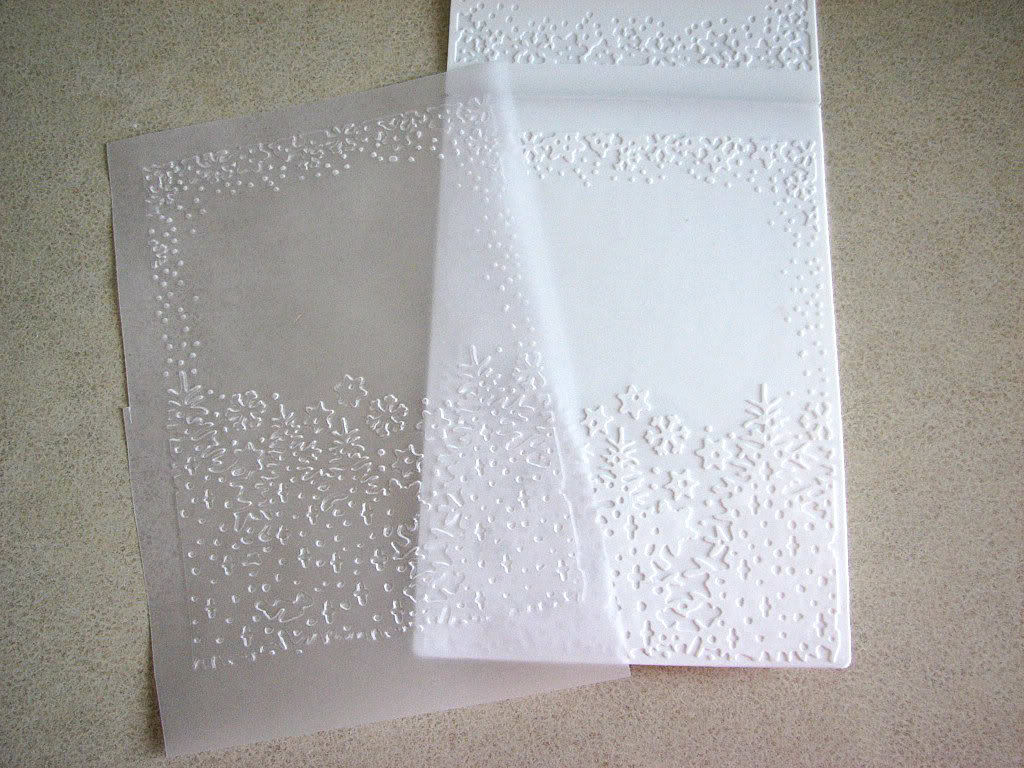
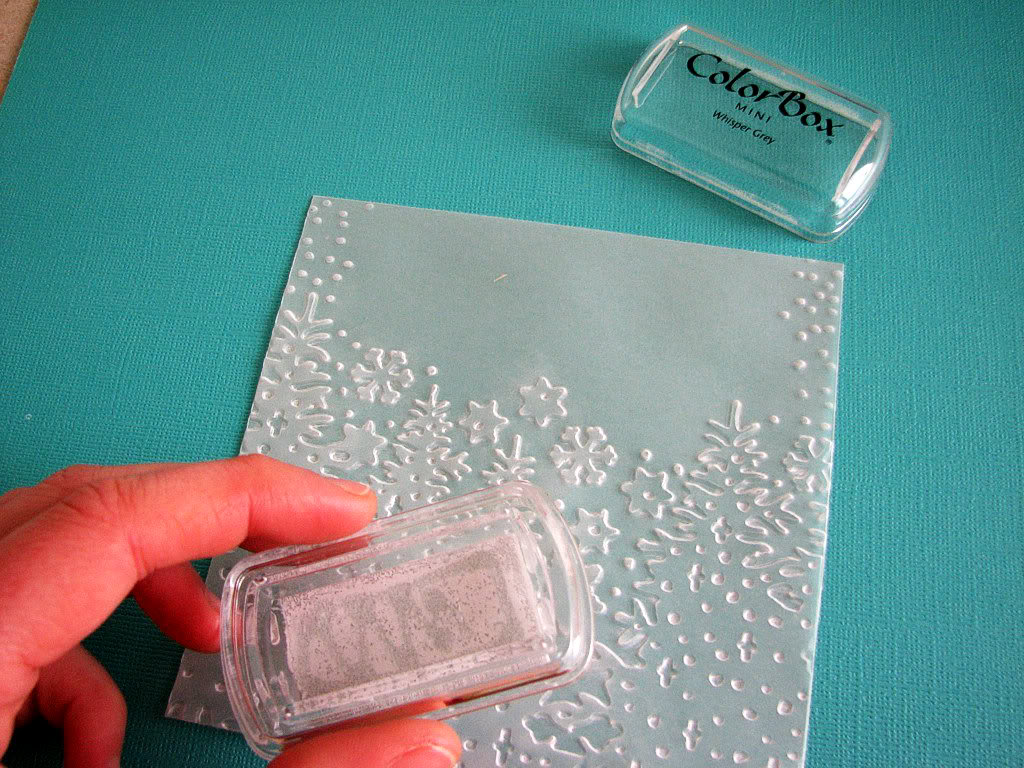
Trim the vellum cardstock to 12.5 x 12.5 cm (4.9 x 4.9 in), keeping all of the bottom scene. Sponge carefully with Color Box Whisper Grey ink. Pressing the ink pad too much against the vellum will cause the ink smudge the non-embossed areas. You will want to lighten the embossed parts only.
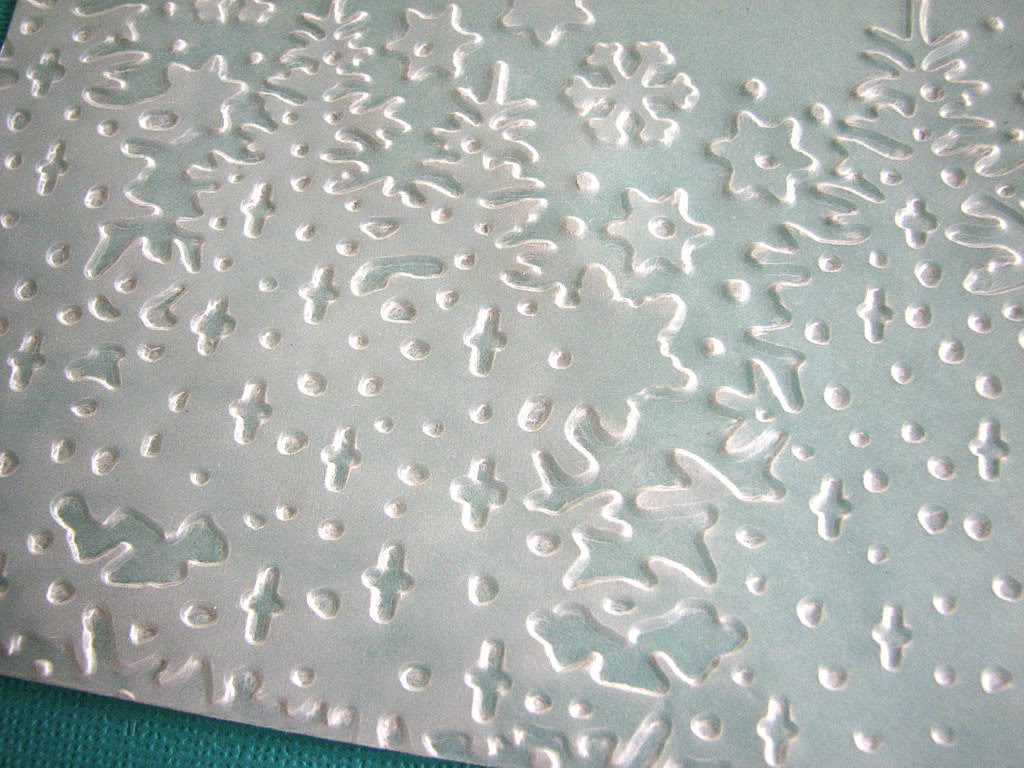
Mat the vellum first with Teal cardstock, then with Black cardstock. Sew around the edges. Don’t mind the nasty fold that was created by sewing, this part will be covered with a label.
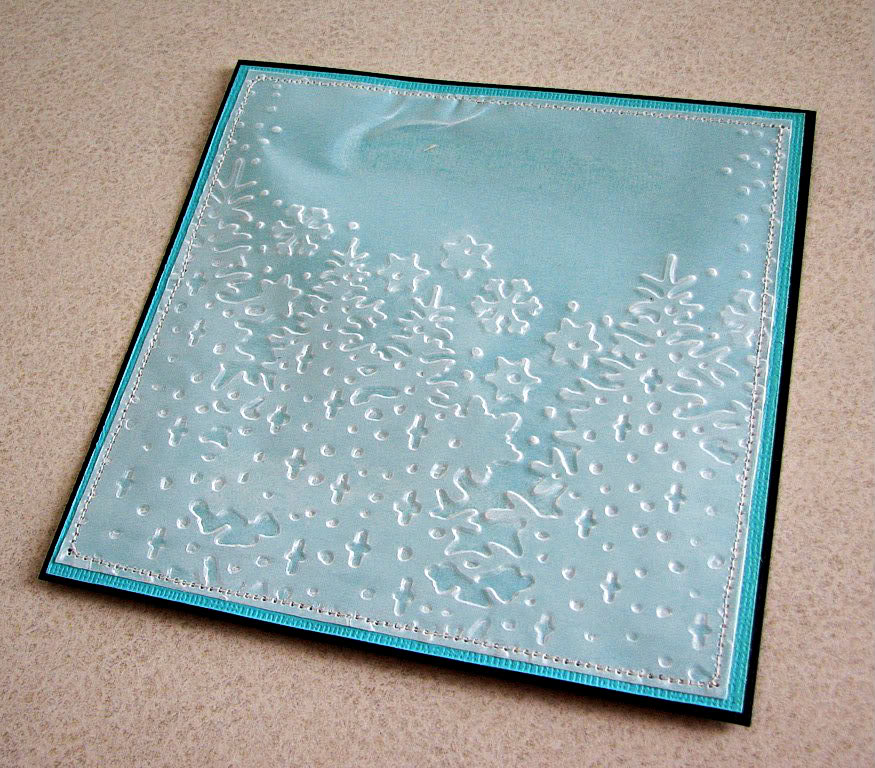
You can now create your card base from white cardstock. By trimming it to 14 x 28 cm (5.5 x 11 in), you’re left with just enough border around the panel, and you only have to trim on one side, because the cardstock length is just right.
After you cut it, you can score the card and set it aside.
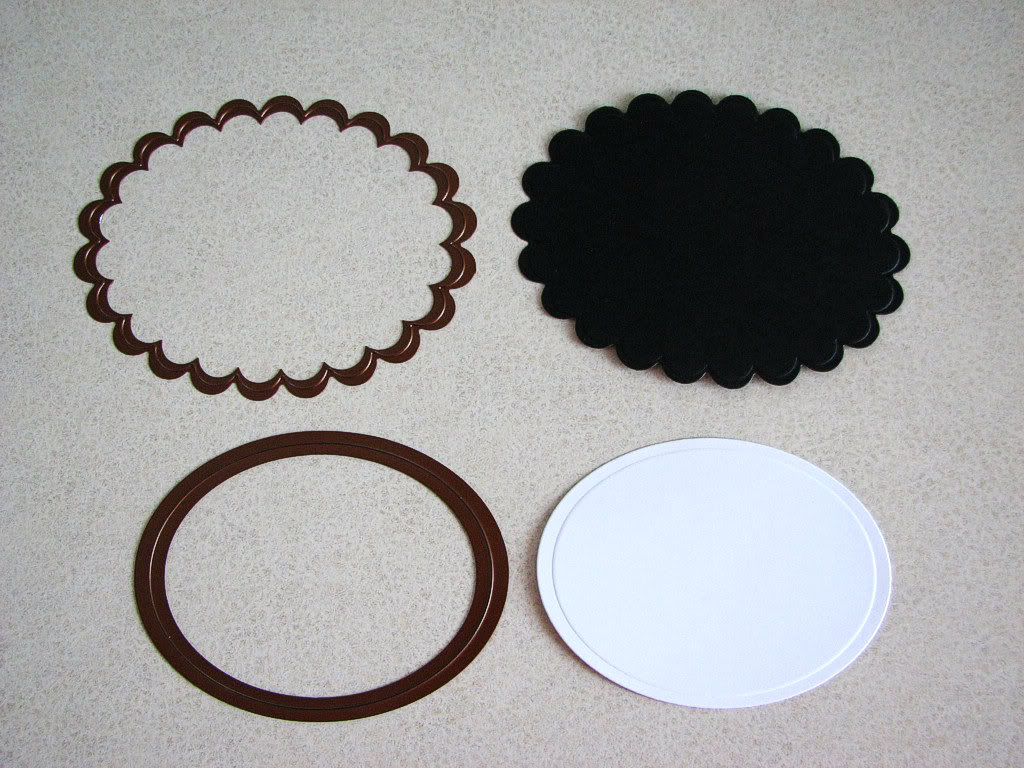
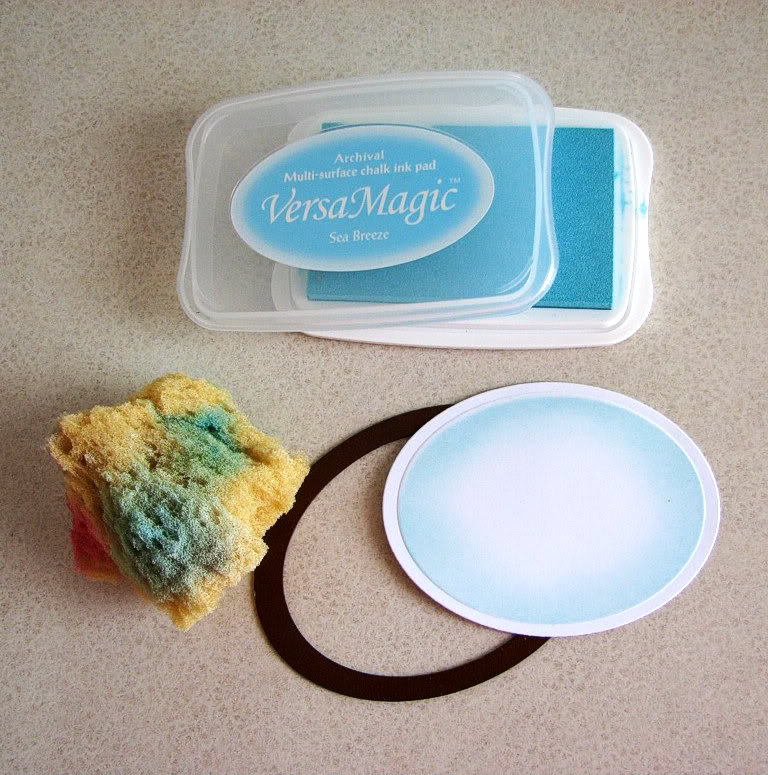
Now we can proceed to the label! Cut and emboss the oval/scalloped oval, and sponge with an aqua ink of your choice. I used Versa Magic Sea Breeze.
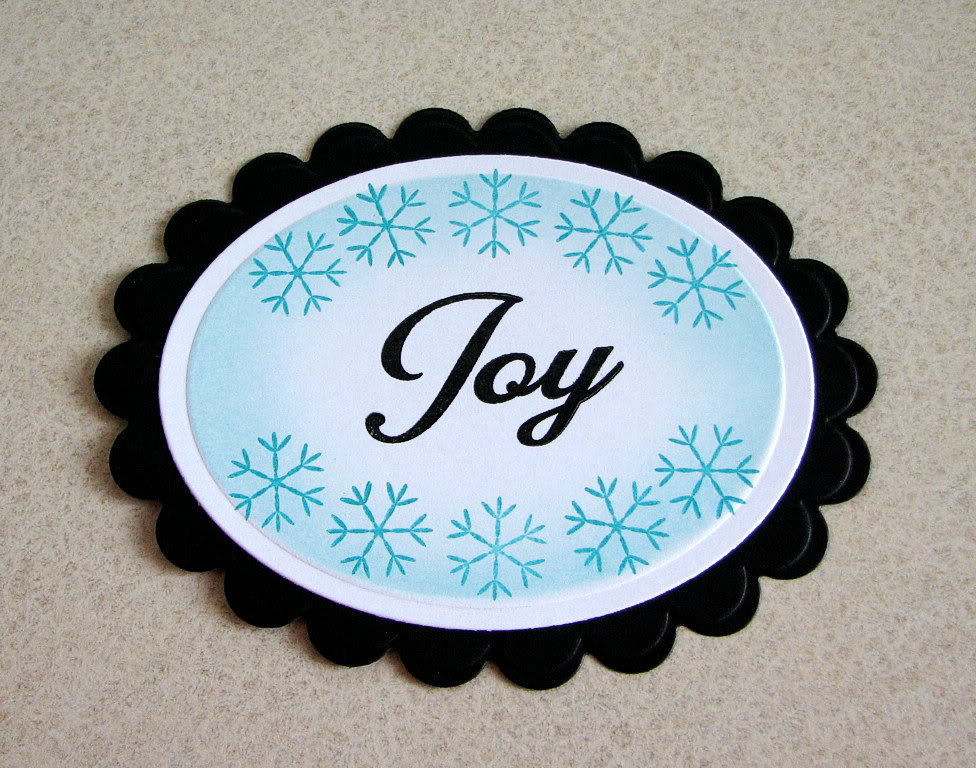
Assemble the oval by adhering the pieces together. Stamp the snowflakes with teal ink (I used Versa Magic Turquoise Gem) and sentiment with Wicked Black ink as shown. You don’t have to stamp in the immediate left and right corners, these parts will be covered.
Die cut and emboss the tag from Fancy Framed Tags One, using the insert so that you’re cutting out the “window” too. Sponge through the die with aqua ink, like you did with the ovals.
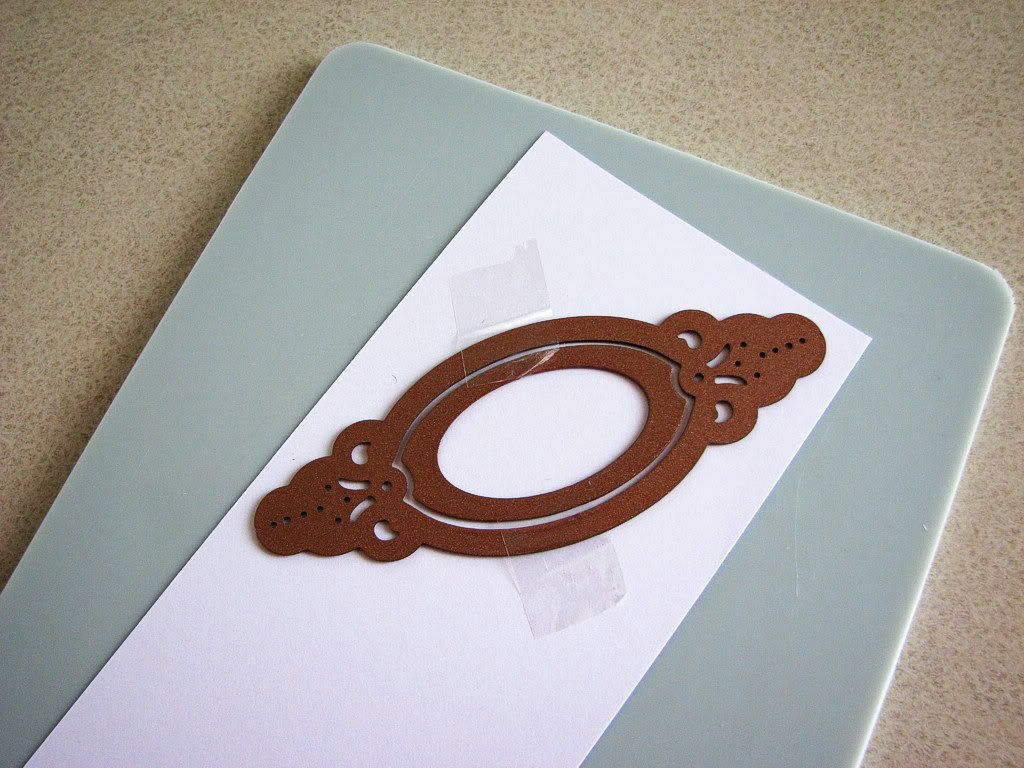
Adhere 3D Foam Squares to the back, and attach the tag to the oval as shown.
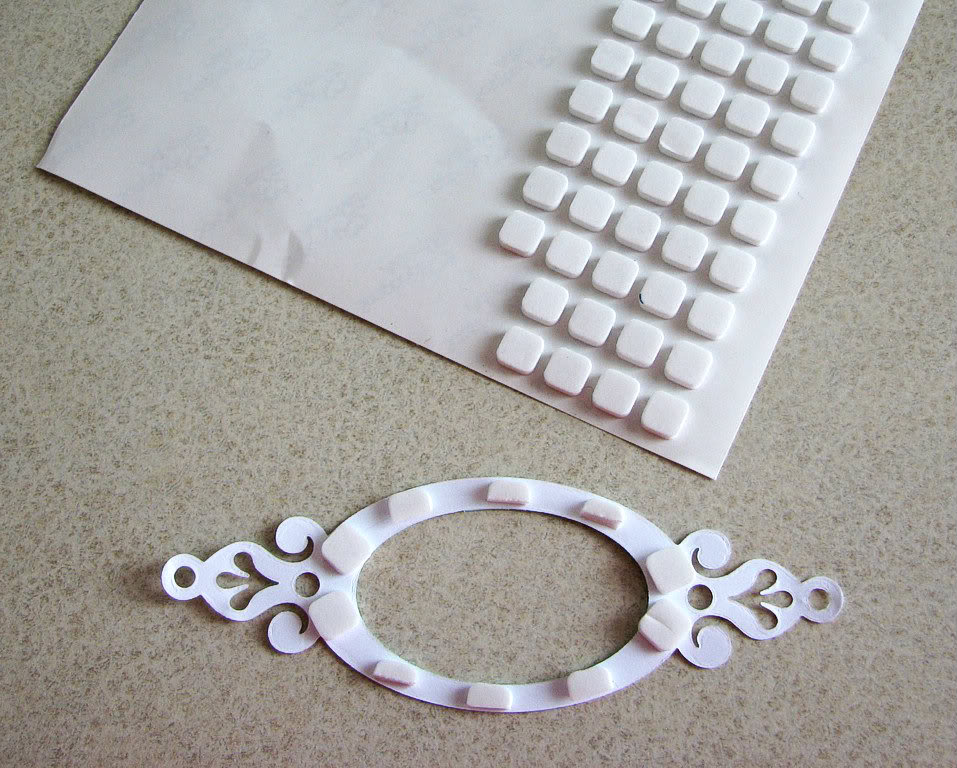
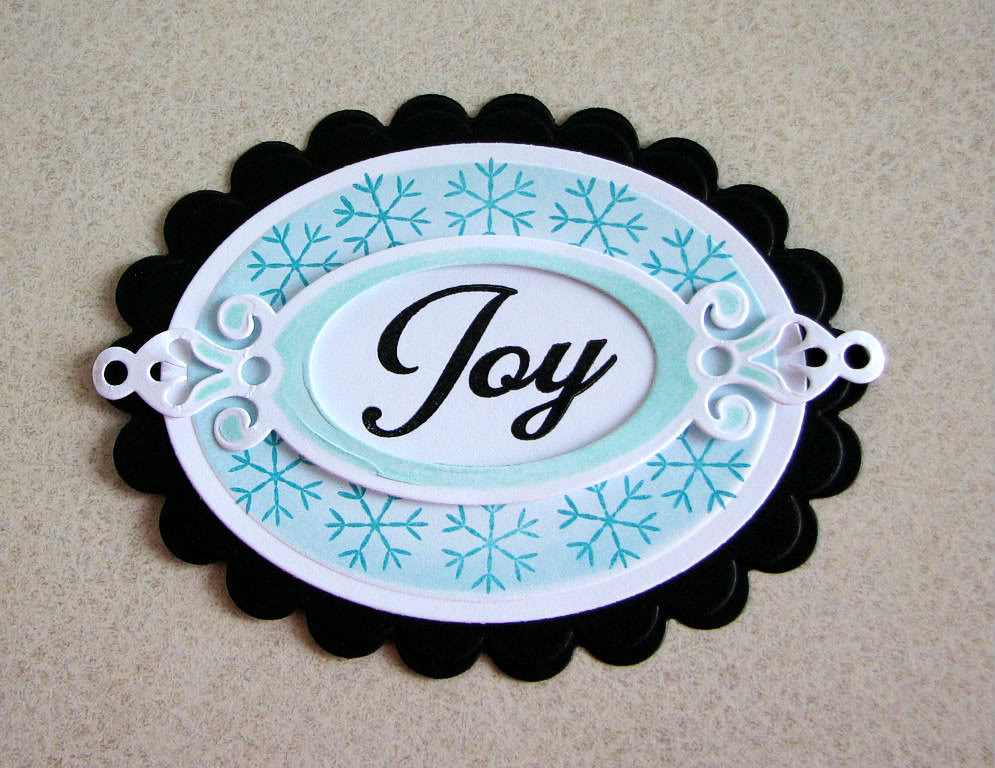
You can now tie the ribbon across the panel, and attach the label over it, using foam tape. Once that’s done, you can adhere your panel to the card base.
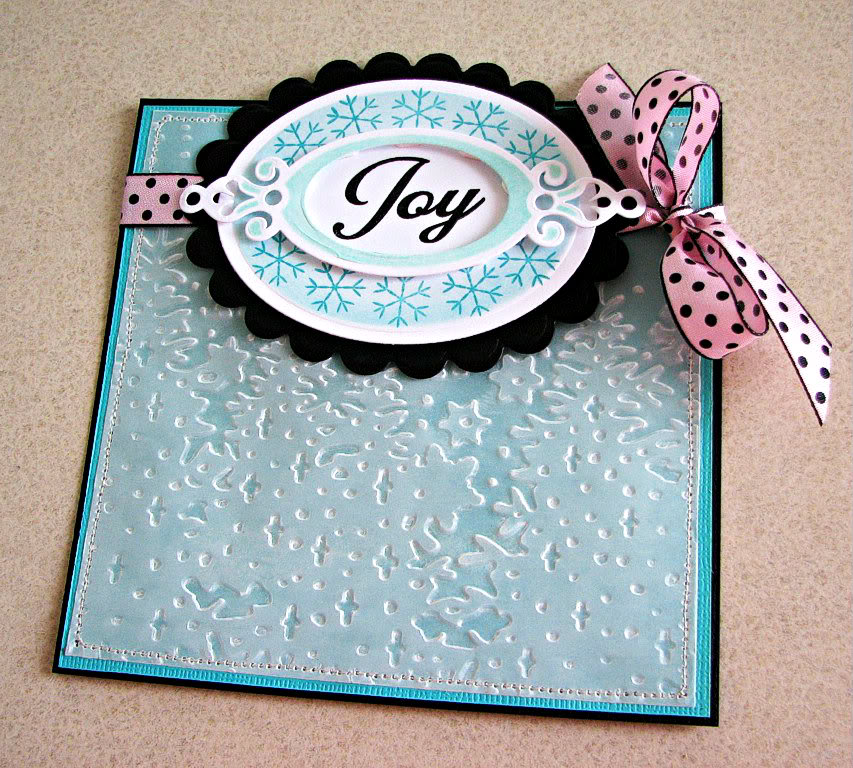
Die cut/emboss/sponge another tag from Fancy Framed Tags One, this time without using the insert. Stamp the sentiment and attach the tag to the bottom of the card.
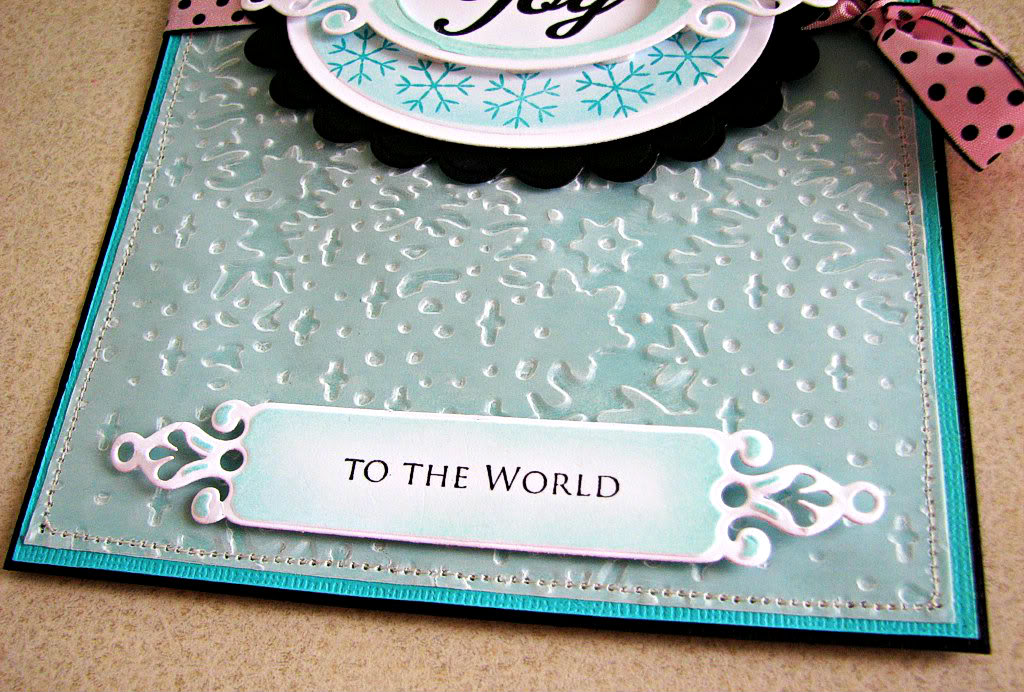
Lastly it’s time for the finishing touches, like adding some Liquid Pearls in Pewter to the label and tag. You can also use pearls or rhinestones.
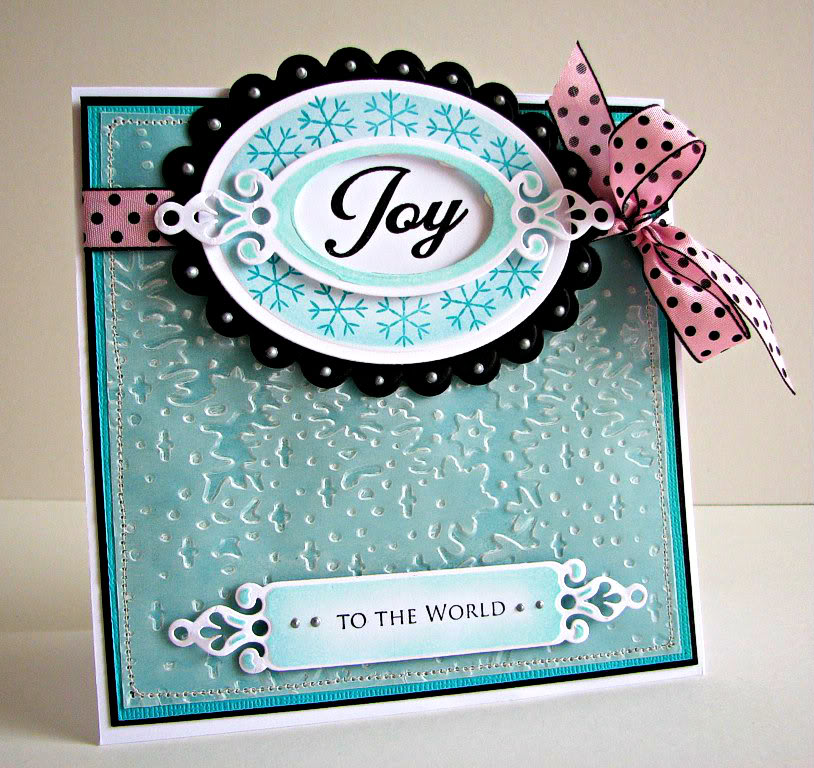
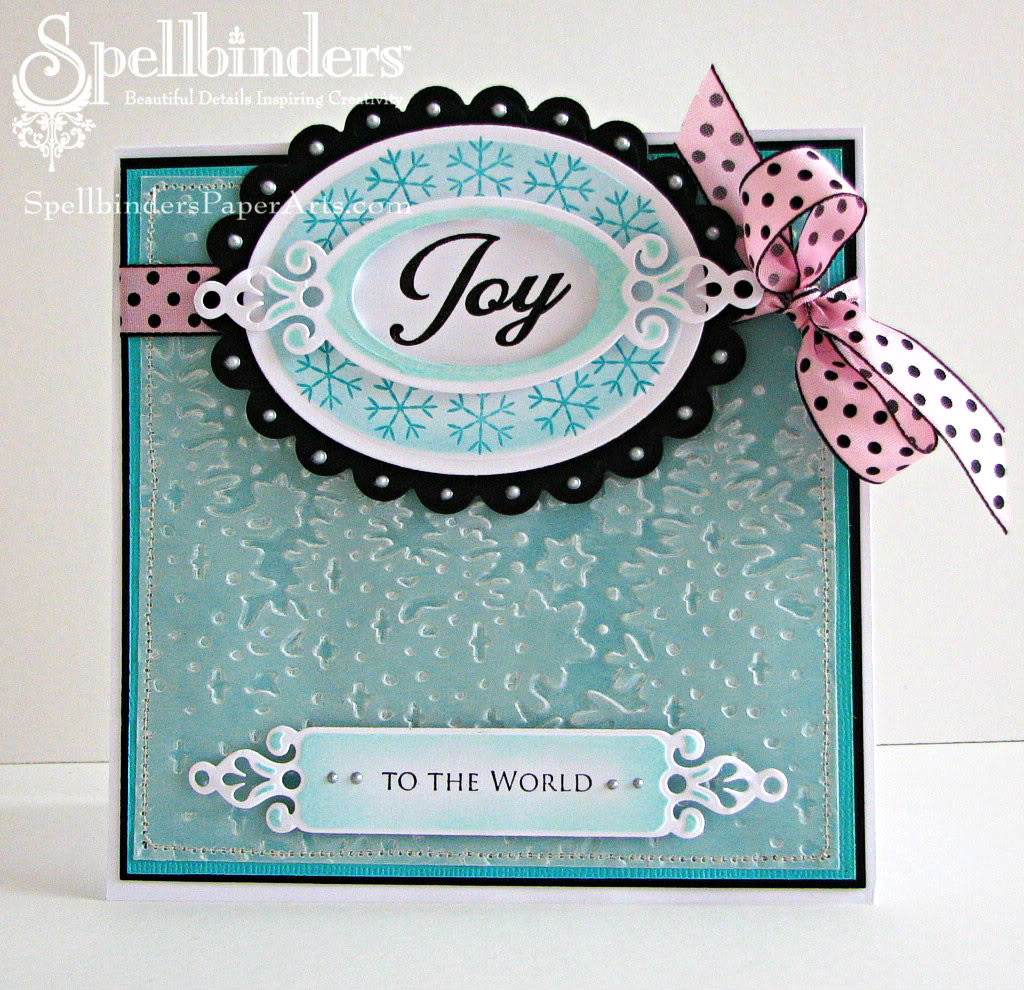
Voila! We got ourselves a nice Christmas card 
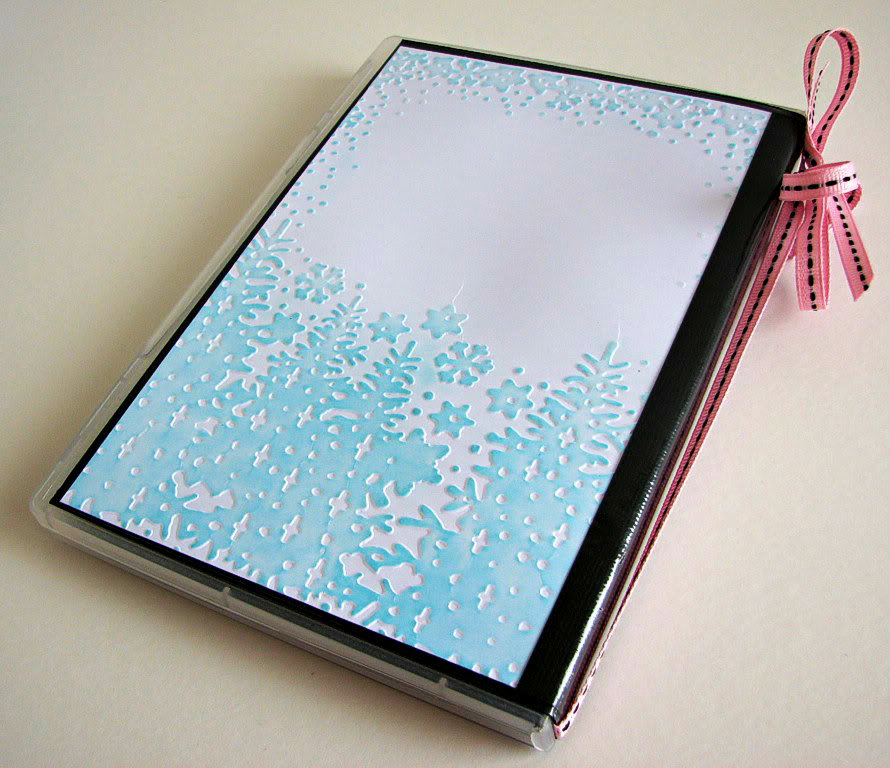
The matching CD holder is meant to hold a recorded Christmas message (perhaps from the kids taking center stage??) that you can then send to the family that lives far away. You can also put a CD with your favourite Christmas carols in.
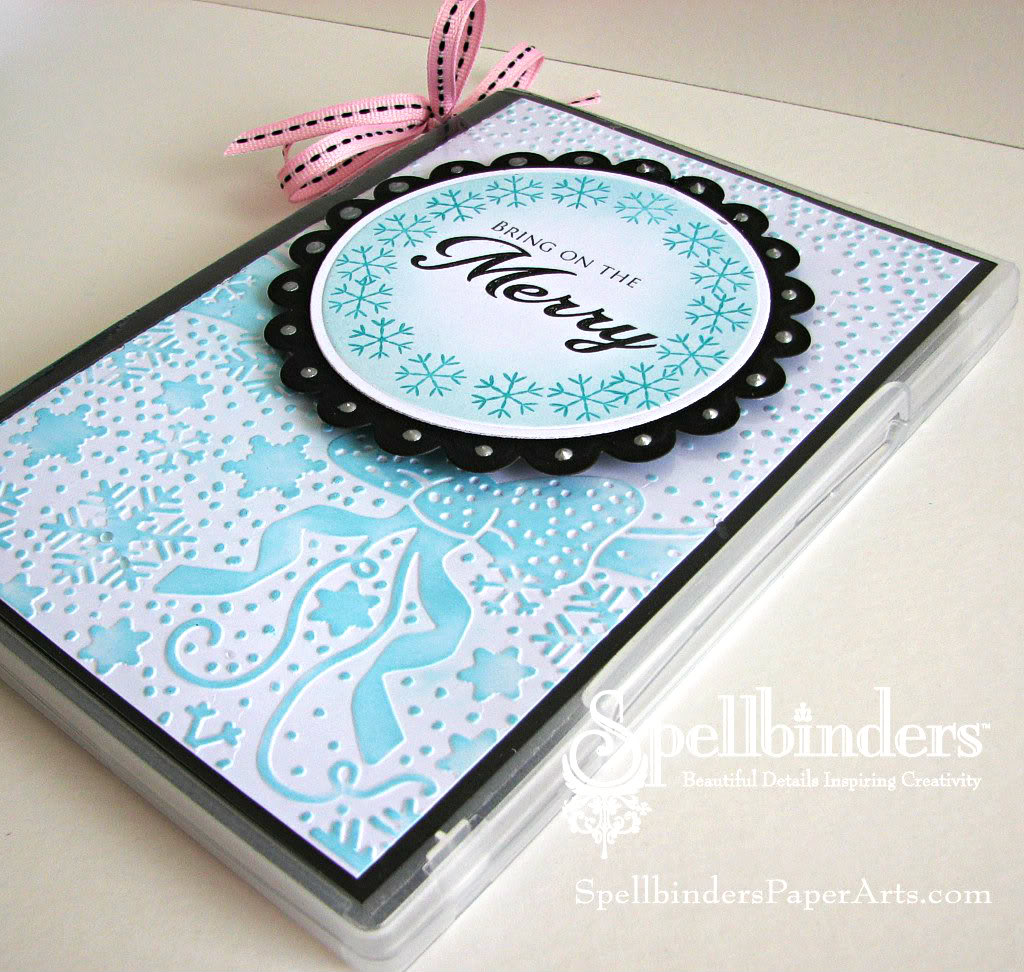
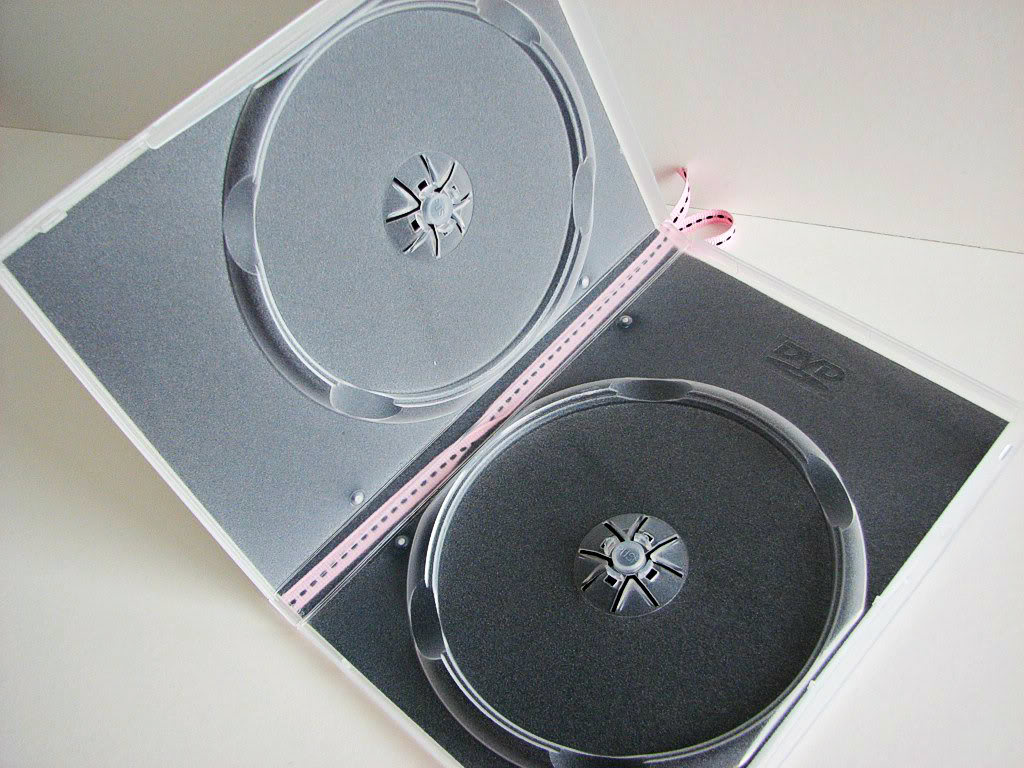
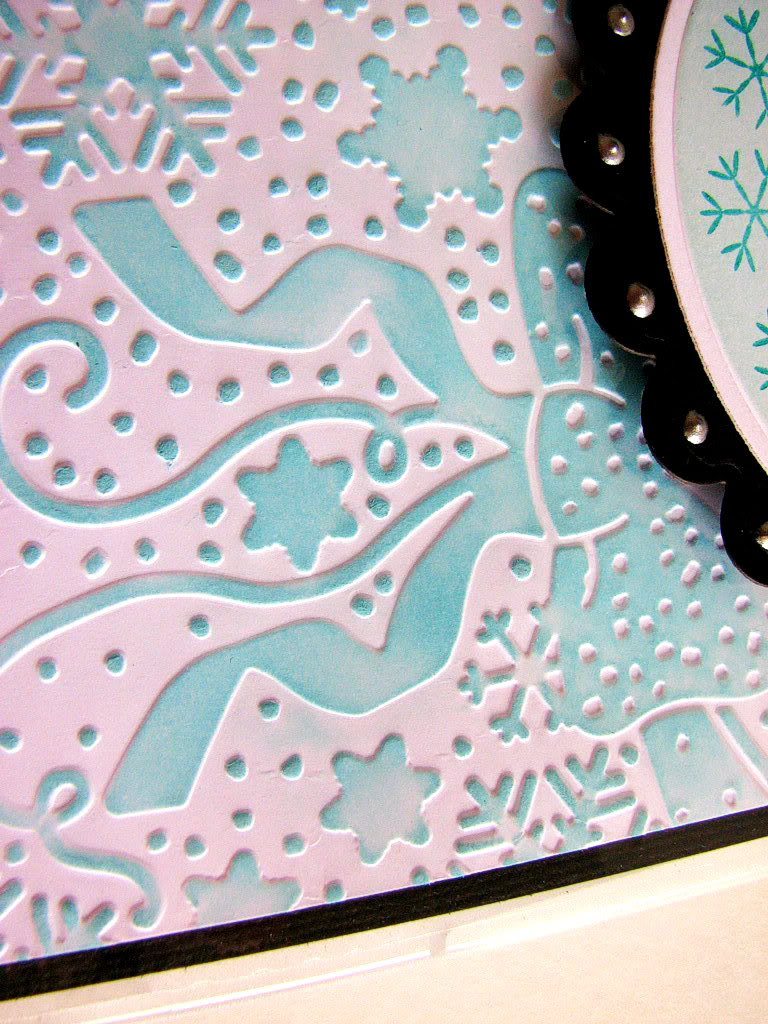
This time I embossed the Winter Wonders M-Bossabilities on white cardstock, and sponged it carefully with aqua ink. The embossing folder happens to be just the right size for the holder, so all I needed to do is take an A2 card, emboss it with the two different patterns, trim slightly and fold in the middle.
The Sneak Peek: Spellbinders™ Summer Spectacular! Begins on June 21st and will end on June 28th, 2012. It consists of 24 individual prizes and one grand prize drawing. Enter the Sneak Peek: Spellbinders™ Summer Spectacular! by visiting the participating blogs each day.
At the end of each blog post, click on the “Enter HERE” to open the entry form. You may only enter once from each blog each day.
Spellbinders™ will randomly draw one winner from each participating blog to receive that blog’s newly revealed dies. The Grand Prize Winner will be randomly drawn from the pool of entrants who sent entry forms from each and every participating blog during the 48 hours each blog was open. For the full list of official rules please click RULES.
**THIS CONTEST IS NOW CLOSED**
**Enter the contest by clicking HERE**
Thank you for joining me today, friends! There’s more goodness to see and more changes to win, on two other blogs today. Please stop by to see what Linda Duke and Julianna Hudgins have in store!!
Questions? [email protected] No entries will be accepted at this email address.


Gorgeous projects, Chupa! Love the vellum embossing!
Wow! Such fabulous creations! Thanks for the detailed instructions :o)
Love the wintery white spin you put on the projects by glamming up vellum! Both enchanting and totally stunning!
Love the layered tag dies and your projects are amazing…love the vellum and embossed snow scene.
What fabulous projects!! Love how you used the vellum to achieve that cool icy look.
Fantabulous!! I love it all and can’t wait to get my hands on these awesome goodies! Your creations are wonderful!
Awesome creativity and wonderful designs! I love all the textures and layers. Can’t wait to try the vellum technique and I want to make a DVD case now too! LOL Thanks so much for inspiring us today [email protected]
Very pretty cards!
Oh wow! These are beautiful! Love the new dies!!
Amazing work, love the card and the tutorial, awesome ribbon
Chupa- your card and matching CD holder are so lovely. I really like these new M-Bossability folders. Your idea of embossing on vellum and then sponging lightly gives it an ethereal glow. Lovely!
Beautiful projects.
Lovely projects using the fabulous new dies and folders.
Love the way you’ve used the
Love the way you’ve used the m-bossabilities folder and the idea with the vellum. Very nice.
So very pretty, love these m-bossabilities!! Thanks for sharing…beautiful cards!
Awesome! Love the metallic ink on the embossing - makes the detail really stand out.
These Mbossabilities are beautiful - and the tags just perfect for messages!! Cxx
Oh My Gosh! these dies and Mbossabilities are absolutely stunning! what fun they would be to play with! your projects are beautiful!
thanks
Judy
Stunning projects, I am really inspired with your creative use of these new dies, Thank you for sharing. georgina.
Stunning projects, I am really inspired with your creative use of these new dies, Thank you for sharing. georgina.
I’m glad I’m not the only one to have started on Chrostmas cards! These are absolutely stunning, but then again I’m not in the least but surprised
This is so pretty. I love the effect of the vellum it’s so soft and pretty.
Thank you for sharing.
Sara Tanner Sar Tann
this is the perfect gift for someone far away- love the new label dies I could have so much fun with them
How lucky are you? To get to play with these fabulous products before any of us. Love how you have ;used them - the vellum is so inspired.
Wonderful projects!!!
Paper Hugs,
Jan
Your projct is absolutely gorgeous, and I love how you made this, and what a stunning color used here too, just one of my favorites too. Thanks a lot for some wonderfukll inspiration here, it´s really beautiful work.
Beautiful card and technique !!
Very nice projects. When I first looked at the card I did not know it was vellum, I would have never thought to do this technique. Thank you for the idea
Both the card and CD holder are lovely. Love the colors, too!
gorgeous creation, love how you did the vellum overlay. Very pretty.
Anne x
Le fond sur velum est une super idée et la carte est trop belle. Bravo.
So Beautiful!!! Love that snowflake folder with your design!
Lovely embossed Christmas cards, thanks for sharing them with us today
Wow love these new embossibities and the projects you have done also the new label dies.
Hugs Sheila xx
Absolutely gorgeous.
Two beautiful projects! Perfect detail - amazing how much it added to the first card when you used the Liquid Pearls. Love the new dies and embossing folders. Thanks for the inspiration!
WOW! Fabulous post! Gorgeous projects! Loving the new dies and embossing folders!
Love the new winter embossing folders and labels dies!
absolutely beautiful cards! love these embossing folders and dies.
luanne
Very lovely card. This will be a popular die!
Beautiful! These are on the top of my wish list!
Karen M.
These projects are so beautiful, and I love the new dies and embossing folders.
Thank you so much for the inspiration, I will make some christmascards in the same style.
Beautiful cards!! I love these new products!!
Your cards are so pretty!
I am so loving these new M-Bossability folders, and the new tag frame dies! Your cards showed off the beauty in your cards!
Wow! Love what you did with the new M-Bossability
folders. Nice combination using mixed Spellbinders’ products.
Wow! Love what you did with the new M-Bossability
folders. Nice combination using mixed Spellbinders’ products.
Just love all yor projects. Thanks for sharing.
I’ve not used any of the M-bossibility folders, but I think they’re going on my wish list! Your projects are super!
I am a huge fan of the M-bossibility folders…they are so fun to use. But on vellum? You just opened up a whole new world to me! Thank you! Absolutely stunning cards…love the pink/turquoise combo for the holidays!
Beautiful!!
I love the new fancy tags! i haven’t used the m-bossibility folders yet…they are on my list of new items to try!!
I’m bookmarking this post for future reference! What a fantastic idea to create a DC that matches a card! This would be such a treasured gift for giving to grandparents who live far away!! Everything is beautifully detailed and so pretty!
I just love the designs of the new holiday M-bosibilities. They look so fabulous on vellum!
gorgeous, i can’t wait for this floder to come out. i love winter scenes. as long as i don’t have to live there anymore. your projects are so cute. tfs
Oh my goodness, these cards are stunning! I love the new fancy tags, and also the M-Bossibility folders. And I love what you’ve done with them.
Thanks so much for sharing.
Iwona,
Lovely job, love the use of vellum, and your tag looks so very pretty!! Love it, and thanks for sharing with us.
hugs
Donna
Love your card. The new embossing folders are beautiful. Thanks for sharing,Johanne L.
Beautiful projects - I like the CD case idea for Christmas. Thanks!
What a creat ID in using the CD.
Awesome cards, loving these tages and embossing.
This is really a beautiful way to use these folders! You always do such an amazing job
Love the color! That black really pops with the blue! TFS.
Lovely projects Iwona - great use of the new dies and beautiful M-Bossabilities. Thanks for all the detailed instructions.
Heather (UK)
a lovely project. and what and idea. thanks for sharing…..hugs and smiles
a lovely project. and what and idea. thanks for sharing…..hugs and smiles
Gorgeous dies and embossing folders and you have used them to great effect!
Gorgeous projects thanks for sharing
Linda
Thanks for sharing your wonderful work with these new embossing folders and dies. Oh, man! the holiday greetings are gonna be *awesome* this year…
What beautiful projects! I love all the new dies and the new mbossibilities folder. They’re spectacular.
Stunning project!
Stunning project Iwona! Love the great gift idea. Gorgeous details!
Iwona: Absolutely georgous CD covers. So out of the box and beautiful
How beautiful- love the Vellum over the blue CS- and love the tag too! How fun is this new release!
Gorgeous! Such pretty textures Chupa.
Love how you used the vellum with this die…beautiful cards and tags!
Gorgeous cards! Love the vellum and the wintery colour palette.
Adore the vellum embossing! Very cute new folder.
What BEAUTIFUL cards!! I am really loving these folders and the tags are perfect!
very pretty embossing and I just love those tags!
Love your cards and your tutorial has made it impossible not to want all the supplies you used. This is so inspiring and such fun. Thank you all.
Beautiful layers and texture on your projects!
My favorite color of blue and a stunning card!
Very pretty!! Love the CD case idea!!
Kristan
This is so beautiful!! Thanks so much for the incredible inspiration
Lisa
A Mermaid’s Crafts
Beautiful cards! Love the new folders!
Beautifully gorgeous projects!
I love your card and CD-case! The layout, design, the new dies!, the colours (LOVE that hint of pink) - they all come together in a fabulous project!
Gorgeous!!! Love the vellum treatment!!!
Those dies are just amazing as so are your projects. Thank you for sharing.
WOW all beautiful!! Love the dies and the embossing!! Just beautiful!
Hugs, Cathy-Lynn
Love the dies and embossing. Christmas always a must have.
Fantastic idea & great techniques x
hugs sally x
sallysbitz.blogspot.co.uk
Such a sweet, sweet card with that adorable pink polka dot ribbon! Just love that. My granddaughter would be delighted to receive a card like this. Very cool.
Beautiful cards. I love these new dies. Love the vellum. It looks like frosted glass.
Margie F.
I’m ready to start my Christmas in July cards!
Gorgeous! So Elegant!
What a gorgeous project! Love those new embossing folders…Wow!
These are beautiful.
Thanks for sharing!
Gorgeous!
What a great project- I love it!
I love it! This is some of my favorite colors!
Love the beauty and simplicity of your designs. Gorgeous cards to look at on a summer day!
very pretty. love all the new dies and embossing folders. Lots of choices.
Fantastic designs. Thank you for sharing your talents and artwork.
I am such a sucker for vellum! Beautiful work!
WOW, this is absolutely awesome. The design is so beautiful. I just love the new dies and folders. Thanks for much for you wonderful inspiration. Blessings, Linda
Beautiful work
Gorgeous work Chupa! Love it all!
Great projects using great products! I already have thw Waltzingmouse stamps, but really need to get those embossing folders and fancy tags, then I’m good to go!
Lynn Wild
what great dies. love the fancy framed tags - just what i’ve been after!!!
sorry if i entered twice - my internet was playing up and wasn’t sure if it worked!!
kathleen mc x
Beautiful projects! I like both the Winter Wonders M-Bossabilities, and the Fancy Framed Tags dies. They’d be a great addition to my card making supplies.
Great idea for a cd case I love your work and can’t wait until all the new SB are released. TFS
Wow!!! Incredible cards!!!!
LOVE these projects…the die and how you used it are amazing.
So amazed by the cards and projects these dies can do. Your card and case are so awesome!
I absolutely love these designs. Would never have thought of using these colours for Christmas, let alone pink polka dot ribbon, but I think it looks fantastic! Thanks for the inspiration to step outside my comfort zone for this years Christmas cards!
really loving these embossing designs..beautiful work.
What a beautiful gift set. I love the vellum embossing and feel inspired to get my vellum out and play now. Gorgeous!
:O)
Jessica S
Wow! Great projects you’ve made using great procusts! Love the ebossing folders especially! And thanks so much for the great tutorial!
Sandie
Beautiful!
Love your Christmas cards! And your color choice is just perfect for them. I’m definitely taking notes on these cards. Thanks so much.
Gorgeous work!
Just gorgeous! I love the embossing!
I just love both card you made and the embossing and I like how you use the tags on them. Thank you for sharing your creation with us.
Have a great day
Delama
fabulous creations Chupa!
Really beautiful cards, thank you for sharing them.
Oh I love this idea….what a great gift….but I love…love….these dies….this whole set is what I need…tfs