Apr 28

Here and there… and Altenew winner announced!

Hello friends, I’ve been busy behind the scenes hence the temporary silence on the blog, but I’m happy to announce that there’s plenty of me elsewhere today! But before I tell you all about it, let’s meet the winner of the Altenew stamp sets from THIS POST!

 photo winner_zps457ce035.jpg

Kiesa Salazar, congrats!! I’ll be in touch with you shortly.

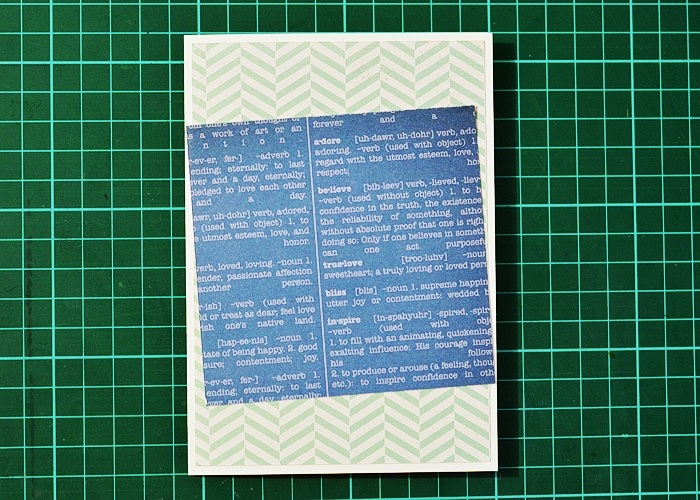
First up, today I launch as a Designer on the WPlus9 blog and Dawn is sharing a couple of my projects - below is a sneak peek (plus one more in the header above!).

See them all HERE!

There’s plenty more coming in the next four days so stay tuned!

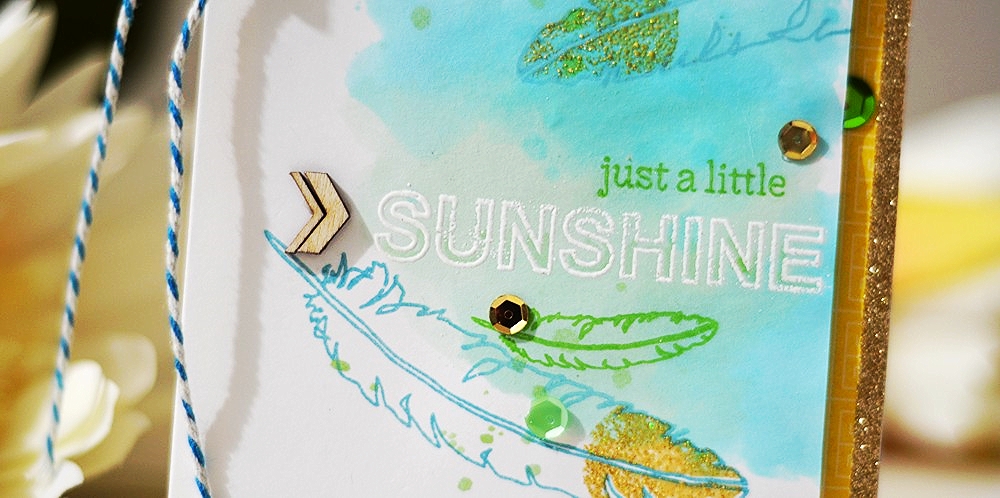
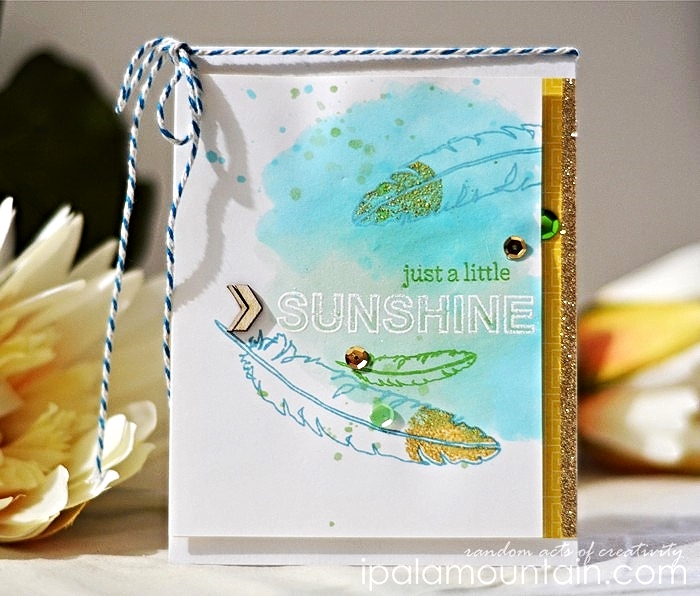
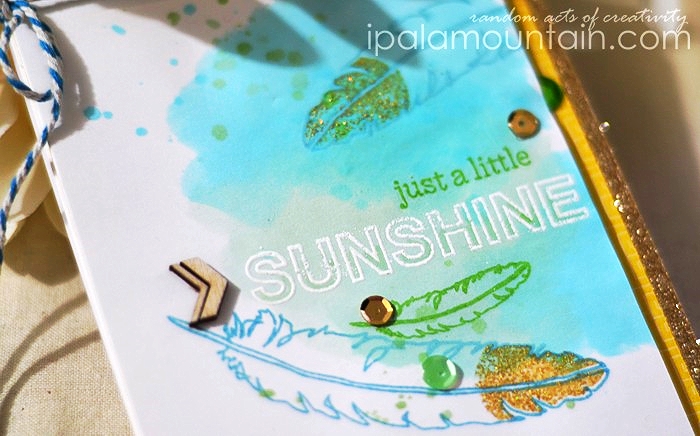
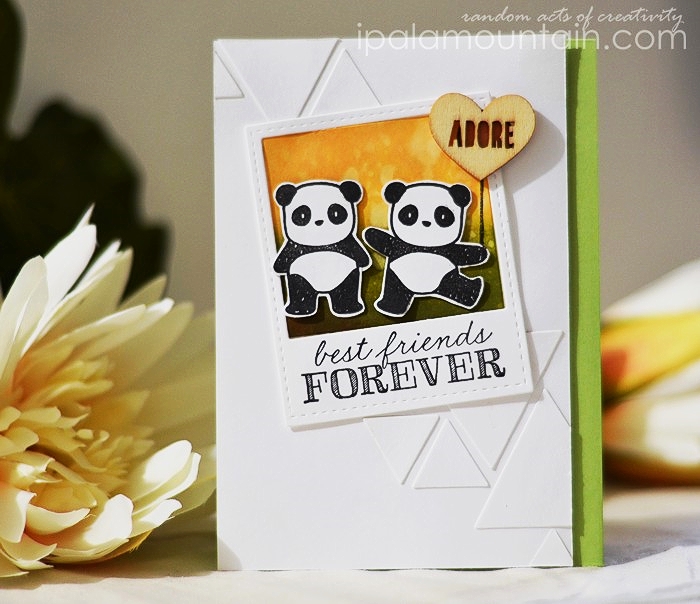
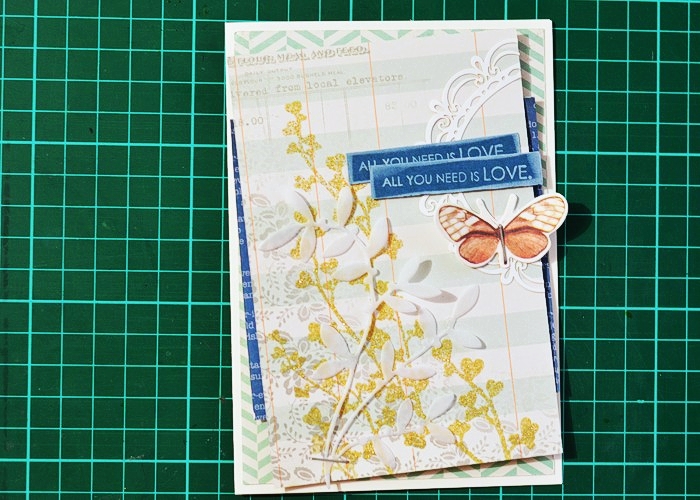
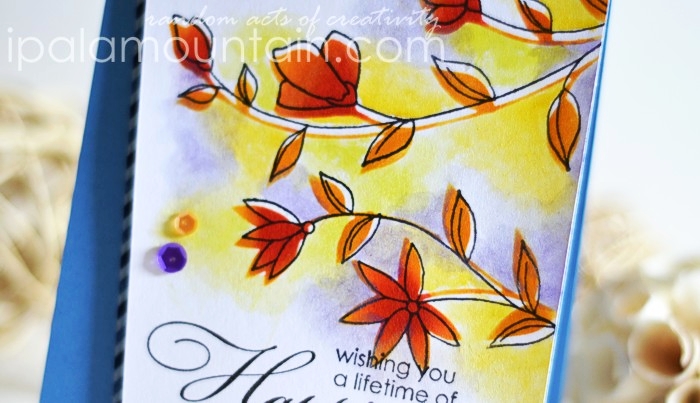
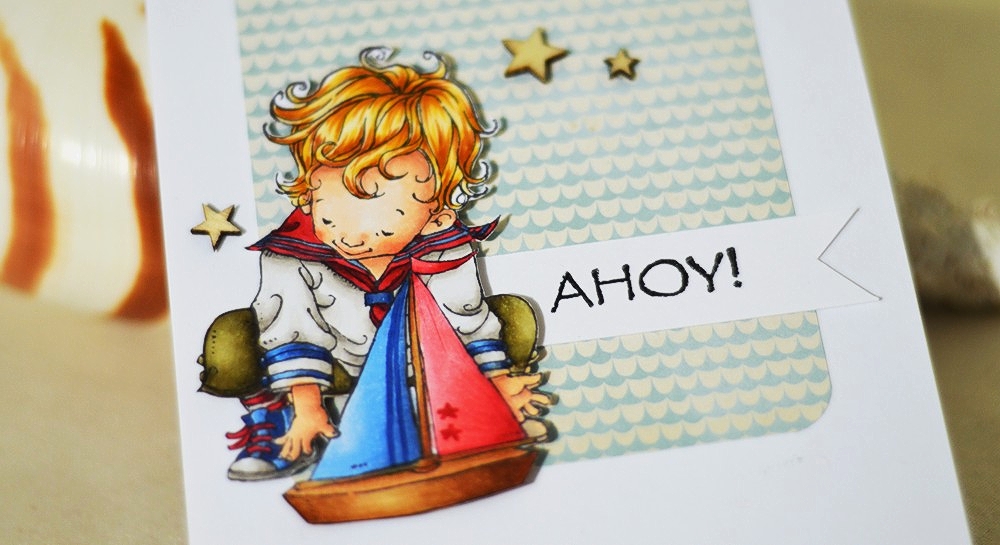
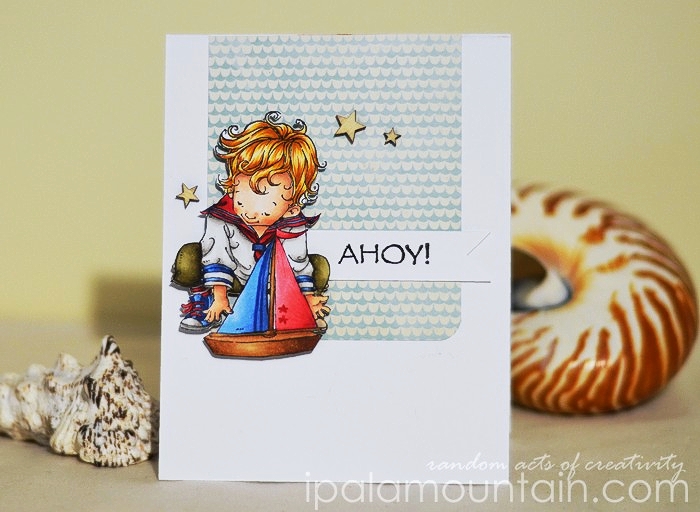
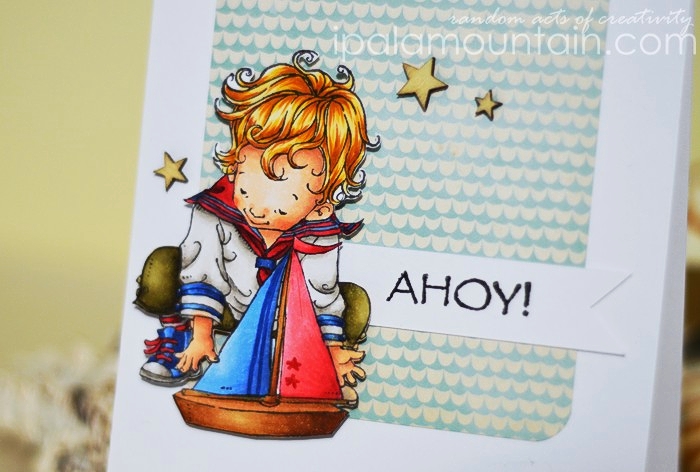
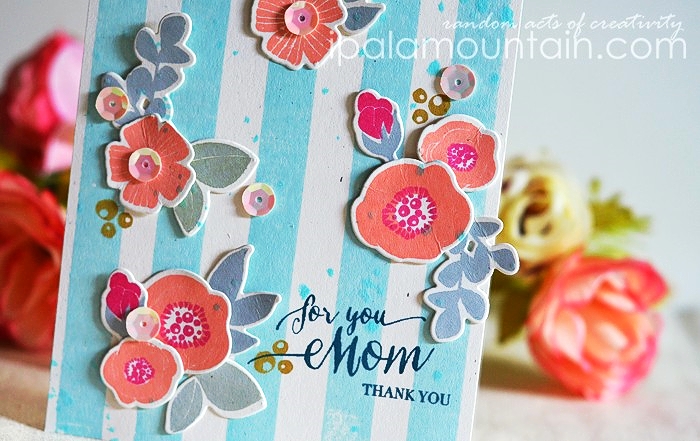
It’s a busy time on StampNation as well, starting from the bonus challenge which launches later today (um, tomorrow for most of you) and is sponsored by none else but Hero Arts! HA is giving away TWO StampNation memberships and a few SN members who take the challenge, will leave with HA goodie bags! Fun 🙂 You can read upon the details of how you can win, on Catherine’s blog. Here’s a peek of my card…

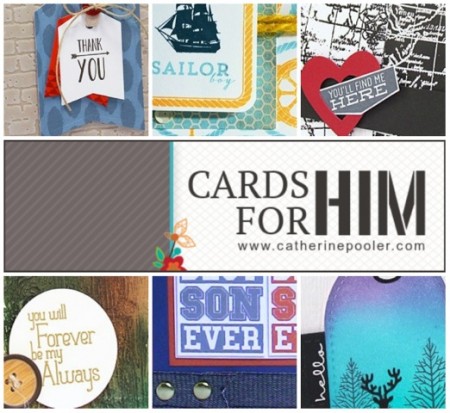
Remember how I hinted on a new class from Catherine, Mo and myself, starting soon??
The class is called Cards For Him and is about creating for the MEN in your life, tomorrow is the day it launches and we’re celebrating with a super fun blog hop! StampNation members will get 50% off the class, if they register before May 30th!
Stay tuned for the details on the class, coming on Wednesday 🙂

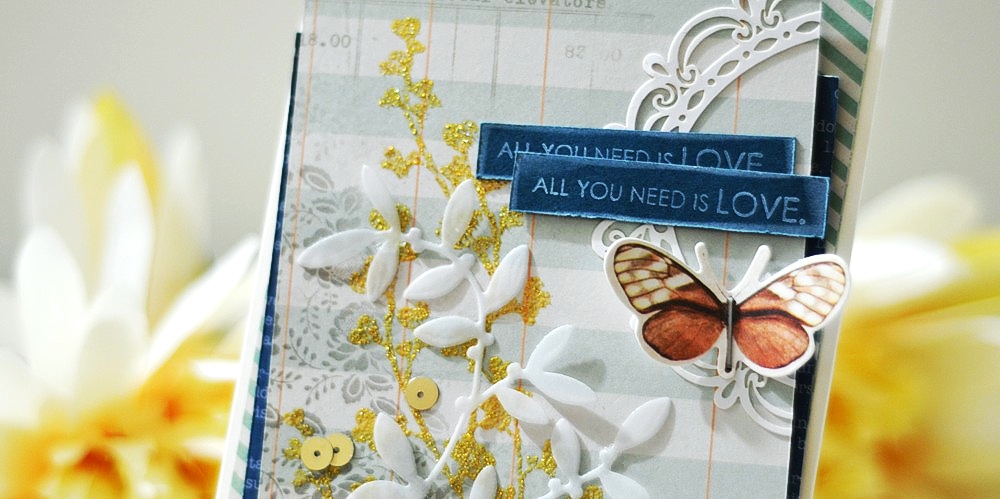
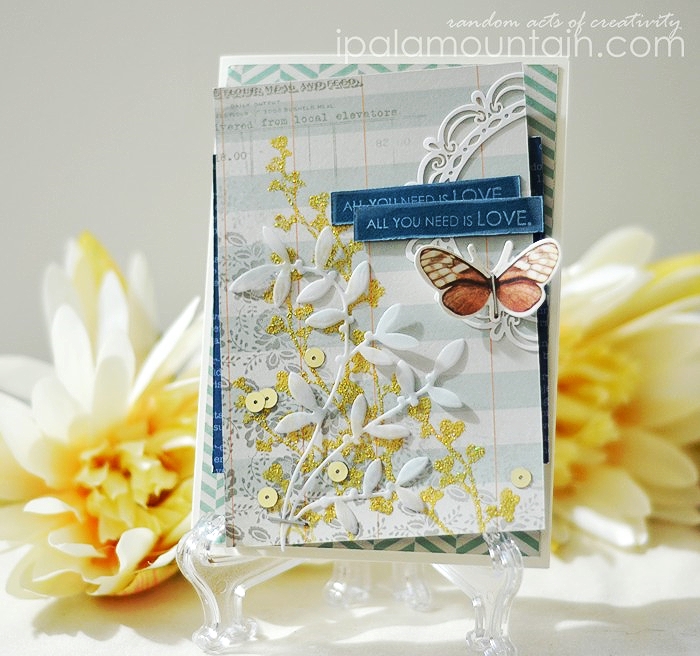
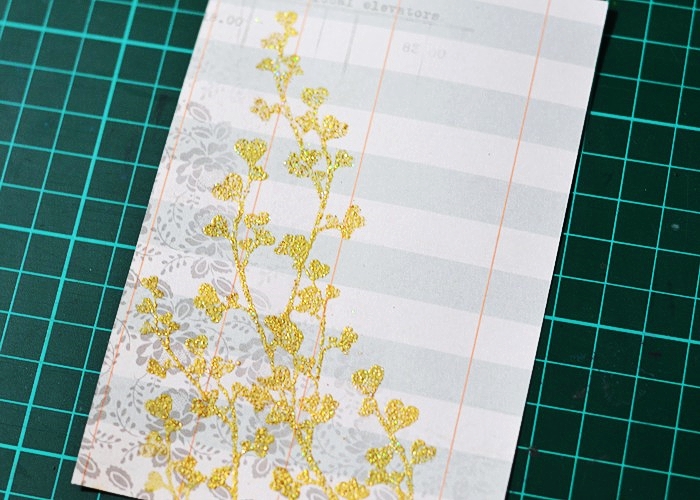
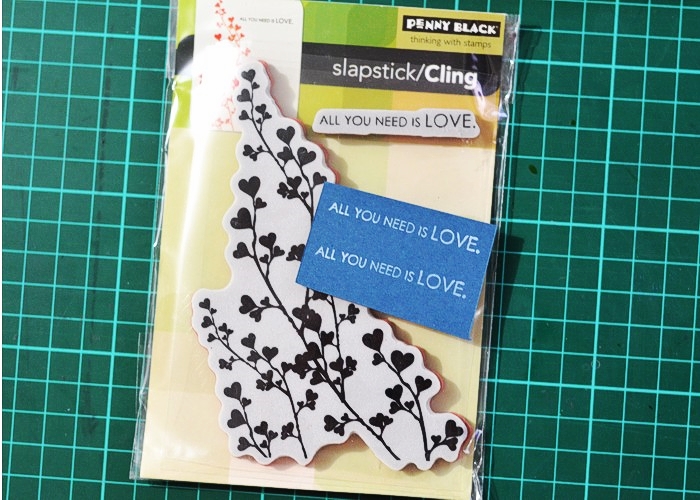
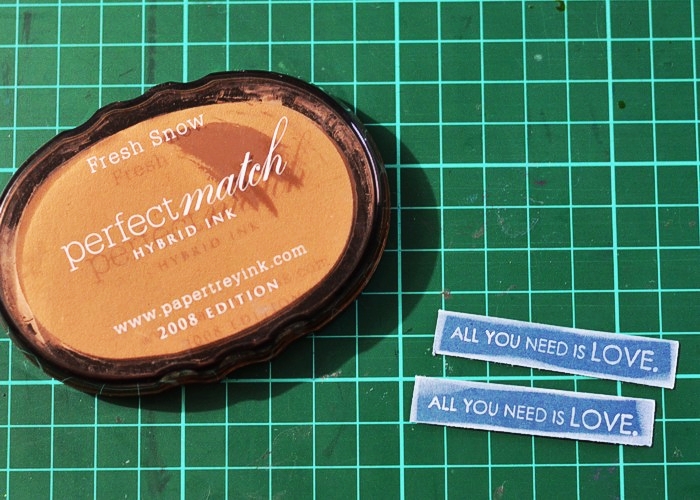
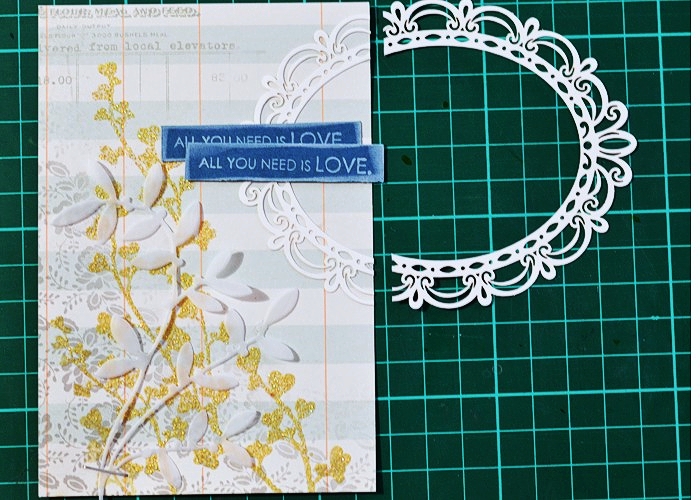
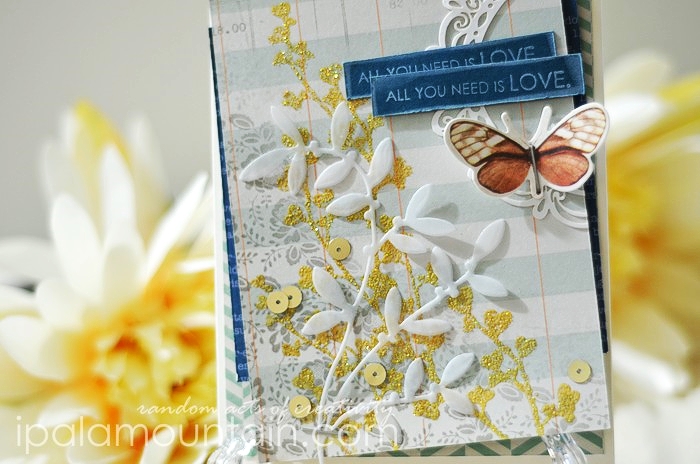
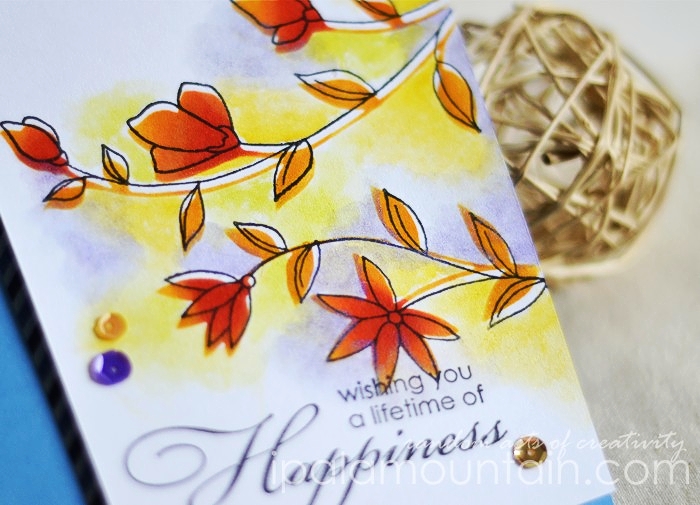
And lastly, my new Technically Speaking tutorial and video is up on StampNation! I’m showing you how to make this pretty little thing…

Not a member yet? Click here and check StampNation out!

StampNation is just over 3 years old. The moment you join, you have full access to all the content that has ever been added to the site. Let’s break it down:

  • over 400 exclusive videos – you won’t find these anywhere else
  • 25+ lessons on Clean and Simple Design
  • over 100 challenges that never close
  • more than 17,000 samples in the gallery
  • SN is INclusive – all companies accepted and celebrated!
  • and more….
Apr 15

Mama Elephant love

Hi there! It’s been a few days since I shared anything, but I’m back with… wait, three cards?! I’ve been wanting to join in Mama Elephant April challenge, but alas, I was partly held back with other stuff and partly waiting on an SSS order with some coveted ME stamps (still waiting! they’re on reserve… grrr)

Then I decided that I make something instead, with my older but firm favourites - Fair Feathers and So Breezy.

I created the watercoloured background first, using Tattered Angels Glimmer Mists and then stamped the feathers and part of the sentiment, using ME inks in Mojito and Ocean. The ‘sunshine’ word was white embossed and I added a hint of green to the bottoms of the letters using a fine brush and more of the green Glimmer Mist. See how I combined the two stamp sets to create the sentiment? FUN. The last part was to gold emboss the tips of the feathers, and finish the card with some patterned paper, a strip of glitter tape, baker’s twine and some sequins / wood veneer.

I wasn’t hugely satisfied with that card which kept bugging me, so I modified one of the cards I made a few weeks back at the retreat, to roughly meet the inspiration photo. I used the super-adorable Pandamonium set (and Honey Bunny for the sentiment - adore those fonts!!), ones that I don’t own but was thrilled to ink up 🙂

I created the background with Distress Inks and added Triangles Die-Namics to the background and I’m sorry but I forgot to note down the manufacturer of the insta-frame… anyone? One of the buddies was originally holding a balloon but I replaced it with a wood veneer (Freckled Fawn Hearts).

Also, for the sake of posting all ME tonight, I’m sharing one more card from the retreat, this time I gave more love to Honey Bunny. This set IS coming my way so I’m trying to persevere 🙂 I also used the Falling Hearts stencil from Simon Says Stamp, with a Memento Luxe ink. Totally blaming Joy for enticing my addiction to anything SSS. Happy sigh!

I paper pieced the bunnehs and made them sit on the “lawn” cut with ME Landscape Trio die set.

A Little Sunshine card


Best Friends card


Some Bunny card


In other news:

After a long-ish hiatus, I’m happy to be back with the video tutorials for StampNation! My Technically Speaking forum has just grew to accommodate this lovely marbled feathers card and a technique explained to boot 🙂

Not a member yet? Don’t wait another day to join us…$9 a month (cancel at any time if you find it’s not for you) gets you access to more than 400 exclusive video tutorials all in one place.
SING UP TODAY AND NEVER MISS A THING!

Apr 12

Anatomy of layers - all you need…

Hello! How’s your weekend so far? I’m hoping to make it a little bit more interesting, with a new tutorial on my freestyle collage style. Here’s the card I’m sharing, followed by the step-by-step instructions - hope you’ll enjoy it!

I started by covering a cream card base with the chevron design, found on My Mind’s Eye Kate & Co. Cambridge Court Medallion Paper (anyone else wonders why MME gives their papers so many names??). I also cut a panel, slightly smaller, from Pink Paislee Portfolio Incredible paper. I’m talking 12″ x 12″ papers here… I’m a shameless hoarder of those 🙂

I embossed the foliage from Penny Black All You Need slapstick stamp set, with Stampendous Jeweled Gold embossing powder. I aimed for a super sparkly and textured effect, hence the choice of powder.

I stamped the sentiment in white ink, twice on a scrap piece of navy blue cardstock (SU! Not Quite Navy).

Cut them both out by hand and inked the edges in white.

I set them aside and went back to the panel. I cut Penny Black Dancing Leaves in vellum, and adhered to the panel and over the embossed foliage, adding a cute staple detail.

Then I created a cluster in the upper right corner, with a part of a Manor House Creations Cheval die cut frame and the two sentiment strips stacked together so that they overlap slightly.

…and added a must-have butterfly 🙂 This one came from Kaisercraft Curiosity Collectables and I stapled it in as well.

At this stage I decided that I want to have a matching, dark accent peeking out from behind the panel and so I adhered a piece of Kaisercraft Porcelain Rose Relic paper to the card base.

Nearly there. I popped the panel up on dimensional tape, on the card front…

…and finished with a couple of gold flat sequins scattered across the image.

TA-DA!


Mar 24

Penny Black “How-To” Video Blog Hop

Welcome to the Penny Black How-To Video Blog Hop!

Have you come here from Dina’s blog? Wonderful! Otherwise I hope you’ll join us at the beginning - the Penny Black blog.

Today some creative minds got together to promote the new large-scale stamps and coordinating stencils, which came in their new Spring 2014 release. You will find a video at each stop, as well as a Giveaway!

One lucky winner will receive the full collection of new Penny Black Large-Scale Stamps and Coordinating Stencils. That’s FIVE stamps and FOUR stencils!

To enter, leave a comment on each stop along the hop, including the Penny Black blog. Besides the hop today, Penny Black will be featuring additional “How-To’s” all week long, so be sure to pop by and leave a comment on their blog each day. For an extra entry, “like” the Penny Black Facebook page (the “like” button at the very top) and post a comment.

NOTE: This giveaway closes on Saturday, March 29 at 11:59 PM Pacific Standard Time.

On my card I used the 40-322 Delightful and 40-319 Softly stamps, with the coordinating stencils - 25-003 Verdant and 25-001 Promenade. I finished the card with the Happiness sentiment woodblock stamp. I filled the stencils with Distress Inks and watercoloured the background using LuminArte Twinkling H2O’s. See the video and the product list below for the details.

I’m entering this card in the Styling with Stencils Challenge in the Moxie Fab World.

The next stop in the hop is the one and only Joy from Simple By Design blog. Enjoy and good luck!!


Mar 18

Let’s Copic! Ahoy sailor boy!

Woo-hoo! You have no idea how much I’d love my various blog features to grace these pages more often, but it is what it is and when it does happen, I’m a HAPPY chicken! Today I bring you another colouring tutorial. I had so much fun with this little guy from the Penny Black Ahoy stamp set, I’ve been dying to colour him but alas it had to wait. There’s a couple more images in this set and I swear I won’t rest until they’re all coloured (well, at least the boys!). LOL

The layout is based on Retro Sketches #106:

I hope you’ll enjoy 🙂

I actually had an accident along the way, with a marker leaking ink and leaving a nasty pool on the paper right on the coloured image - these sadly happen often but I’m determined to salvage the work when I can, and so I did now. I’m keeping it real, LOL!
To save you the details, I suck at refilling markers because all those I attempted to refill in the past, do leak. Badly. I’m not sure what the problem is but I assume it may lie in over-stuffing them with ink. Any ideas, please share!

This slideshow requires JavaScript.


Feb 23

Basics & Beyond is almost here!

The Basics & Beyond button in my sidebar went up a couple weeks ago and now I’m excited to finally say that this new Online Class is just about to begin! After the smashing success of our first Online Class, “A Very Trendy Holiday”, this Autumn, we couldn’t WAIT to bring you the next one. Maureen, Catherine and I have put together a class that will take you from the:

BASICS- from the basic supplies you need to cutting cardstock and basic card design. Great for new stampers, or for stampers that want tried and true card designs that will work for all occasions and for mass producing.

to BEYOND- we show you how to take these basic ideas and tweak them, add to them, and make them shine!

What is included in this class:

  • 8 exclusive video tutorials
  • 28 card ideas, some with step-by-step photo tutorials
  • 10 sketches
BONUS! for those that sign up in the first week. Be ready – registration opens on February 26th!

StampNation Members - your class fee will be half off, look for the coupon code that will be posted on SN that day. CLICK HERE to sign up and gain access to 100’s of exclusive tutorials and MORE!

Can’t wait to see you inside the Classroom 🙂

Related Posts Plugin for WordPress, Blogger...