Nov 13

Pretty peonies

I haven’t checked in for another long week and while there’s been plenty of valid reasons, I’ve been itching to stamp. This time just as much a creative therapy as a source of relaxation, because a recent death in the family shook my world quite hard. Yet again crafting proved a soothing distraction.

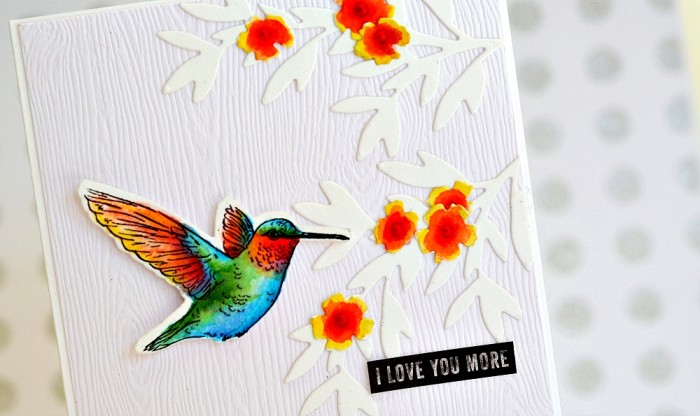
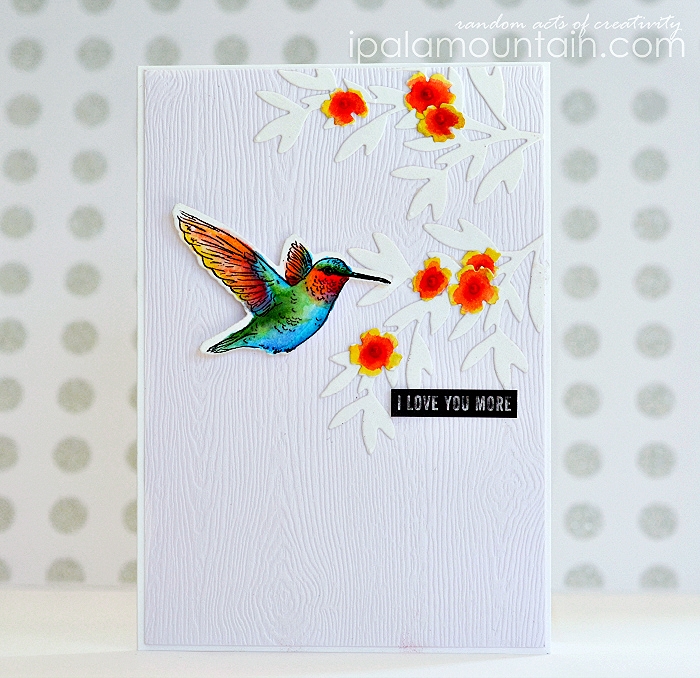
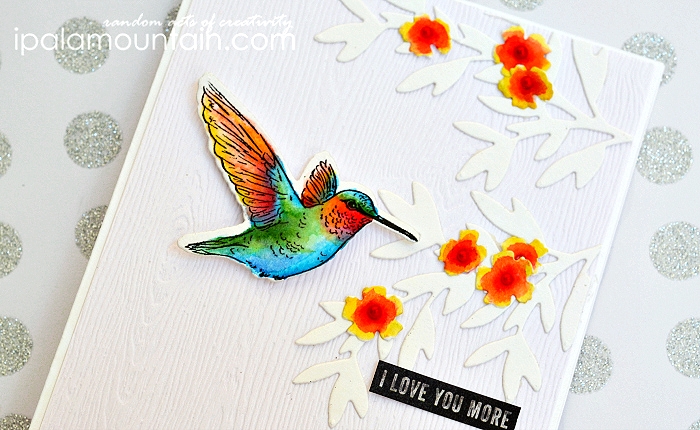
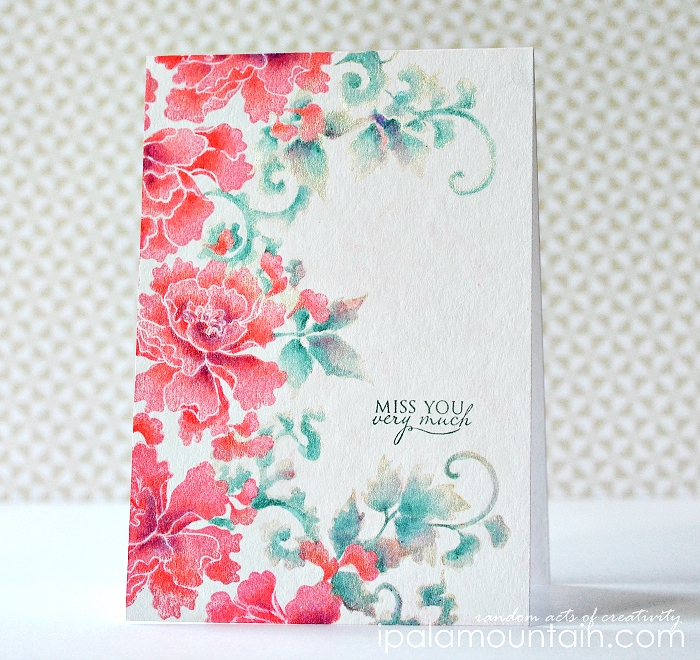
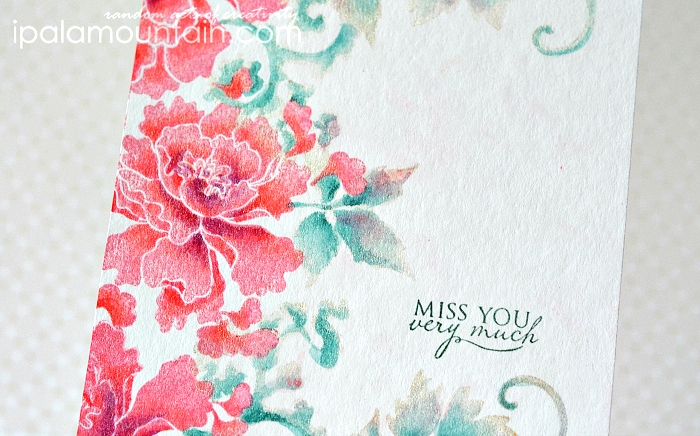
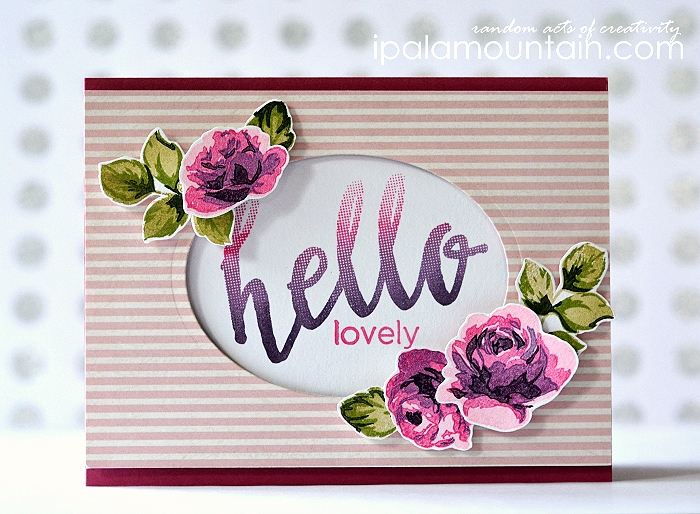
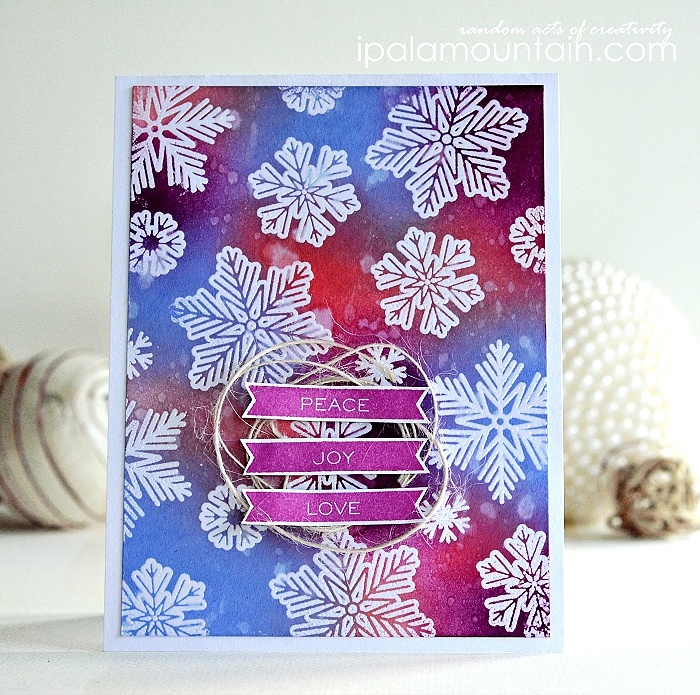
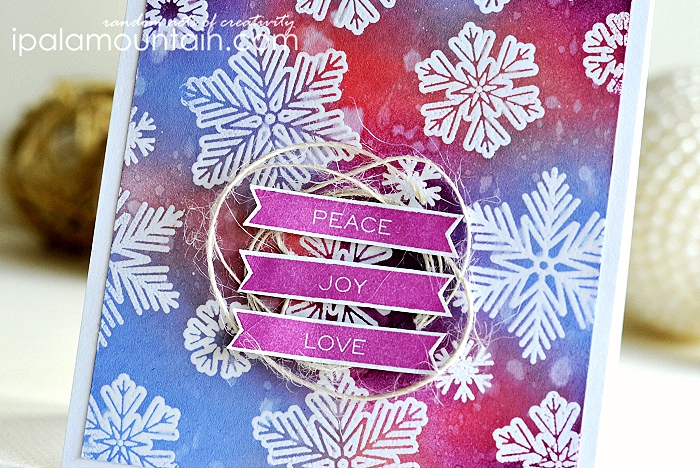
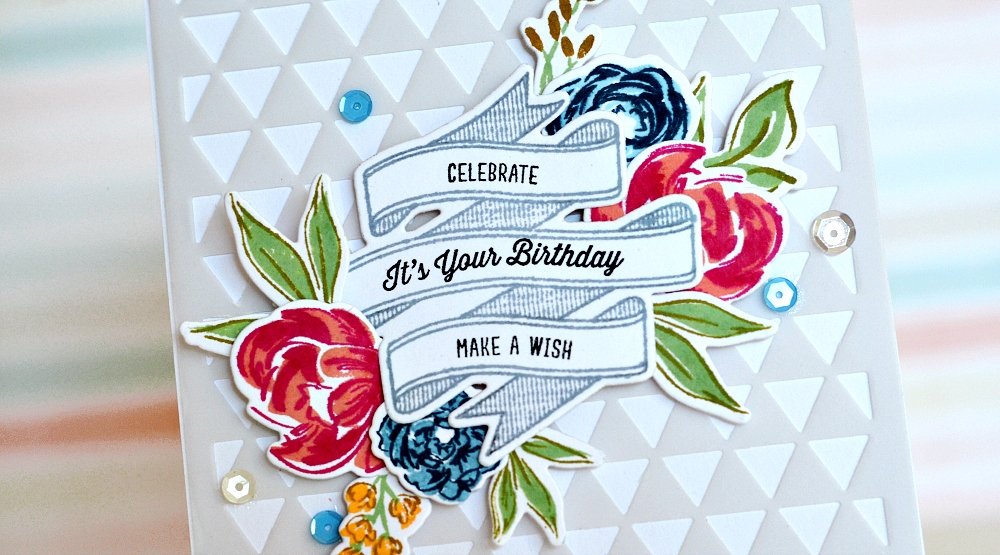
I made a card in my favourite style as of late, an airy floral arrangement with textured bits packed in tightly. I reached for Pretty Peonies and Pretty Little Peonies stamp sets (WPlus9), both endlessly waiting for me to give them the love they fully deserve. I picked a few flowers and leaves from both sets, and stamped them on the corresponding die cut pieces (found here and here), with a variety of WPlus9 Pure Color inks.
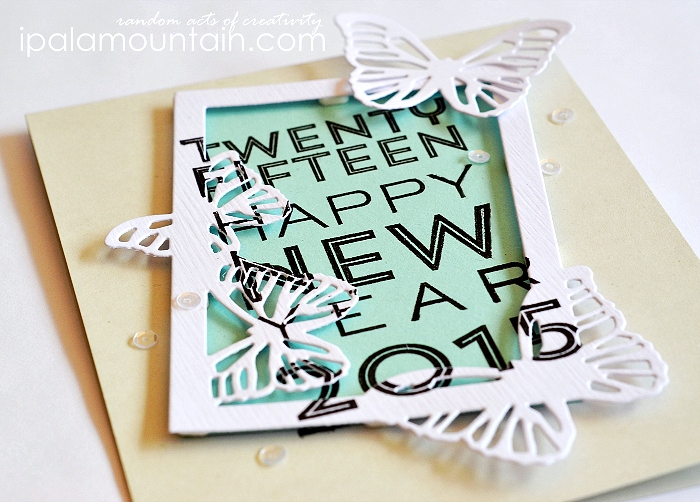
I also die cut and stamped the banner from one of my older favourites, Written On Ribbon (stamps and corresponding die here), arranging everything later in a cluster.

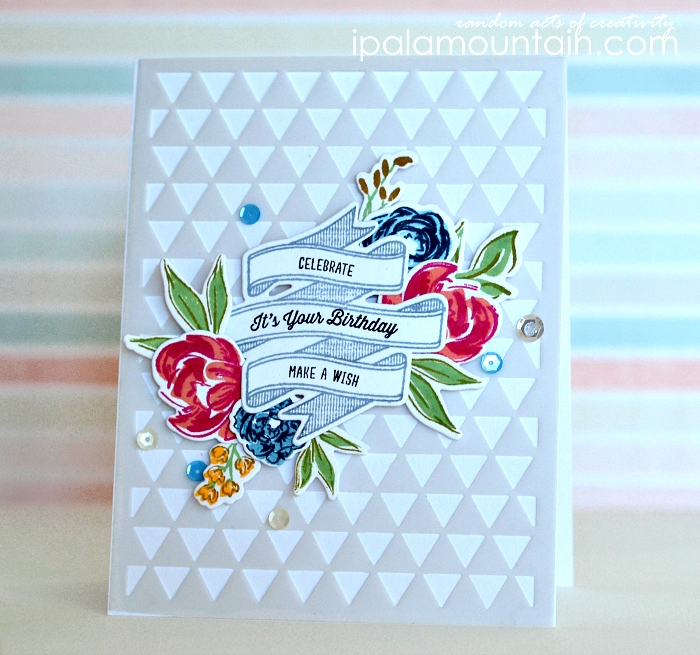
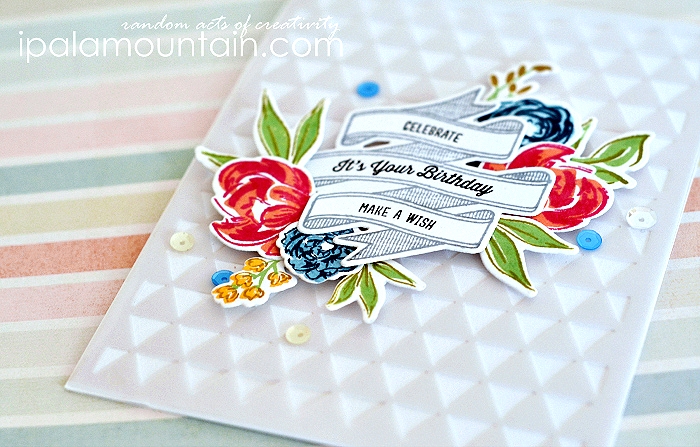
The only non-WPlus9 element (apart from the sequins) is a vellum background piece, die cut with a Hero Arts Triangle Background die. I’ve been a tad obsessed with vellum which I’m sure you noticed 🙂


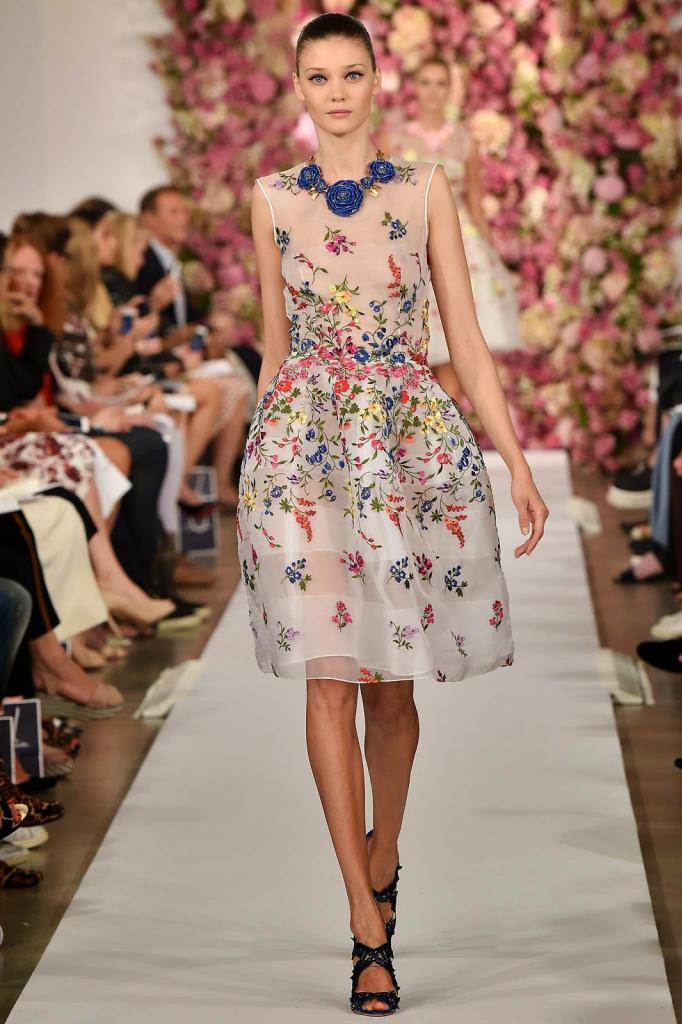
I had help in a form of inspiration here, the new Runway Inspired Challenge honoring Oscar de la Renta. I’m not a big fashion enthusiast but I wouldn’t mind taking any of the dresses picked by the DT home. The models look stunning as well, with understated make-up. But I digress. Here’s the inspiration for my card - the vellum is a bow toward of the sheer fabric, I only wish I had a large striped cover-up die so that I could follow the pattern more closely.

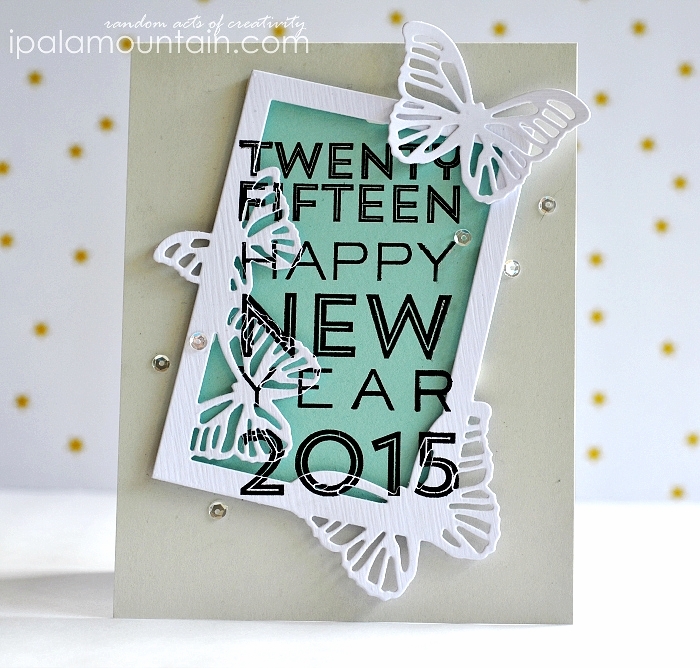
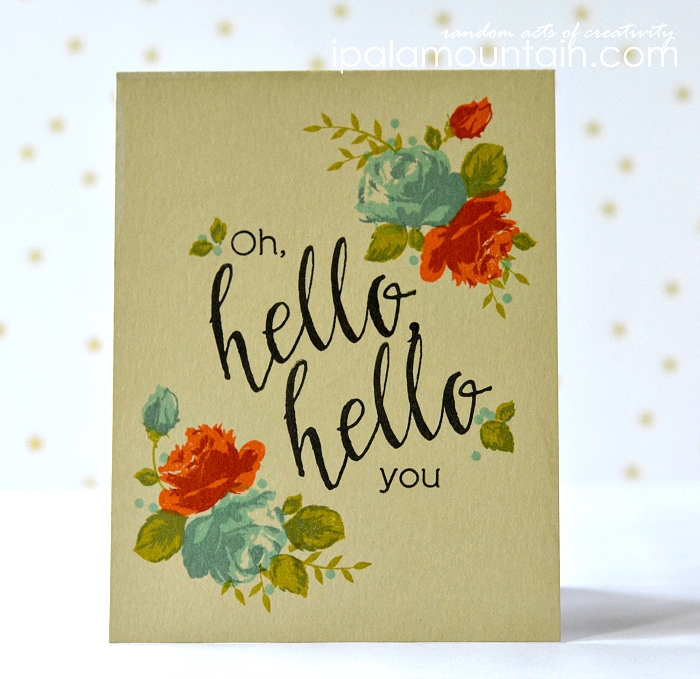
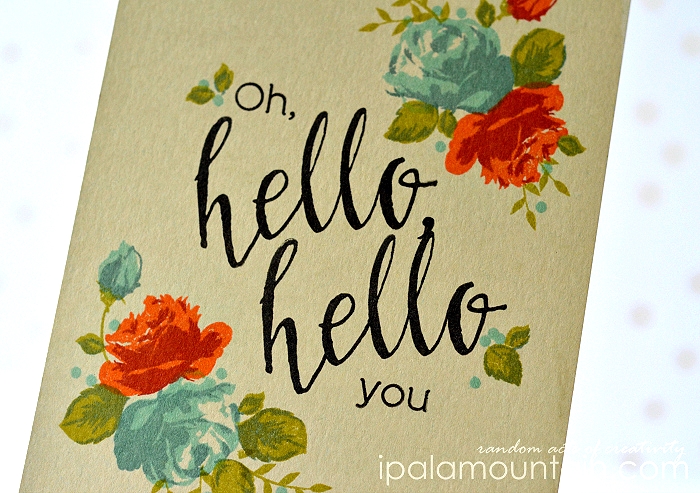
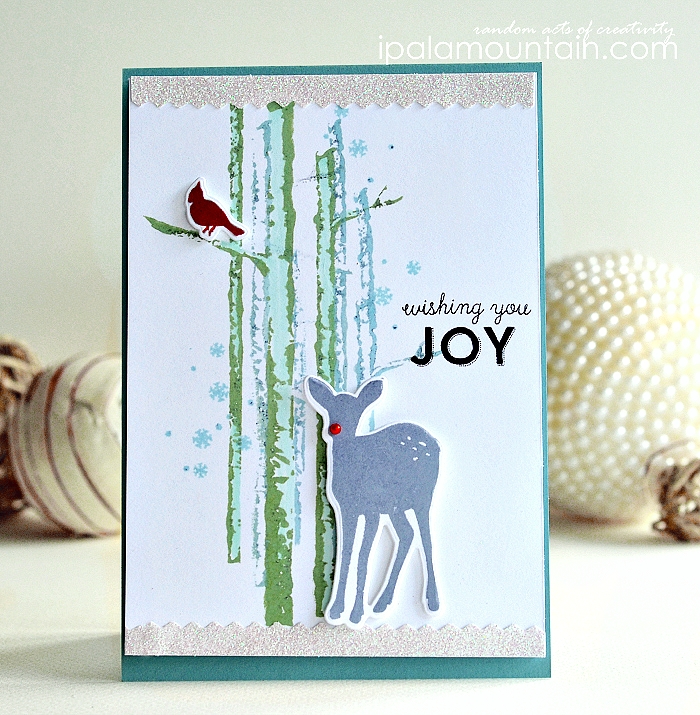
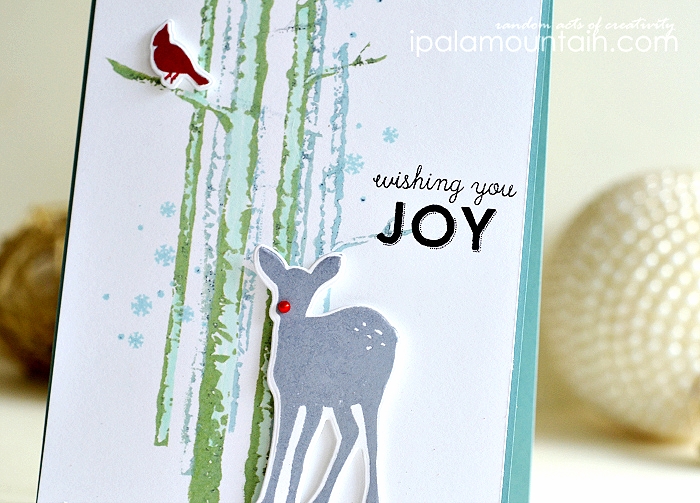
I also wanted to sneak in a card that I’m about to send for my parents’ impending anniversary. Good ole’ layers, as you know something I wouldn’t necessarily be doing any more but I enjoy it when I do 🙂 Mum likes dainty cuts and feminine touches and I don’t mind as soon as it means that some of the lovelies I rarely pull out are put to a good use.

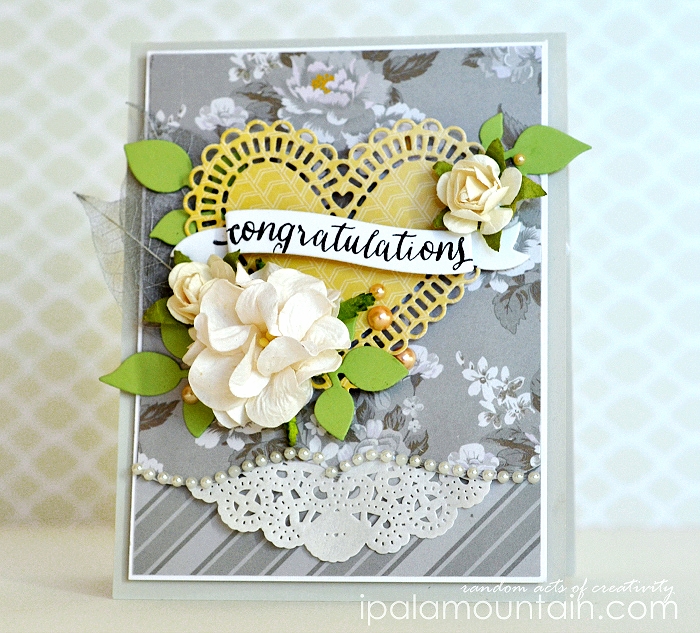
The patterned paper I used here is a gorgeous, shimmery bliss. I love it so much so that during the recent visit to a craft store I stumbled upon it by accident and had to have. I don’t even buy 12 x 12 sheets any more… but WHOA. The manufacturer is a local (?) low-key brand called Bella! (I know, how creative, hey?) so I’m sorry to anyone who may not have luck finding one one their own.

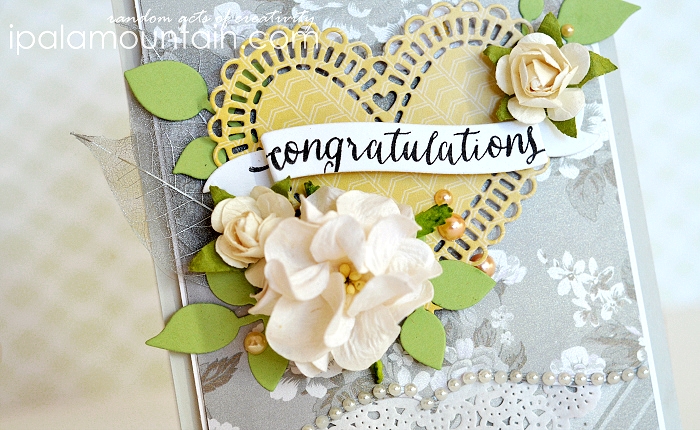
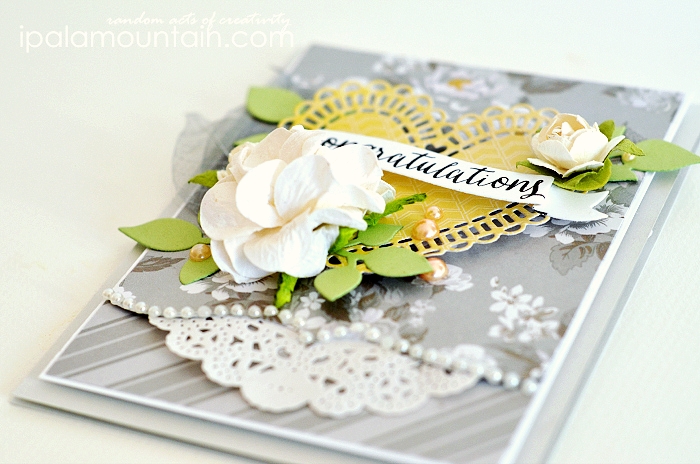
There is quite a few more locally sourced products here (flowers, doily, pearls, skeleton leaves) plus scraps of unnamed paper and cardstock utilized, so the product list is unfortunately limited. Nevertheless, I hope you enjoyed taking a peek at both cards. See you next time!

Birthday card


Congratulations card


Oct 31

WPlus9 medley

Hi guys, first of all thank you so much for the comments left for my Altenew Blog Hop post below. It’s not as much as the sheer multitude of them, but the thoughtfulness and the fact that so many took your time to leave meaningful feedback, means a lot to someone who knows first hand how much effort it takes to fit commenting in one’s busy life. Muchos gracias, amigos!

Thing is, the fun I’ve been having stamping lately plus your encouraging c0mments, gave me fuel to keep going and so I’m happy to say that I have two WPlus9 cards for you today. Let’s get straight to it.

This card below you would’ve seen a sneak peek of on my Instagram. I’ve been itching to colour the hummingbird from Flora & Fauna 2 and so I did, using my Peerless watercolours (turned out a quick job, nothing too spectacular in therms of colouring I’m afraid) and after having it die cut with a corresponding die. I paired the bird with the branches, die cut with Foliage Frame Die (separate branch only) and the tiny flowers from Birds & Branches Frame Die. The latter I watercoloured as well, channeling my inner Teamie Joni *wink*

I mounted the elements on the panel of SSS Woodgrain cardstock (good stuff) and added a sentiment sticker (My Mind’s Eye).

The second card features the new Twenty Fifteen Clear Stamps which I paired with Small Butterfly Frame Die. I wanted to achieve that spectacular double-stamped look that Laura Bassen so effortlessly creates on her cards - alas, my die cut is in retrospection too elaborate for the sleek look I was hoping for.

I stamped the three different sentiments on a piece of PTI Ocean Tides CS and again on the lightly textured white CS which was then die cut. It’s not an easy job trying to align the images, I had a few mishaps 😉 Everything was then mounted on a SSS Fog card and embellished with clear sequins and an extra butterfly.

Hope you enjoyed, cheers and until next time xx

I Love You More card


Twenty Fifteen card


Oct 27

Altenew October release blog hop

Welcome to Altenew‘s third Blog Hop! It’s my pleasure to join Tasnim and Jennifer this month, along with some fabulous creative minds. Hopefully you have come here from Yana’s blog, otherwise feel free to join us from the beginning at the Altenew blog.

Altenew is a relatively new stamp company that opened it’s doors in April 2014. Today they are celebrating the release of their third collection of stamps. All the stamps that you will see here are available for purchase at the Altenew store and the Simon Says Stamp store.

Prizes
To celebrate this release, Altenew is giving away five stamp sets of choice to three lucky winners! The winners will be chosen from comments left on the Altenew blog.
There is more! I will choose a winner from comments left on this post and the prize will be two stamps sets of your choice.
You have until Friday October 31, 11:59 EST to leave your comments. You may enter up to two comments on each blog:

  • Comment on the project, or the stamps.

The winners will be selected and announced on Saturday November 1 at 9:00 am EST.

On to the projects! I had *so* much fun with the new stamps and I’ll start with my favourite card from the lot, one that features the new Lacy Scrolls set. The idea happened when I read someone’s comment on the revealed set saying that it has Asian flair. I decided to try a silk painting look and I think I got quite close 🙂

I stamped the images in Brilliance inks first: flowers in Pearlescent Coral and foliage in Platinum Planet respectively. Then I applied shading with Peerless watercolours. The elaborate shading enriched the simple stamped look but you can see the base colour peeking out here and there. The shimmer from the Brilliance ink base adds extra beauty. I finished the card with the sentiment from the older Lace Up set.

For the other two cards, I focused on the new Halftone Hello and Vintage Roses stamp sets. If you follow me on Instagram, you’d have seen me getting a little excited over the latter one especially and here’s why. Suppose you expressed your wish casually on FB that you’d love to see someone design multi-stamped vintage roses, so that you could imitate the lovely look of retro designs. Suppose you were contacted by a stamp designing friend saying that this just happened. Yeah. Mind = blown.

So firstly I combined both sets on this graphic one-layer. I stamped the sentiment first in Versafine Onyx Black (the comma is added by hand) and then the roses in clusters with a variety of PTI dye inks. I didn’t use the base solid layer on the flowers, just the second and third layer so that the look is light and airy. I also added some branches and ‘berries’ from Hennah Elements to help giving the clusters the wildflower bunch look.

On the last card I stamped the roses and foliage with all the layers available and I used Memento Luxe inks, also for the sentiment. The rich, spongy surface of those inks helped me blend them seamlessly on the surface on the stamp and achieve a neat gradient effect on the sentiment - I used Rose Bud, Sweet Plum and Elderberry for this purpose. I fussy cut the elements and arranged them in clusters over the aperture window cut from patterned paper.

That’s it from me today, thank you for taking a peek! I’m the last stop in the hop, you can now make your way back to the Altenew blog and don’t forget to comment on both this post and Altenew’s one for your chance to win some of the October release goodness!

Miss you card

Hello you card


Hello lovely card


Oct 17

Mama Elephant 2nd Anniversay Stampede

I’m so excited to be helping Mama Elephant celebrate their 2nd anniversary and joining their October Stampede today, alongside some crafty geniuses! Today marks the last day of the event and the new product is already available for purchase in the ME store. So much great stuff there, no wonder my love for ME grows every month!

Hopefully you made it here from Lorraine’s blog, otherwise feel free to join us at the beginning on the Mama Elephant blog.

SALE ALERT!
* There’s a 10% discount code active for the 3 day blog hop (HAPPY2ME)
* Purchases over $100 will receive the HAPPY EVERYTHING stamp set free.
* Purchases over $150 will receive the HAPPY EVERYTHING stamp set and HAPPY SCRIPT die free.

GIVEAWAY!
* ME is giving away THREE $25 gift certificates today.
* There are exclusive prize giveaways on Facebook, Twitter, and Instagram, 3 winners total.
* Winners will be chosen and announced by us Monday, October 20th on the ME blog.

The stamp set I got to play with is also one of my personal favourites from the release, it’s called Season’s Greetings and it comes with four amazing script sentiments accompanied by some lovely, detailed snowflakes.

I used both on the card above, I stamped the sentiment first in Versafine Onyx Black and encircled it with two-tone snowflakes. I distressed the edges of the panel with Iced Spruce Distress Ink, , matted with a light grey cardstock (which for some reason turned beige on the photo) and scattered some silver confetti stars across the card.

Here’s another card, this time I paired the set with the snow globe from Believe In Magic. I curved the sentiment on the block to mimic the shape of the globe.

I covered the globe with Glossy Accents and added some Glimmer Mist splats to the panel.

I clearly was having too much fun with this set, here’s one more!

This time I turned the adorable critters from Honey Bunny into snow pals! Gave them a quick Copic flick, fluffy pom-pom tails and sat them on a sparkly, snowy hill, looking away at the sunset / sunrise made with Distress Inks and water. I love how the sentiment (stamped with Mama Elephant Ocean ink) blends with the sky and is semi - transparent.

Thank you for joining us today, it’s time for you now to visit Heather at her blog! Happy hopping (and shopping)!

Season’s Greetings card

Joy to the World card


Let It Snow card


Oct 15

Getting To Know Me blog hop (and a bonus)

Hi there, creative people! Over the course of the last two months I was approached by some fabulous friends to take up the ‘Getting To Know You’ blog hop, and I needed to refuse them all, sadly, because of lack of time. I’m by no means having more of it now but I’m learning to manage it more efficiently, plus I think some of my creativity is coming back and so is the willingness to spend an evening writing a post like this one, instead of just crashing into bed *wink*.

Thank-you to Tasnim, Dawn, Elizabeta, Kathy, Kathryn, May, Asty for the nominations and the kind words that came with them. I owe you, girls. That’s why I decided that I make the time… this time. Let’s go! 🙂

1.What creative projects are you currently working on?

I’m preparing for a guest gig on Friday, here’s a sneak peek:

Can you guess the company? 🙂
Otherwise, there’s not much happening craft-wise in my week any more - I might spend an odd evening stamping a card or two and then another one sharing it (I’m rather slow and meticulous with both) but you surely noticed that I stepped back from blogging quite significantly. When I do stamp, I take wild pleasure in biting into the latest WPlus9 releases. Mmmm.

2.What inspires your designs?

Fellow bloggers, to the largest extent. I confess that 100% of my style (if any) and knowledge of stamping is a direct result of hours upon hours spent gushing over my favourite bloggers’ artwork - and quite frankly, such was the story of starting CASE Study.
As I would have admitted many times before, I don’t watch crafting videos. Tutorials bore me, but I do look at the work of the others a lot, analyze it, and usually I’m able to pinpoint the techniques or design principles that made them stand out.
I have favourite artists on both sides of the spectrum, from heavily layered & vintage to super clean & CAS. Depending on my mood or idea in my head, whenever I’m stuck I hit a blog or two, do a Google/Pinterest search, and I’m able to find some sort of a starting point for my design which I’m ready to put my own spin on.
I used to participate in a plethora of challenges and they were excellent at giving me inspiration as well.

3.What method / process (if applicable) do you apply to each of your creative projects, and how long does each project take to complete?

Would you believe that I never actually checked how much time it takes me to make a card? I think it would be safe to assume that I never really go below an hour, but I often go way over it. Because I don’t plan my cards in advance, the process is fluid and full of experimenting, endless mixing and matching, perfecting the details or adding ‘just one more’.
I usually start with a choice of product and a general idea in my head, but often I decide on altering the look as my stamping progresses or when I discover a different, more appealing way of conducting a design at hand. It happens A LOT. Hence the copious amount of time required for me to go from a blank card to a blogged artwork, but it never occurred to me that I could have it any other way. It keeps me entertained, and my designs fresh 🙂

4. If you had to describe your ‘signature’ style, what would it be?

This is the question I should ask you instead, because I don’t see anything bonding, except from eclecticism, in my artwork. It’s moody, versatile, and it’s constantly evolving.

5. What are 3 crafting products/tools you can’t live without?

Can I name more? I’m old style and I need a self-healing mat, a ruler and a bone folder to fold the card base. I’m using a ruler and a craft knife to cut everything - with the exception of cutting a page in half for the base, where I use paper trimmer.
As for the favourites, I should mention Versafine Onyx Black ink, natural twine, ribbon banner dies, sequins (my love for them can be tracked way back before they were cool) and lightly coloured, neutral cardstock (like SSS Fog or PTI Fine Linen). Oh, and let’s not forget floral designs 🙂

6. My crafty idols

This is where I’m supposed to tag two-three folks but I’ll skip this part, if you don’t mind - I don’t want to pressure anybody and seems like almost everyone has been taken anyway, lol.
You can always hit my Pinterest card inspiration board, or my blogroll to see who I admire, and for today I’m leaving you with my newest crafty crush: Cris! I can’t recommend enough clicking over to see the outpouring of her genius.

Muchos gracias for bearing with me, I hope you enjoyed the part above - it’s not the end of the post just yet! Thanks to the mid-day surprise crafting session, these two are now lying on my desk:

I used the images and sentiments from the WPlus9 Merriest Wishes stamp set. The images were coloured with Copics:
skin:E00/02/04/93
clothing: R32/35/37/59, G99/94/82, W1/W3
star: Y18
hair: E51/53
tree: G02/09/29
sock: G02/09/29, Y18/26, R32/35/37/59, W1/W3/W8

I dabbed Colourless Blender all over the sock for the texture. For the tag I fussy cut the image and mounted using foam tape, for the card the image was enclosed in a frame cut with Holiday Apertures Designer Dies and made to minic a picture frame. I cut the outer edge myself, just above the dashed line. I secured some twine at the top with a brad. Both the card and matching tag were decorated with Snowflake Trio Designer Dies. Aren’t they divine?!
The background was watercoloured using Peerless Watercolors (disclaimer: Neenah is NOT the best cardstock for this job…), I sprinkled some of the paint around it.

That’s all, folks! (yes, that’s my shameless, melancholic Looney Tunes insertion). Meet you here again on Friday, shall we?


Oct 09

WPlus9 October 2014 Holiday Release #2

I’m back with more of the WPlus9 Holiday release today! The Holiday 2014 Collection is now available in the WPlus9 store, as well as in the Simon Says Stamp store. It goes without saying that the product, like everything WPlus9, is of excellent quality and if the designs take your fancy then don’t hesitate to go for a shopping spree - you won’t be disappointed!

First card I want to show you, was done using mostly dies - die cut in a traditional way as well as embossed with. The embossed die is the last year’s Simple Snowflake, I used woodgrain texture cardstock to give my card extra interest. Then I topped it with the biggest one of the Snowflake Trio Designer Dies, which I cut from the glitter cardstock. I added the ‘merry’ from Hand Lettered Holiday Designer Dies on top, matched with the sentiment from Hand Lettered Holidays Clear Stamps which I stamped on my all time favourite Banner Trio die. I finished the panel by creating a ‘bokeh’ effect, using the stamps from the last month’s release Dream Believer Clear Stamps set. I stamped them in Old Paper Distress Ink, the same ink I used to gently distress the edges of the panel.

For the next card, I heat embossed the snowflakes from Snowflake Backdrops in white on white cardstock, and then blended Shaded Lilac, Seedless Preserves, Worn Lipstick and Victorian Velvet Distress Inks over the panel. I sprinkled some water over when I was done, to create texture. The little banners come from the same stamp set, I fussy cut them and mounted over some bundled twine.

Finally, here’s a card featuring the super adorable Winter Woodland Clear Stamps. I started by stamping the birches in Mojito ink, then inking them up selectively in Lake House ink and stamping off-side to create the illusion of depth. Then I helped the ‘front’ trees appear more solid by adding subtle shading with an aqua Copic marker.
The animals were stamped on the matching die cuts from Winter Woodland Designer Dies, in Silver Lining and Cranberry Crush. The sentiment and snowflakes come from the same stamp set.
I finished by adding two thin strips of glitter cardstock, cut with pinking scissors, to either end of the panel. I also made Rudolph out of the reindeer by adding a little red pearl in place of his nose.

You can find the new release HERE in the WPlus9 shop and HERE in Simon Says Stamp. Have fun, and stay tuned for more of it from myself soon!

Merry Christmas card


Peace Joy Love card


Wishing You Joy card


Related Posts Plugin for WordPress, Blogger...