Jan 07

Sending Hugs with Penny Black

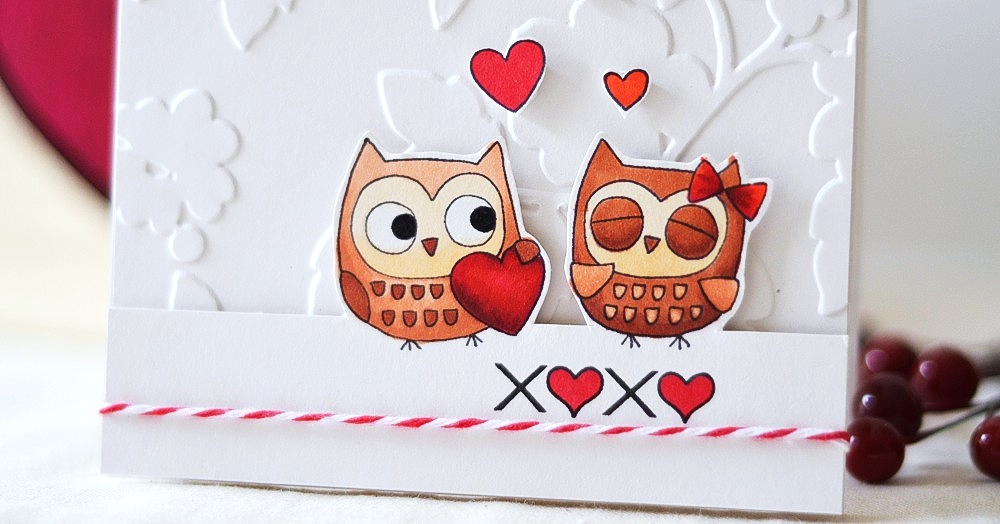
Hi guys, I’m featured over at the Penny Black blog today! The new PB collection called Sending Hugs is available for purchase and it’s a great choice if you want to get in the gear for those Valentine cards. Some seriously super adorable stuff there… like these owlies!

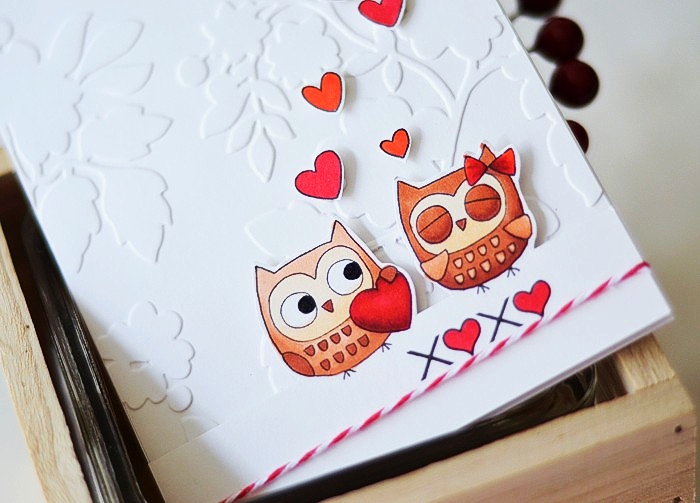
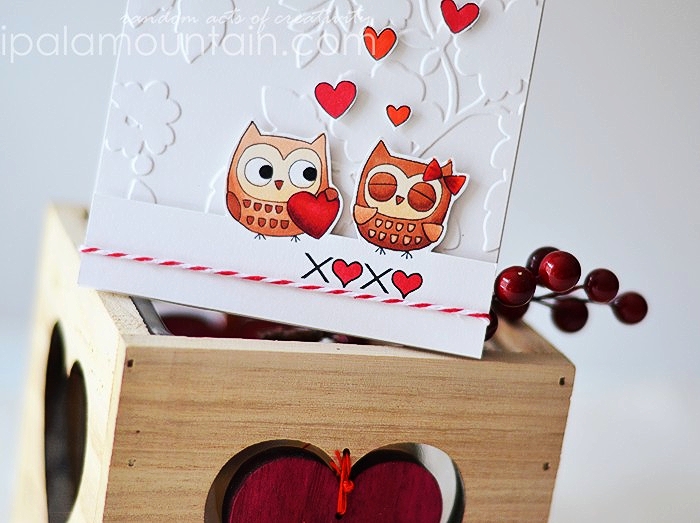
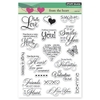
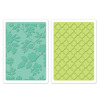
I coloured the guys (Owl Always Love You stamp) with Copics (R46, R05, E11, E13, E15, E30, E31), trimmed the cardstock around them to have a card front-length of a panel at the bottom with the owls popping up at the top. Then I stamped and coloured the sentiment (From The Heart stamp set), coloured and cut out the remaining hearts and mounted everything over a gorgeous embossed background (Sizzix embossing folder).
Check out the card here on the Penny Black blog!


Mar 03

Sketchbook Saturday Challenge #91, plus extras!

Hello and happy weekend! In full swing here, mid-Sunday here we go… bummer, I wish there was one more day off for me & hubby to enjoy each other while leisurely getting about our stuff! It’s still a really, really nice arvo, fleeting as these moments are :)
LOTS to share today, so I better get into it!

First up, a new sketch! It came to me in the middle of the night, out of the blue… I seem to dream a lot of my crafty creations lately, not sure why it suddenly started as I never experienced such phenomenon. It’s quite amusing… if not worrying…. haha!

I allowed myself for creative freedom with this one (the card isn’t anything like the one I dreamt of), mostly because I wanted to give the awesome Glitz Design Cashmere Dame papers, as much exposure as they needed. Cutting into these feels divine!
I did the trick with the layers, which I learnt from fellow bloggers - swiping a dark-coloured inkpad directly against the edges of the papers, to give them definition. Try that if you’re curious and never did so - you wouldn’t believe how much life this simple trick adds to the layering!

I had so much fun with this card, it should be forbidden… I spiced up the papers with October Afternoon and Kaisercraft rub-ons (I especially like the teeny tiny print on the label); die cutting (negative on the heart, plus I added the cut out shape right next to it… can you see??); XOXO cut with my Silhouette, blinged up and mixed with the bits of sentiments taken from a Technique Tuesday stamp set (Simply You), Cosmo Cricket sentiment sticker and chippie… plus some washi tape, button, ribbon & twine :)

I have one more card, actually. Sneaking it in with mixed feelings as I intend to keep my sketch posts free from other stuff, but I made it this morning (guess what? …after I dreamt it last night!!) and I love it so much I’m not willing to wait… lol

The camera is another Silhouette cut. Don’t ask me how long it took me to adhere all these little pieces on top of each other… 😛
I wanted to achieve an impression of butterflies flying out of the camera lens, and I used Studio Calico veneer for that purpose. The sentiment comes again, from the Cosmo Cricket sticker sheet. Love it. It’s one of their Tiny Texts and has some awesome ATC-style phrases that I dig so much.

It’s my submission for the Camera Craze Challenge in the Moxie Fab World. I wasn’t happy with my initial one, but felt challenged to give this subject another try. Again, not something I’d usually tackle on my cards, but boy do I love the fact that I did!

Lastly, I thought I’d include a couple of shots done this week, my FB friends might be familiar with them already :)

Love these photos of Chuplet, doing a little baking with mummy & grandma the other day…

 
This hangs in our kitchen / dining area. As much as I find these often too cheesy, this saying resonates with me so much.

—————————————————

A few things to keep in mind if you decide to use my sketch:

- You’re kindly asked to save the image onto your computer first, and if you make a card based on it, please link back to this post.
- If you upload your card to an online gallery, use the code SSC91.
- Feel free to share the link to your creation via the Inlinkz widget, so that I can come and check it out!
- The colours/elements mean nothing towards the card. All styles, colours and supplies, as well as slight alterations of the sketch are welcome.
- A new sketch and sample is posted every other Saturday night (American EST time ~ or around mid-day Sunday Melbourne time), but you’re welcome to play any time! Just leave a link in the comments section after Inlinkz widget closes.
—————————————————


Feb 28

CASE Study Challenge #130

Sadly we’re nearing the end of the month at CASE Study, and it means the last challenge with Teri Anderson… how can have enough of her terrific work??
I hope you’ll all scrape off some time to give Teri the best farewell response, plus it’s a good opportunity to CASE one of her works, guilt-free. BUT that’s how we roll, so it goes without saying, yes? :)
Here’s the piece for this time around. A scrappy genius!

It was settled from the beginning, that I’m going for a “pile it on and see where it takes me” look as well :)

Also, I opted for a toned down background with a few splashes of bold colour and an overall eclectic feel. I used almost exclusively Glitz Design product, with two small, decorative chippies from Cosmo Cricket.

I took the opportunity to use one of my favourite past Retro Sketches (rs#45 below), since their current challenge is a “pick your own”. Fun :)

Click on the links below, for more inspiration from our Team, Muse & Guest Designer!

Teri Anderson - February Muse
Amy Wanford
Andrea Ewen
Christina MacLaren
Clare Buswell
Debby Hughes
Jean Martin
Jeanne Jachna
Maureen Plut
Teneale Williams
Sylvia Blum - February Guest Designer

The challenge details, as well as the Inlinkz list to link up your entry, can be found on the CASE Study blog

Feb 24

Old gold

Just a quick post today… I’ve been BUSY over the weekend making myself comfortable in a new craft space, which I’m hoping to share the photos of with all of you lovely peeps soon :)
I had a quick ‘good job reward’ inky session tonight, and an affair with Tuesday Trigger: Set the Table.
Totally lovely piece of inspiration, but not quite as easy as I initially thought.

I’m digging the culinary theme and I’ve been meaning to get a nice, vintage stamp featuring knife & fork (especially fitting since I’d love to make a few custom cook books), but it’s not happened as of yet and thus I went with the colours and an old world feel only.

I layered a piece of Teresa Collins paper on kraft cardstock (digging all of the new TC collections!!), stamped with PTI Damask Designs stamp and Memento Rich Cocoa ink (twice and inking partially), and did some layering on top of it. I used gold ribbon, paper doily spritzed with Marigold Glimmer Mist, burlap cut with Spellbinders Circles, label cut with WPlus9 die and stamped with Always & Forever stamps, Chloe Stem die cut and some flowers.

Hope you like it! xx

Feb 14

Jay Gee’s Nook - Valentine’s Day inspiration

This is my second post for today, please see the CASE Study post below as well. Thanks!

I’m breaking the schedule, with a sweet extra post for JG’s Nook! All of the Teamies prepared a group posting for your viewing pleasure today, you can see them all on the Jay Gee’s Nook blog. We’re also saying hello to our first Guest Designer today, but I’m not going to reveal the name, you’ve got to pop in there to find out :)

We are sharing some Valentine’s Day inspiration, and my project is a cute little stamped canvas bag. Judith recently started to offer bags of all sorts in the store, and I thought I’d show you how nice they look stamped. Just FYI, my bag is not exactly like the ones that the store carries, but they would perform just the same.

The stamps used, come from the beautiful WPlus9 set called Love Birds, but I’ve also got pink butterflies and “berries” from another set of theirs, Mother’s Day Bouquet. Memento inks in Lilac Posies, Love Letter and Hero Arts Soft Blossom, were the inks I used for stamping.

To stamp the pattern in a shape of your choice, all you need is trace this shape onto the canvas, using a pencil and a very light pressure. Once you’re done, you can erase the lines easily enough. Make sure your eraser is clean, or you’ll end up rubbing graphite onto the fabric!
I used rectangle and heart-shaped Nestabilities to trace my shapes.

Hop on over to the Jay Gee’s Nook blog to see more from the Design Team :)

Feb 07

10 minute craft dash #11

CASE Study post launches in under an hour, peeps!

I did it again! Took part in another 10 Minute Craft Dash challenge, that is. Tee hee!

While the first time was intimidating, this time around I knew what to expect. Meaning - never underestimate the value of gathering ALL of the supplies you’ll need beforehand!
I did just that…

Card scored, scraps of papers and stamps all in place… I was immediately reaching for the Grand Calibur plates and getting on with the die cutting, after the clock started ticking.
Even though, I still barely made it in under 10 minutes. Sigh. How do you guys do it?? lol

Want to see what I made?

The die is a Simon Says Stamp exclusive, called String Of Hearts. The DP comes from a Glitz Design Yours Truly paper pad. Lastly, the Hero Arts stamp belongs to the Year Round Sentiments set.
Whew! I need some camomile tea right about now:)

Related Posts Plugin for WordPress, Blogger...